
2009-2019 BMW 5, 6, & 7 Series Front Upper Control Arm: Clunks, Camber Versions & Replacement
Diagnose front-end clunks and steering issues on your F-chassis BMW and learn the critical step of choosing the correct camber version when buying a used control arm.
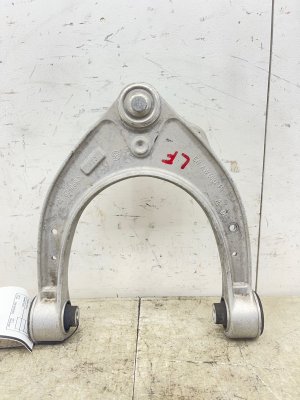
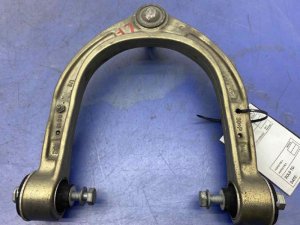
- This control arm comes in three different versions (Standard, +30 min, -30 min) to adjust camber; you MUST match the part number from your old arm to ensure proper vehicle alignment.
- The most common signs of failure are clunking noises over bumps and a loose or vibrating steering wheel, caused by worn bushings or a bad ball joint.
- When replacing, the inner bushing bolts must only be tightened with the vehicle's weight on the suspension (at normal ride height) to prevent rapid failure of the new part.
- A four-wheel alignment is mandatory after replacement to prevent unsafe handling and severe tire wear.
Symptoms of a Failing Front Upper Control Arm
When the front upper control arm on a 2011-2012 BMW 740i, 2009-2012 BMW 750i, 2011-2012 BMW Alpina B7, 2011-2016 BMW 528i, 2011-2016 BMW 535i, 2010-2017 BMW 535i GT, 2011-2016 BMW 550i, 2010-2017 BMW 550i GT, 2012-2019 BMW 640i, or 2012-2019 BMW 650i begins to fail, the symptoms are often noticeable from the driver's seat. The failure is almost always due to wear in the two rubber bushings that attach to the frame or the outer ball joint that connects to the wheel assembly.
Clunking or Knocking Noises
This is the most common symptom. You may hear a distinct clunking, knocking, or popping sound coming from the front suspension. This noise is most apparent when driving over bumps, potholes, or uneven road surfaces. It can also occur during sharp turns, acceleration, or braking as the suspension load shifts and the worn components move excessively.
Steering Wheel Vibration or Shaking
A worn ball joint or degraded bushings can cause vibrations that travel up through the steering column. This may feel like a shimmy or shake in the steering wheel, especially at highway speeds. The vibration can fluctuate with speed and may become more pronounced when braking.
Vague or Wandering Steering
If the steering feels loose, imprecise, or less responsive than usual, it's a strong indicator of worn control arm bushings. The vehicle may tend to 'wander' or pull to one side, requiring constant small corrections to keep it driving in a straight line. This happens because the worn bushings allow for unwanted movement in the wheel's alignment.
Uneven Tire Wear
A bad control arm allows the wheel's alignment, particularly the camber angle, to shift out of specification. This results in accelerated and uneven tire wear. Typically, you will see excessive wear on the inner or outer edge of the front tires. If you notice this pattern, the suspension components should be inspected before simply replacing the tires.
Diagnosing a Bad Control Arm
You can diagnose a failing control arm with a physical inspection. Safely raise the front of the vehicle and support it with jack stands. With the wheel off the ground, you can check for play and visual signs of wear.
- The Wheel Shake Test: Grip the tire at the 12 o'clock and 6 o'clock positions. Try to rock it in and out. If you feel significant play, movement, or hear a clunking sound, it often points to a worn ball joint or wheel bearing.
- Visual Bushing Inspection: Use a flashlight to inspect the two rubber bushings where the control arm mounts to the subframe. Look for visible cracks, tearing, or deterioration in the rubber. Some bushings are fluid-filled; a dark, rust-colored stain on the subframe below the bushing is a clear sign it has leaked and failed.
- Pry Bar Test: To check for bushing play more definitively, use a pry bar. Place it between the control arm and the subframe and gently pry. Excessive movement indicates the rubber has lost its integrity and the arm needs replacement.
Buying a Used Suspension Control Arm
A high-quality, low-mileage used OEM control arm can be a smart alternative to an expensive new part or a low-quality aftermarket replacement. OEM parts are made to a higher standard, with better quality rubber and ball joints that often last longer than budget aftermarket options. Here’s what to look for.
Critical: Verify the Camber Version! For these BMW models, BMW produced three versions of this specific upper control arm to allow for fine-tuning of the front wheel camber during alignment. The versions are Standard (0), Positive (+30 min), and Negative (-30 min). Installing the wrong version will make it impossible to properly align your vehicle, leading to poor handling and rapid tire wear. You MUST verify the part number or markings on your existing arm before purchasing a replacement. The part numbers are:
- Standard Camber: 31126775967
- Negative Camber (-0°30'): 31126779871
- Positive Camber (+0°30'): 31126779908
Inspect your original part closely for one of these numbers or a "+" or "-" marking to ensure you purchase the correct used arm.
Physical Inspection Checklist
- Bushings: Inspect the rubber bushings for any cracks, tears, or signs of leaking fluid. The rubber should be firm and intact. Avoid any arms with visibly rotted or separated bushings.
- Ball Joint: Check the ball joint boot. It should be fully intact with no rips or tears. A torn boot allows dirt and water in, causing the joint to fail quickly. Try to move the ball joint stud by hand; it should be stiff and smooth, not loose or gritty.
- Arm Body: Check the aluminum arm for any signs of impact, deep scrapes, or cracks. Ensure it is straight and not bent, which can happen in a collision.
- Mileage: While there's no exact lifespan, these control arms often show wear between 50,000 and 100,000 miles. A used part from a lower-mileage vehicle (under 70,000 miles) is a safer bet.
Replacement Overview and Torque Specs
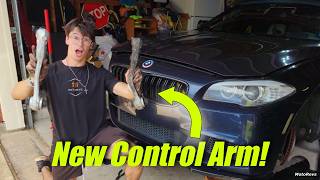
Replacing the front upper control arm is a feasible DIY job for those with mechanical experience and the right tools. The process generally involves removing the front wheel, detaching the arm's outer ball joint from the steering knuckle, and unbolting the two inner mounting points from the subframe.
🎬 Watch this full DIY tutorial for a step-by-step replacement walkthrough.Special Procedures & Pro Tips
- New Hardware: BMW uses single-use, torque-to-yield bolts and nuts for most suspension components. It is highly recommended to use new hardware for the installation.
- Suspension Loading: The most critical step is to only perform the final tightening of the two inner bushing bolts when the suspension is compressed to its normal ride height. Tightening them with the wheel hanging in the air will pre-load the bushings, causing them to fail very quickly. You can achieve this by placing a jack under the lower control arm to lift the suspension assembly before torquing the bolts.
- Alignment: A four-wheel alignment is mandatory after replacing any control arm. Skipping this step will result in poor handling and will destroy your tires.
Torque Specifications
These values are critical for a safe and lasting repair. Always use a torque wrench.
🎬 See this video for a visual guide to suspension torque specs.| Fastener | Torque Spec |
|---|---|
| Inner Bushing Bolts to Subframe | 85 Nm (63 lb-ft) + 180° |
| Outer Ball Joint Nut to Steering Knuckle | 100 Nm (74 lb-ft) + 90° |
(Source: Multiple forum and DIY references.)
Related Parts and Other Considerations
When one suspension component fails, others are often worn as well. To save on labor and ensure a complete repair, inspect and consider replacing the following parts at the same time:
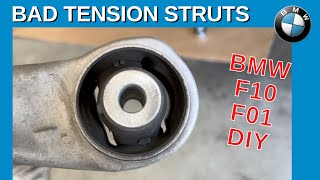
- Front Tension Strut (Forward Lower Control Arm): This is the other major control arm on the front suspension and its bushings are a very common failure point. 🎬 Watch how to change the tension struts on these BMW models.
- Front Lower Wishbone: The main lower arm that the strut mounts to.
- Sway Bar End Links: These connect the sway bar to the strut and can cause rattling noises over bumps when worn.
Known Recalls
While there are no specific recalls for this control arm on these models, owners of the 2011-2012 BMW 740i should be aware of NHTSA Recall #17V067000. This recall concerns a rear driveshaft CV joint that can fail, causing noise and vibration. These symptoms could potentially be confused with a front suspension issue, so it's worth checking if this recall has been performed on your vehicle.
Cost Comparison
The cost to replace a front upper control arm can vary significantly based on the parts you choose and whether you do the work yourself.
| Item | Estimated Cost (Per Arm) |
|---|---|
| New OEM (Dealer) | $350 - $500 |
| New Aftermarket (OEM-quality like Lemforder, TRW) | $180 - $220 |
| New Aftermarket (Value grade) | $80 - $130 |
| Used OEM | $50 - $100 |
| Shop Labor (per side) | $140 - $250 |
(Note: Prices are estimates and can vary by supplier and location. Labor costs do not include the mandatory wheel alignment.)
Frequently Asked Questions (FAQ)
Do I need to replace both the left and right control arms at the same time?
It is highly recommended. Suspension components wear at similar rates. If one side has failed due to age and mileage, the other side is likely not far behind. Replacing them in pairs ensures balanced handling and saves you from having to pay for labor and another alignment in the near future.
How do I know which camber version (+30, -30, or standard) I need?
The only certain way is to inspect the original control arm that is currently on your vehicle. Look for a stamped part number (31126775967, 31126779871, or 31126779908) or any markings like a "+" or "-" symbol. Do not guess, as installing the wrong arm will prevent your car from being aligned correctly.
Can I just replace the bushings instead of the whole arm?
While some aftermarket companies offer replacement bushings, the factory procedure typically involves replacing the entire arm. The original bushings are pressed in, and removing them requires a hydraulic press and special tools. Furthermore, if the bushings are worn, the non-replaceable ball joint is likely worn as well. For most DIY and professional mechanics, replacing the complete arm assembly is faster, easier, and more reliable.
Is an alignment really necessary after replacing the control arm?
Yes, absolutely. Replacing the control arm directly affects the wheel's camber, caster, and toe settings. Driving without an alignment will cause unpredictable handling, unsafe driving characteristics, and will destroy your front tires in a very short amount of time.
Helpful Videos


Technical Specifications
OEM Part Numbers: 31126775967 (Standard) 31126779871 (Negative Camber) 31126779908 (Positive Camber)
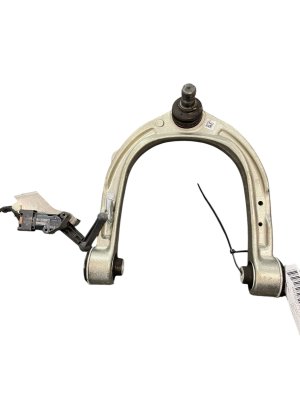
Material: Aluminum. Includes two inner rubber bushings and one outer ball joint.
We Have This Part in Stock

The information in this article is provided for general reference and educational purposes only. Vehicle specifications, procedures, and part compatibility can vary by production date, trim level, and region. Always consult your vehicle's factory service manual and verify part numbers before purchasing or performing repairs. Safety-critical components such as airbags, seat belts, and braking systems should be installed by a qualified professional.
- BMW 740i:
- BMW 750i:
- BMW Alpina B7:
- BMW 528i:
- BMW 535i:
- BMW 535i GT:
- BMW 550i:
- BMW 550i GT:
- BMW 640i:
- BMW 650i:
- BMW 760i:
- BMW ActiveHybrid 5:
- BMW ActiveHybrid 7:
- BMW Alpina B6 Gran Coupe:
- BMW i8:
- 🎬 Helpful Videos
- 🛍️ Shop This Part
- Symptoms of a Failing Front Upper Control Arm
- Clunking or Knocking Noises
- Steering Wheel Vibration or Shaking
- Vague or Wandering Steering
- Uneven Tire Wear
- Diagnosing a Bad Control Arm
- Buying a Used Suspension Control Arm
- Physical Inspection Checklist
- Replacement Overview and Torque Specs
- Special Procedures & Pro Tips
- Torque Specifications
- Related Parts and Other Considerations
- Known Recalls
- Cost Comparison
- Frequently Asked Questions (FAQ)
- 🎟️ Get 5% Off