
2009-2016 Nissan GT-R Tail Light: Failures, Upgrades, and Bumper Removal Guide
This guide covers common GT-R tail light issues, the critical 2015 style update, and what to know before tackling the complex replacement.
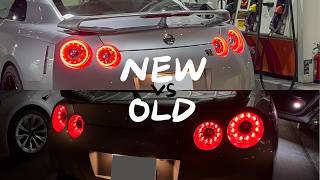
- A major design change occurred in 2015; the 2009-2014 'ring' style and 2015+ 'lightning bolt' style are not directly interchangeable without wiring considerations.
- Replacement is a difficult (4/5) job because it requires the complete removal of the rear bumper to access the mounting hardware.
- The most common issues are not complete failure, but rather moisture getting inside the lens or individual LEDs burning out.
- There are no outstanding safety recalls or TSBs from Nissan specifically for tail light failure on these models.
Vehicle Generation and Part Changes: 2009-2014 vs. 2015+
The most important factor when buying a tail light for a Nissan GT-R is the model year. There was a significant design change starting in 2015.
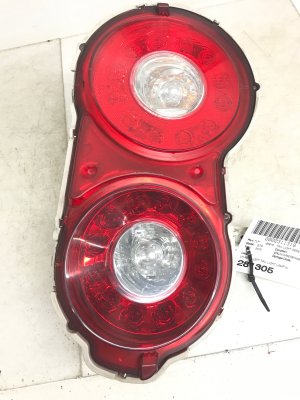
- 2009-2014 Models: These vehicles are equipped with the classic dual-ring LED tail lights. The OEM part number for the left (driver's side) is 26555-KB50A and the right (passenger's side) is 26550-KB50A.
- 2015-2016 Models: These vehicles feature an updated design with a continuous LED light strip, often called the "lightning bolt" or "halo" style, for a more modern look. The part numbers for these are different (e.g., 26555-62B1A for the left side).
While the newer 2015+ style lights are physically compatible with the older 2009-2014 models and are a popular cosmetic upgrade, the parts are not a direct one-for-one swap without considering wiring adapters that may be needed for full plug-and-play functionality. When purchasing a used part, it is essential to verify which style you are buying.
Known Issues and Symptoms of Failure
The GT-R's tail lights are generally reliable, but like any modern electronic component, they can develop issues. Failure is rarely a complete blackout; more often, you will notice one of the following symptoms.
Condensation or Moisture Inside the Lens
The most common complaint is fog or water droplets forming inside the tail light housing. This happens when the seal between the lens and the rear housing degrades, or through the breather vents during extreme temperature swings. While a small amount of light fog that disappears quickly may be normal, persistent moisture can damage the LED circuit boards and chrome reflectors over time.
Individual LEDs Burning Out
The tail light is composed of multiple LEDs. Over time, one or more of these individual diodes can fail, creating a broken or incomplete light ring. This is not repairable by replacing a single "bulb." Since the tail light is a sealed unit, a partial failure of the LEDs requires replacing the entire assembly.
Cracked or Damaged Housing
Physical damage from impacts is a common reason for replacement. A crack in the lens or housing will allow water to enter freely, leading to rapid failure of the internal electronics. Even a small hairline crack can compromise the seal and cause condensation issues.
Complete Electrical Failure
Though less common, the entire tail light can stop working. This could be due to an internal circuit board failure, a bad wiring harness, or a corroded connector plug. Before replacing the unit, it's wise to check the vehicle's fuses and test the connector with a multimeter to ensure it's receiving power.
Pro Tip: Aftermarket modules, like those from Diode Dynamics, can modify the stock tail light behavior, making the entire red ring flash for the turn signal instead of the small incandescent bulb. This is a popular modification for all 2009+ GT-R models.
🎬 Watch: How to install the popular tail-as-turn signal modification.Buying a Used 2009-2016 GT-R Tail Light
Purchasing a used OEM tail light can offer significant savings over a new part. However, a thorough inspection is critical to ensure you get a quality component.
- Inspect the Lens: Check for any cracks, deep scratches, or hazing. Hold the light up to a light source to spot fine hairline cracks that could cause leaks.
- Check the Housing: Examine the black plastic housing on the back for cracks or damage, especially around the mounting studs. Ensure all mounting studs are intact and not broken off.
- Look for Signs of Moisture: Check for any water lines, mineral deposits, or a foggy film on the inside of the lens. This indicates the light has had a leak in the past and may have underlying electronic damage.
- Verify the Connectors: Look at the electrical connector pins. They should be clean and free of any green or white corrosion.
- Confirm the Style: Double-check whether you are buying the 2009-2014 ring style or the 2015+ lightning bolt style to ensure it matches your vehicle or your upgrade plans.
Replacement Information
Replacing the tail light on a Nissan GT-R is a complex task for a novice mechanic due to one major step: the rear bumper must be removed to access the tail light mounting bolts.
Warning: Unlike many cars where tail lights can be accessed from the trunk, the GT-R's tail lights are bolted to the rear bumper and the body. Attempting to remove them without first removing the bumper will result in damage.
Tools Required:
- Socket set (8mm, 10mm, 12mm)
- Panel clip removal tool
- Phillips screwdriver
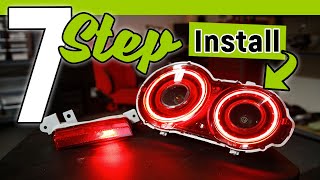
- A soft blanket or mat 🎬 See this 7-step guide for a professional tail light installation. to place the bumper on
- Open the trunk and remove the plastic trim and carpeted liners to access the bolts and wiring inside.
- Remove the clips and bolts securing the bottom of the bumper and the rear diffuser.
- Remove the screws and clips inside each rear wheel well.
- Disconnect any wiring for license plate lights or backup cameras.
- With a helper, carefully pull the bumper away from the body, releasing the clips on the sides.
- With the bumper off, you can now access the 10mm nuts that hold the tail light assembly to the bumper.
- Installation is the reverse of removal. Test all light functions before fully reassembling the bumper.
Some experienced mechanics suggest it's possible to only partially drop the bumper to gain access, but full removal is the recommended procedure to avoid scratching the paint.
🎬 Watch: A complete walkthrough of the bumper removal and light swap.Cost Comparison
| Part Type | Estimated Cost Range |
|---|---|
| New OEM | $850 - $1350 (per side) |
| New Aftermarket | $300 - $900 (per pair) |
| Used OEM | $400 - $700 (per side) |
| Shop Labor | $300 - $500 |
Recalls and Technical Service Bulletins (TSBs)
As of late 2023, there are no specific safety recalls or widespread Technical Service Bulletins (TSBs) issued by Nissan or the NHTSA for failure of the tail light assemblies on the 2009-2016 Nissan GT-R.
Frequently Asked Questions (FAQ)
Can I install 2015+ 'lightning bolt' tail lights on my 2012 GT-R?
Yes, this is a very popular cosmetic upgrade for owners of 2009-2014 GT-Rs. The newer style lights will physically fit, but you may need a plug-and-play wiring harness adapter to ensure all functions work correctly without any error codes.
Do I really have to remove the rear bumper to change a tail light?
Yes. The tail light assemblies are secured to both the car's body and the rear bumper cover itself. Full removal of the bumper is the standard procedure required to access all the fasteners without causing damage.
Why is there condensation inside my GT-R tail light?
Condensation forms when moist air gets trapped inside the light and the outside temperature drops, causing the moisture to turn into fog or water droplets on the cool lens. This can be due to a bad seal, a small crack, or even just atmospheric changes via the built-in breather vents. If it doesn't clear up on its own, the seal may be compromised, requiring replacement of the unit.
Can I just replace the burnt-out LED inside the tail light?
No, the LED components are integrated into a circuit board and the assembly is sonically welded or glued shut at the factory. They are not designed to be serviced. If any of the primary LEDs fail, the entire tail light unit must be replaced.
Helpful Videos
Technical Specifications
OEM Part Numbers: 26555-KB50A (Left Hand, 2009-2014) 26550-KB50A (Right Hand, 2009-2014) 26555-62B1A (Left Hand, 2015+) 26550-62B1A (Right Hand, 2015+)
LED Illumination, Sealed Assembly
We Have This Part in Stock

The information in this article is provided for general reference and educational purposes only. Vehicle specifications, procedures, and part compatibility can vary by production date, trim level, and region. Always consult your vehicle's factory service manual and verify part numbers before purchasing or performing repairs. Safety-critical components such as airbags, seat belts, and braking systems should be installed by a qualified professional.
- NISSAN GT-R:
- Nissan GT-R:
- 🎬 Helpful Videos
- 🛍️ Shop This Part
- Vehicle Generation and Part Changes: 2009-2014 vs. 2015+
- Known Issues and Symptoms of Failure
- Condensation or Moisture Inside the Lens
- Individual LEDs Burning Out
- Cracked or Damaged Housing
- Complete Electrical Failure
- Buying a Used 2009-2016 GT-R Tail Light
- Replacement Information
- Cost Comparison
- Recalls and Technical Service Bulletins (TSBs)
- Frequently Asked Questions (FAQ)
- 🎟️ Get 5% Off