
2001-2005 Pontiac Aztek Tail Light: A Fix for Failures and Fogging
This guide covers common Aztek tail light problems, how to inspect a used assembly, and a step-by-step replacement that takes less than 30 minutes.
- All 2001-2005 Pontiac Aztek tail lights are physically interchangeable, but they are side-specific (left vs. right).
- The most common failure points are simple burnt-out bulbs and corrosion in the bulb sockets, often caused by moisture getting inside the housing.
- Replacement is an extremely easy DIY job that requires only a single socket wrench and about 15-20 minutes.
- When buying a used assembly, prioritize units with clear, crack-free lenses, intact mounting studs, and no signs of internal moisture.
Common Symptoms of a Failing Aztek Tail Light
Tail light issues on the Pontiac Aztek are typically straightforward to diagnose. Problems usually stem from a few common electrical or physical failures.
- Dim or Flickering Lights: If a light appears dimmer than the one on the other side or flickers intermittently, it often points to a failing bulb, a loose connection, or corrosion in the bulb socket.
- One or More Lights Not Working: When a specific function fails (like the brake light or turn signal), the first step is to check the bulb. Most Aztek tail lights use a dual-filament bulb (size 3157) where one filament can burn out while the other still works. If the bulb is good, the problem could be the socket, wiring, or a fuse.
- "Hyperflash" (Fast Blinking Turn Signal): If your turn signal indicator on the dashboard blinks much faster than usual, it's the car's way of telling you a turn signal bulb is burned out or there's a resistance problem in the circuit.
- Moisture or Condensation Inside the Lens: Fogging or water droplets inside the tail light mean the factory seal has failed. This moisture will quickly corrode the bulb sockets and reflective surfaces, leading to electrical failures and reduced light output.
- Cracked or Hazy Lens: Physical damage like cracks or a cloudy, hazy appearance from UV exposure reduces the light's effectiveness and can allow water to enter the housing.
Buying a Used 2001-2005 Aztek Tail Light
A used OEM tail light is often a better choice than a cheap aftermarket alternative. Genuine GM parts typically offer superior fit, plastic quality, and seal durability. Here’s what to inspect before buying a recycled assembly.
Physical Inspection Checklist:
- Check All Mounting Tabs: The Aztek tail light is held on by several plastic mounting studs. Carefully inspect each one to ensure it is not cracked or broken. A broken tab will prevent the light from seating securely against the body, leading to vibrations and water leaks.
- Examine the Lens for Damage: Look for deep scratches, stress fractures (especially around the mounting points), and any signs of hazing or yellowing from sun exposure. Minor scuffs can often be polished out, but major cracks cannot.
- Look for Signs of Water Intrusion: Hold the assembly up to the light and look for water lines, mineral deposits, or a foggy film on the inside of the lens. These are clear indicators that the seal is bad and the internal electronics may be corroded.
- Inspect the Bulb Sockets and Harness: The initial buyer warning is key: verify if the assembly includes the bulb sockets and wiring harness pigtail. If it does, check the electrical contacts inside the sockets for any green or white corrosion. A clean, included harness is a major bonus, as it saves you from having to reuse your old, potentially corroded one.
Pro Tip: All tail light assemblies for the 2001, 2002, 2003, 2004, and 2005 Pontiac Aztek are interchangeable. You only need to ensure you are buying the correct side (left/driver or right/passenger).
Cost of a 2001-2005 Pontiac Aztek Tail Light Assembly
The cost can vary significantly based on whether you choose new or used, and OEM or aftermarket. Replacement is a simple DIY job, so you can easily save on labor costs.
| Part Type | Estimated Cost |
|---|---|
| New OEM (GM) | $160 - $240 |
| New Aftermarket | $70 - $150 |
| Used OEM (Recycled) | $50 - $100 |
| Shop Labor | $50 - $120 |
Replacement Guide (Difficulty: 1/5)
Replacing the tail light assembly on an Aztek is one of the easiest repairs you can perform. It requires basic tools and takes about 15-20 minutes per side.
Tools Needed:
- Ratchet with a deep socket (size may vary, but typically 10mm)
- Trim removal tool or flathead screwdriver (optional, for the access panel)
Step-by-Step Instructions:
- Open the Rear Hatch: Access to the tail light fasteners is from inside the cargo area.
- Locate the Access Panel: On the side trim panel directly behind the tail light, you will find a small, removable cover. Pry this open.
- Disconnect the Wiring Harness: Reach through the opening and locate the single electrical connector attached to the tail light assembly. Press the release tab and pull the connector straight off.
- Remove the Mounting Nuts: Inside the opening, you will see two or three nuts securing the tail light studs to the vehicle's body. Use your ratchet and deep socket to remove these nuts. Be careful not to drop them into the body panels.
- Remove the Old Assembly: With the nuts removed and the harness disconnected, firmly pull the tail light assembly straight back, away from the vehicle. It may be snug, but should pop out of place.
- Install the New Assembly: Align the mounting studs on the new assembly with the holes in the body and press it into place. Re-install the mounting nuts from inside the cargo area and tighten them until they are snug—do not overtighten, as this can crack the plastic housing.
- Reconnect and Test: Plug the wiring harness back into the new tail light until it clicks. Before closing everything up, have a helper confirm that the running lights, brake lights, and turn signals all function correctly.
- Replace the Access Panel: Snap the interior trim cover back into place.
Recalls and Technical Service Bulletins (TSBs)
As of mid-2024, there are no specific NHTSA recalls or manufacturer TSBs for the tail light assemblies on the 2001-2005 Pontiac Aztek. While other electrical issues have been noted on the Aztek, the tail light housing itself has not been the subject of a widespread service campaign.
Frequently Asked Questions (FAQ)
Is the driver side and passenger side tail light the same part?
No, they are not interchangeable. They are mirror images of each other and have different part numbers. You must buy the specific side you need to replace.
Do I have to replace the whole assembly if just a bulb is out?
No. If only a bulb is burnt out, you can simply replace the bulb itself by accessing it through the same interior panel. However, if you see moisture inside the lens or the bulb socket is heavily corroded, replacing the entire assembly is the best long-term solution.
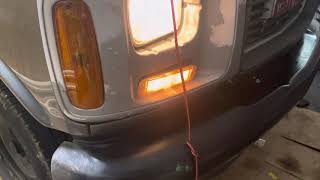
Why is my turn signal blinking really fast? 🎬 Watch: How to fix a fast blinking turn signal
This is called "hyperflash." It is an intentional design feature to alert you that a turn signal bulb has burned out. The change in electrical resistance from the dead bulb causes the flasher relay to cycle more quickly. Replacing the burnt-out bulb will return the blinker speed to normal.
Will a tail light from any 2001-2005 Aztek fit my car?
Yes, the tail light assemblies are identical across all trim levels and model years from 2001 through 2005.
Helpful Videos
Technical Specifications
OEM Part Numbers: 10325501 (Left/Driver Side) 10325502 (Right/Passenger Side) 10316027 10355153
Bulb Type: 3157 (for brake/tail/turn functions)

The information in this article is provided for general reference and educational purposes only. Vehicle specifications, procedures, and part compatibility can vary by production date, trim level, and region. Always consult your vehicle's factory service manual and verify part numbers before purchasing or performing repairs. Safety-critical components such as airbags, seat belts, and braking systems should be installed by a qualified professional.
- Pontiac Aztek:
- 🎬 Helpful Videos
- Common Symptoms of a Failing Aztek Tail Light
- Buying a Used 2001-2005 Aztek Tail Light
- Physical Inspection Checklist:
- Cost of a 2001-2005 Pontiac Aztek Tail Light Assembly
- Replacement Guide (Difficulty: 1/5)
- Tools Needed:
- Step-by-Step Instructions:
- Recalls and Technical Service Bulletins (TSBs)
- Frequently Asked Questions (FAQ)
- 🎟️ Get 5% Off