
2008-2012 Mazda CX-7 Backup Camera: Diagnosing a Black or Flickering Screen
This guide explains the common causes of backup camera failure in the 2008-2012 Mazda CX-7, what to look for when buying a used one, and how to perform the replacement.
- The most common cause of failure is a black or flickering screen, often due to a damaged wiring harness where it flexes at the liftgate.
- Before buying a replacement, check the camera's electrical connector and wiring for visible damage, as this is a frequent failure point.
- Replacement is DIY-friendly (Difficulty 2/5) and involves removing the rear liftgate's interior trim panels.
- A used OEM camera (Part No. E22367RC0) is a good option, but inspect the lens for fogginess and the connector for corrosion before purchasing.
Symptoms of a Failing Backup Camera
When the backup camera on a 2008-2012 Mazda CX-7 begins to fail, the symptoms are almost always visual. Because it is a relatively simple system, diagnosis is straightforward. Look for the following signs when you put the vehicle in reverse:
- Black or Blank Screen: The most common symptom is a completely black screen where the video feed should be. This usually indicates a total loss of signal from the camera, which could be due to a dead camera, a severed wire, or a disconnected plug.
- Flickering or Intermittent Image: If the image cuts in and out, or flickers between a picture and a black screen, it often points to a loose connection or a frayed wire. The wiring harness that runs from the liftgate to the body is a common failure point, as it flexes every time the hatch is opened and closed.
- Blue Screen: Some infotainment systems will display a solid blue screen when they are expecting a video signal but are not receiving one. This is functionally the same as a black screen and points to a problem with the camera or its wiring.
- Distorted or "Rolling" Picture: A distorted, static-filled, or rolling picture suggests a poor quality signal. This can be caused by water intrusion into the camera lens or connector, or corrosion on the electrical pins.
Known Issues: Wiring Harness Failure
While no specific recall for the backup camera exists for the CX-7, other Mazda models from a similar era were recalled for a design flaw that is highly relevant. The issue involves the backup camera wiring harness becoming damaged from the repeated stress of opening and closing the liftgate. Over time, this movement can cause the wires inside to fray or break, or cause the connector pins to wear out. This leads to a poor connection and the flickering or complete signal loss described above. When diagnosing a camera issue, the wiring harness that passes through the rubber grommet between the liftgate and the vehicle body should be considered a primary suspect.
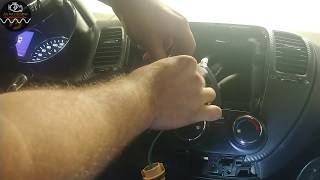
🎬 Watch: How to diagnose a rear view camera faultPro Tip: Before replacing the camera, carefully inspect the connector plug and the first few inches of wiring coming from it. Sometimes, the problem is a loose plug or a visibly damaged wire that can be repaired without needing a whole new camera unit.
Buying a Used 2008-2012 CX-7 Video Camera
A used OEM camera is often a reliable and cost-effective alternative to an expensive new dealer part. Since aftermarket cameras may not have the same image quality or plug-and-play fit, a recycled OEM unit is a great choice. Here’s what to check before you buy:
- Verify the Part Number: Ensure the part is the correct OEM number, E22367RC0. While it may fit multiple years, confirming the number guarantees compatibility.
- Inspect the Lens: Look closely at the camera lens. It should be clear and free of deep scratches, cracks, or internal cloudiness. A hazy or fogged lens indicates the seal has failed and moisture has gotten inside, which will produce a blurry image.
- Check the Connector Pins: The electrical connector pins should be straight, clean, and free of any green or white corrosion. A corroded connector is a major red flag and suggests the part was exposed to moisture.
- Examine the Wiring Pigtail: Look at the short length of wire attached to the camera. It should be free of cuts, exposed copper, or shoddy-looking electrical tape repairs. This area is a known weak point.
- Ask About the Source Vehicle: If possible, find out the mileage of the vehicle the part came from. A camera from a lower-mileage vehicle is generally preferable, though failure is more often related to age and use of the liftgate than mileage itself.
Replacement Difficulty: 2/5
Replacing the backup camera is a manageable DIY job for most people with basic tools. The process primarily involves removing interior trim panels, which requires patience to avoid breaking clips.
Estimated Time: 1 hour
Tools Needed:
- Panel removal tool kit (plastic pry tools)
- Socket set (likely 10mm)
- Screwdriver
General Steps:
- Open the rear liftgate.
- Using plastic pry tools, carefully remove the upper and side trim panels from the inside of the liftgate.
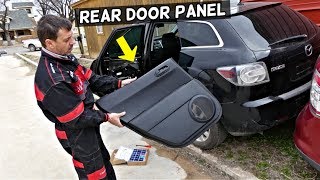
- Remove the main lower trim panel. This is usually held on by a combination of clips and a few screws, sometimes hidden inside the interior pull handle. 🎬 See this walkthrough for removing the rear door panel
- Once the panel is off, locate the camera. It is mounted on the exterior trim piece, often near the license plate lights.
- Disconnect the single electrical connector from the camera.
- Unbolt the camera from its mounting bracket.
- Install the new camera, reconnect the electrical plug, and test it by putting the car in reverse before reassembling all the trim panels. 🎬 Watch: Full backup camera installation guide for CX-7
Warning: Plastic trim clips can become brittle with age. Work slowly and use proper panel removal tools to minimize the chance of breaking them.
Cost Comparison
| Part Source | Estimated Price Range |
|---|---|
| New OEM (Dealer) | $250 - $400+ |
| New Aftermarket | $20 - $120 |
| Used OEM | $50 - $150 |
| Shop Labor Cost | $100 - $200 |
Frequently Asked Questions (FAQ)
My camera screen is black. Does that mean the camera is broken?
Not necessarily. A black screen means the display is not receiving a signal. This could be a failed camera, but it could also be a disconnected plug or a broken wire in the harness that runs through the liftgate hinge area. It's always best to check the connections before buying a new part.
Can I install an aftermarket camera instead of an OEM one?
Yes, but it may require more work. While many universal aftermarket cameras are available, they often require splicing wires and running a new video cable from the liftgate to the radio. An OEM replacement is plug-and-play, using the existing factory wiring for a much simpler installation.
My camera image is foggy. Can I just clean the lens?
You should always clean the exterior of the lens first with a soft microfiber cloth. However, if the fogginess appears to be on the inside of the lens, it means the camera's waterproof seal has failed. In this case, the entire camera unit must be replaced.
Do I need to have the new camera programmed by a dealer?
No. For the 2008-2012 Mazda CX-7, the backup camera is a simple plug-and-play component. No special programming or calibration is required after installation.
Helpful Videos

Technical Specifications
OEM Part Numbers: E22367RC0 E223-67-RC0
NTSC video signal, connects via factory vehicle harness.
We Have This Part in Stock

The information in this article is provided for general reference and educational purposes only. Vehicle specifications, procedures, and part compatibility can vary by production date, trim level, and region. Always consult your vehicle's factory service manual and verify part numbers before purchasing or performing repairs. Safety-critical components such as airbags, seat belts, and braking systems should be installed by a qualified professional.
- Mazda CX-7: