
1999-2006 Silverado, Sierra, Tahoe & More: Fixing Wiper Arm Spline & Spring Failures
This guide covers the common causes of wiper arm failure—stripped splines and weak springs—on GMT800 trucks and SUVs, and how to diagnose and replace the part.
- The two main failures are a weak spring causing poor windshield contact, and stripped splines causing the arm to become loose or stop moving.
- When buying a used arm, the most critical inspection is the condition of the splines inside the mounting hole; if they are rounded, the part is unusable.
- A special wiper arm puller tool is highly recommended for removal, as the arms often seize onto the pivot shaft.
- If both wipers fail simultaneously, suspect the wiper motor/module; if only one fails, the arm is the most likely cause.
Symptoms of a Failing Windshield Wiper Arm
When a wiper arm on your 1999-2006 Chevrolet Silverado, GMC Sierra, or a related SUV like the Tahoe, Yukon, Suburban, or Escalade starts to fail, the symptoms are usually obvious and directly impact visibility. Because the arm is a mechanical part, failures are related to physical wear and tear.
1. Wipers Not Touching the Windshield (Lifting)
The most common failure is a loss of spring tension. The internal spring can weaken from age, rust, or fatigue, causing the arm to lift away from the glass. This is especially noticeable at highway speeds, where airflow can get underneath the blade and lift it completely off the windshield, leaving large un-wiped areas.
2. Streaking, Skipping, or Chattering
Even if the arm still touches the glass, weak spring pressure prevents the wiper blade from conforming to the curve of the windshield. This causes the blade to skip across the surface, chatter noisily, or leave behind streaks and unwiped patches. Many owners replace their wiper blades multiple times, thinking they are the problem, when the real culprit is a weak wiper arm spring.
3. Wiper Arm is Loose or Wobbly at the Base
The base of the wiper arm is made of a relatively soft metal with internal splines (grooves) that grip the hard steel pivot shaft from the wiper linkage. If the 13mm retaining nut becomes loose, the arm can wobble, causing the steel shaft to strip out the softer splines inside the arm. You will be able to physically wiggle the arm at its base, independent of the pivot shaft.
4. Wiper Doesn't Move, But Motor is Working
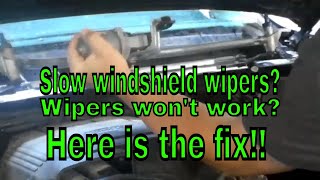
This is an advanced stage of the stripped spline issue. You may hear the wiper motor running, and the other wiper arm may be working correctly, but one arm remains stationary or moves erratically. This indicates the splines are so completely stripped that the pivot shaft is spinning freely inside the arm's mounting hole. 🎬 See how to diagnose and fix a stripped wiper arm spline. This is a critical failure that renders the wipers useless and is extremely dangerous in poor weather.
5. Broken Washer Fluid Nozzle
The plastic washer fluid nozzle integrated into the arm and the rubber hose attached to it can become brittle with age and break, causing a loss of washer fluid spray to the windshield.
Known Issues, TSBs, and Recalls
There are no major recalls or Technical Service Bulletins (TSBs) specifically for the windshield wiper arms on the 1999-2006 GM truck and SUV platform. However, it is important to distinguish arm failure from other common wiper system issues.
GM issued large-scale recalls for the windshield wiper motor and its internal circuit board (pulse module) on many earlier trucks (1994-1997) and other SUV platforms like the 2002-2003 Trailblazer/Envoy. Those failures were typically caused by water intrusion leading to cracked solder joints on the circuit board.
Pro Tip: If both wipers stop working at the same time, behave erratically (e.g., won't turn off), or park in the middle of the windshield, the problem is likely electrical—suspect the wiper motor, pulse board, or switch. If only one wiper is failing while the other works fine, the problem is almost certainly mechanical—a stripped or broken wiper arm.
Buying a Used Windshield Wiper Arm
A used OEM wiper arm is an excellent, cost-effective alternative to expensive new dealer parts or lower-quality aftermarket options. However, a thorough inspection is crucial to ensure you get a good part. These arms fail in predictable ways, so you know exactly what to look for.
1. Inspect the Splines (Most Important!)
This is the number one checkpoint. Look inside the round mounting hole at the base of the arm. The splines must be clean, sharp, and well-defined. Bring a small flashlight to get a clear view. If the splines look rounded, flattened, or stripped, the arm is junk. Do not buy it. A used arm with stripped splines is no better than the one you are replacing.
2. Test the Spring Tension
Hold the base of the arm firmly and pull the arm open, as if lifting it off a windshield. It should offer strong resistance and snap back forcefully when you let go. If it feels limp, weak, or doesn't spring back with authority, the spring is worn out. A weak spring will not hold the blade against the glass, leading to poor wiping performance.
3. Check for Bends and Cracks
Lay the arm on a flat surface to check for any bends or twists. A bent arm will not apply even pressure across the blade. Inspect the metal around the spring pivot and mounting hole for any stress cracks.
4. Examine the Wiper Blade Clip and Washer Nozzle
Ensure the 'J-hook' at the end of the arm that holds the wiper blade is not bent, cracked, or excessively rusted. Check that the plastic washer fluid nozzle is intact and not broken off.
Cost Comparison
| Part Type | Estimated Cost (Per Arm) | Notes |
|---|---|---|
| New OEM | $60 - $95 | Highest quality and perfect fit, but most expensive. |
| New Aftermarket | $20 - $40 | Brands like Dorman are widely available. Quality can be inconsistent; some users report issues with spring tension even on new parts. |
| Used OEM | $20 - $45 | Excellent value, offering OEM quality for the price of aftermarket, provided you inspect the splines and spring tension carefully. |
| Shop Labor | $45 - $90 | Typically a quick job (0.5-0.8 hours), but labor costs can increase if an arm is seized and requires extra time to remove. |
Replacement Guide (DIY)
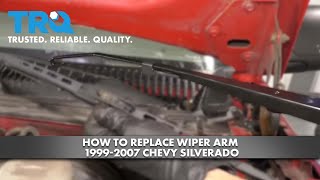
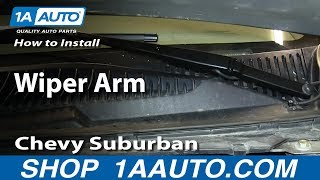
Replacing the wiper arm is a straightforward job that most DIY mechanics can complete in under 30 minutes. 🎬 Watch: Step-by-step wiper arm replacement for Silverado and Sierra trucks. However, it can become difficult if the arm is rusted onto the pivot shaft.
Installation Difficulty: 2 out of 5 (can be 4/5 if arm is seized)
Estimated Time: 0.5 Hours
Required Tools:
- Flat-blade screwdriver or pick tool
- Ratchet with 13mm socket
- Wiper Arm Puller (Highly Recommended)
- Penetrating oil (e.g., PB Blaster)
Warning: While it's possible to remove a stuck arm by prying and hammering, this can easily damage the wiper linkage, the cowl, or the windshield. A wiper arm puller costs very little and is the correct tool for the job, preventing expensive collateral damage.
Step-by-Step Instructions:
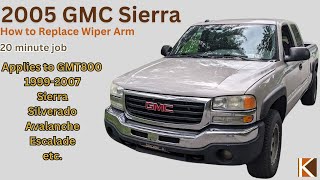
- Mark the Position: Before starting, use a piece of masking tape on the windshield to mark the position of the old wiper blade. This will help you install the new arm at the correct angle. Many of these vehicles also have small black alignment marks baked into the bottom edge of the glass from the factory. 🎬 Watch this walkthrough for replacing wiper arms on Suburban and Tahoe SUVs.
- Open the Hood: This gives you better access to the base of the arms.
- Remove the Nut Cap: Use a small flat-blade screwdriver to gently pry off the plastic cap at the base of the wiper arm, exposing the 13mm retaining nut.
- Remove the Retaining Nut: Use a 13mm socket to remove the nut. If it's rusty, apply penetrating oil first.
- Remove the Wiper Arm:
- First, try to remove it by hand. Lift the arm slightly off the glass and wiggle it back and forth while pulling upwards. Sometimes they pop right off.
- If it's stuck, use a wiper arm puller. Slide the tool's feet under the arm and tighten the center screw against the pivot shaft until the arm pops free.
- Disconnect Washer Hose: Once the arm is loose, disconnect the washer fluid hose from the nozzle fitting.
- Install the New Arm: Connect the washer hose to the new arm. Align the arm with your tape mark or the factory alignment mark on the windshield and press it down firmly onto the splined pivot shaft.
- Secure the Nut: Reinstall the 13mm nut. Tighten it securely. While a specific torque spec is not readily available for this generation, 18-22 ft-lbs is a common range for this type of nut. The key is to make it tight enough that the splines are fully engaged to prevent future stripping. Wiggle the base of the arm to ensure there is no play.
- Test and Finish: Snap the plastic cap back on. Run the wipers and washer fluid to test for proper operation and alignment before closing the hood.
Technical Specifications & Part Numbers
The driver (Left) and passenger (Right) side arms are different parts and have unique part numbers. They are not interchangeable.
| Side | Common OEM Part Numbers | Supersedes |
|---|---|---|
| Driver Side (LH) | 15761497, 15829648 | 12368669, 12487597, 15706391 |
| Passenger Side (RH) | 15829647, 15139553 | 88937402, 10367563, 15114472 |
Note: Part numbers can supersede over time. Always verify fitment with the vehicle's VIN. The numbers 15829648 and 15829647 are commonly sold as a pair.
Frequently Asked Questions (FAQ)
Can I just replace the spring on my old wiper arm?
No, the spring is integrated into the arm assembly and is not sold as a separate component. If the spring is weak, the entire arm must be replaced.
Why does my new aftermarket wiper arm still leave streaks?
This is a common complaint with some lower-quality aftermarket arms. The spring tension may not be as strong as the original OEM part, or the arm itself may have a slight bend. If you've already installed a new arm and new blades and still have issues, the arm itself is the likely cause. This is a key reason why a good used OEM part is often a better choice than a cheap new aftermarket one.
Do I really need a wiper arm puller tool?
It is highly recommended. These arms are notorious for seizing onto the steel pivot shaft, especially in areas with rust. While you might get lucky, a puller tool makes the job easy and prevents damage to the wiper linkage, cowl, or windshield that can occur from prying or hammering.
My wipers stopped in the middle of the windshield. Is this the wiper arm?
Unlikely. When wipers fail to 'park' in the correct position, it is almost always an electrical issue with the wiper motor's internal circuit board (pulse module) or the park switch. A failing arm is a mechanical issue that affects how the blade contacts the glass or whether it moves at all, not where it stops.
Helpful Videos
Technical Specifications
OEM Part Numbers: 15761497 15829648 15829647 15139553 15114471 15139553 15761496 88958115
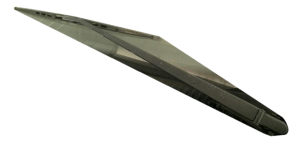
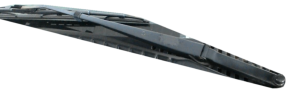
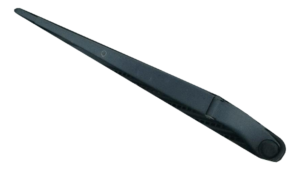
Attachment: Splined hole with 13mm retaining nut. Blade End: J-Hook. Integrated washer fluid nozzle.
We Have This Part in Stock


The information in this article is provided for general reference and educational purposes only. Vehicle specifications, procedures, and part compatibility can vary by production date, trim level, and region. Always consult your vehicle's factory service manual and verify part numbers before purchasing or performing repairs. Safety-critical components such as airbags, seat belts, and braking systems should be installed by a qualified professional.
- Chevrolet Silverado 1500:
- GMC Sierra 1500:
- Chevrolet Silverado 2500 HD:
- Chevrolet Tahoe:
- GMC Sierra 2500 HD:
- GMC Yukon:
- Cadillac Escalade:
- Cadillac Escalade ESV:
- Chevrolet Suburban 1500:
- GMC Yukon XL 1500:
- Cadillac Escalade EXT:
- Chevrolet Suburban 2500:
- GMC Yukon XL 2500:
- Chevrolet Silverado 3500:
- GMC Sierra 3500:
- Chevrolet Avalanche 1500:
- Chevrolet Avalanche 2500:
- Chevrolet Silverado 1500 Classic:
- Chevrolet Silverado 2500 HD Classic:
- Chevrolet Silverado 3500 Classic:
- GMC Sierra 1500 Classic:
- GMC Sierra 2500 HD Classic:
- GMC Sierra 3500 Classic:
- 🎬 Helpful Videos
- 🛍️ Shop This Part
- Symptoms of a Failing Windshield Wiper Arm
- 1. Wipers Not Touching the Windshield (Lifting)
- 2. Streaking, Skipping, or Chattering
- 3. Wiper Arm is Loose or Wobbly at the Base
- 4. Wiper Doesn't Move, But Motor is Working
- 5. Broken Washer Fluid Nozzle
- Known Issues, TSBs, and Recalls
- Buying a Used Windshield Wiper Arm
- 1. Inspect the Splines (Most Important!)
- 2. Test the Spring Tension
- 3. Check for Bends and Cracks
- 4. Examine the Wiper Blade Clip and Washer Nozzle
- Cost Comparison
- Replacement Guide (DIY)
- Required Tools:
- Step-by-Step Instructions:
- Technical Specifications & Part Numbers
- Frequently Asked Questions (FAQ)
- 🎟️ Get 5% Off