


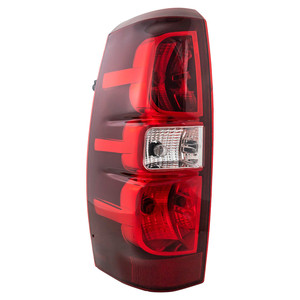

Tail lights are essential safety components on your Chevrolet Avalanche, providing visibility to other drivers in low-light conditions and signaling when you are braking or turning. Keeping your tail lights in proper working order ensures safety and compliance with road regulations.
Over time, tail lights on the Chevrolet Avalanche may experience issues such as burnt-out bulbs, cracked or broken lenses, moisture buildup inside the housing, or faulty wiring connections. These problems can reduce visibility and increase the risk of accidents or traffic violations.
Regular inspection of your tail lights can prevent potential issues. Check for any cracks or damage to the lens or housing. Ensure that all bulbs are functioning correctly by testing the brake lights, turn signals, and reverse lights. Clean the tail light lenses to remove dirt and grime that can dim the light output.
Replacing the tail light assembly on a Chevrolet Avalanche is a straightforward process:
1. Open the tailgate to access the mounting screws or bolts securing the tail light assembly.
2. Remove the screws or bolts using the appropriate screwdriver or socket wrench.
3. Gently pull the tail light assembly away from the vehicle body.
4. Disconnect the wiring harness by pressing the release tab and pulling the connector apart.
5. Connect the wiring harness to the new tail light assembly.
6. Position the new assembly into place and secure it with