
P0106 on 2011-2020 Kia Optima: MAP Sensor Performance, Causes, and Fixes
On a 2011-2020 Kia Optima, code P0106 is most often caused by a faulty Manifold Absolute Pressure (MAP) sensor. Replacing the sensor is a common fix, with aftermarket parts costing around $100 and the repair being relatively simple for a DIYer (2/5 difficulty). However, vacuum leaks and heavy carbon buildup on GDI engines are also significant potential causes that should be investigated before replacing parts.
- P0106 on a Kia Optima almost always points to a problem with the Manifold Absolute Pressure (MAP) sensor or a vacuum leak.
- The most common fix is replacing the MAP sensor, which is an accessible and affordable DIY repair.
- Before replacing the sensor, always check for cracked or disconnected vacuum hoses, as this is a frequent and easily overlooked cause.
- Symptoms include rough idling, poor acceleration, and increased fuel consumption.
- The issue is common to both the 3rd generation (2011-2015) and 4th generation (2016-2020) Optima.
What's Unique About the 2011-2020 Kia Optima
For the Kia Optima, particularly those with Gasoline Direct Injection (GDI) engines (2.4L and 2.0L Turbo), the P0106 code can be more than a simple sensor fault. These engines are known to be susceptible to carbon buildup on the intake valves and ports. Since GDI engines inject fuel directly into the cylinder, the fuel doesn't wash over and clean the intake valves. This buildup can disrupt airflow, causing the MAP sensor to report pressure readings that are out of range, triggering a P0106 code. Owners have also reported the code can sometimes appear after a battery replacement, possibly due to the system's relearning process or a voltage spike. It's also important to rule out simple vacuum leaks, which can mimic a sensor failure and are a common misdiagnosis.
Generation note: The 2011-2020 range covers two Kia Optima generations: the 3rd Gen (TF, 2011-2015) and the 4th Gen (JF, 2016-2020). The causes and fixes for P0106 are largely the same across both generations as they rely on similar MAP sensor technology and share engine families (2.4L GDI, 2.0L Turbo). The exact location and part number of the sensor may vary slightly between different engine options. The 4th generation introduced a 1.6L Turbo engine as well.
Symptoms You May Notice
- Check Engine Light is on
- Rough or erratic idling
- Poor acceleration or hesitation
- Increased fuel consumption
- Engine stalling, especially at stops
- Black smoke from the exhaust
- Engine revving up and down on its own at idle
- Replacing the MAP sensor without first checking for vacuum leaks. A vacuum leak can cause the exact same symptoms and is a common underlying issue.
- Replacing the MAP sensor when the actual cause is heavy carbon buildup on the intake valves of a GDI engine, which requires a different and more involved repair procedure.
Most Likely Causes
- Faulty MAP Sensor 🔴 High Probability → Shop Manifold Absolute Pressure Sensor MAP sensors can fail with age and mileage due to heat cycles and contamination. On the Optima, it's a very common point of failure leading to P0106 and related codes.
How to confirm: After checking for vacuum leaks and wiring issues, test the sensor's voltage output with a multimeter while applying vacuum with a hand pump; the voltage should change smoothly. An OBD-II scanner with live data can also show if the MAP reading is irrational compared to throttle position and RPM. With the key on, engine off, the MAP reading should be close to barometric pressure.
Typical fix: Replace the MAP sensor. It is typically located on the intake manifold, often near the throttle body, and secured by one bolt. 🎬 Watch: This video shows you how to replace the MAP sensor.
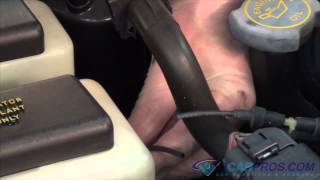
Est. part cost: $80-$120 - Vacuum Leak 🟡 Medium Probability Hoses can become brittle and crack over time, and intake manifold gaskets can fail. A cracked intake manifold itself has been reported by owners. 🎬 Watch: See where common vacuum leaks occur on the Optima. A small split in a vacuum hose can cause the ECU to receive falsely low manifold pressure readings.
How to confirm: Perform a visual inspection of all vacuum hoses connected to the intake manifold for cracks or disconnections. A smoke test is the most effective way to find hard-to-see leaks from gaskets or small cracks.
Typical fix: Replace the cracked vacuum hose or faulty intake manifold gasket. In some cases, the entire intake manifold may need replacement if it is cracked.
Est. part cost: $10-$350 - Wiring or Connector Issue ⚪ Low Probability
How to confirm: Visually inspect the MAP sensor's electrical connector and wiring harness for damage, corrosion, or loose connections. Check for the 5-volt reference signal and a good ground at the connector with a multimeter.
Typical fix: Repair the damaged wire or clean/replace the connector. Ensure the harness is properly secured away from moving parts like the radiator fan.
Est. part cost: $5-$50
Rare But Worth Checking
- Clogged Catalytic Converter: A clogged catalytic converter can create excessive backpressure in the exhaust, which can affect intake manifold pressure and trigger a P0106 code. This is usually accompanied by other codes and a significant loss of power.
- Faulty Powertrain Control Module (PCM): This is extremely rare. The PCM is the last thing to suspect after all other possibilities (sensor, wiring, vacuum leaks) have been thoroughly ruled out.
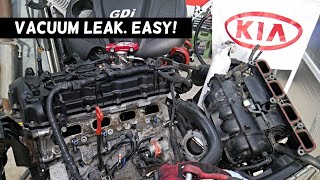
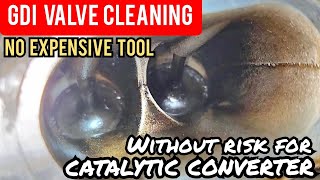
- Excessive Carbon Buildup: On GDI engines like those in the Optima, carbon can build up on the intake valves and ports, restricting airflow. This can alter manifold pressure and cause the MAP sensor to generate readings outside the expected range. Symptoms include misfires, rough idle, and power loss. The fix often requires manual cleaning (e.g., walnut blasting) of the intake ports and valves. 🎬 Watch: A complete guide to cleaning GDI intake valve carbon.
Diagnosis Steps
- Read the code: Use an OBD-II scanner to confirm that P0106 is the active code. Note any other codes present, such as misfire (P030x) or other MAP circuit codes (P0105, P0107, P0108).
- Check for Technical Service Bulletins (TSBs): Search for any TSBs related to P0106 for your specific year and model. Some manufacturers release software updates to correct overly sensitive code triggers.
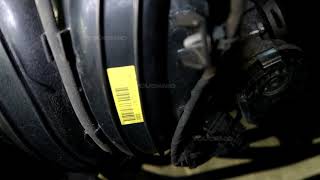
- Visual Inspection: Inspect the air intake system for any obvious issues like a disconnected air hose. Check the MAP sensor's electrical connector for a secure fit and any signs of corrosion or damage.
- Inspect Vacuum Hoses: Carefully check all vacuum lines connected to the intake manifold for cracks, brittleness, or disconnections. Pay close attention to the hose leading to the MAP sensor if it is not directly mounted to the manifold.
- Check Live Data: Use an OBD-II scanner to view live data. With the key on and engine off, the MAP sensor reading should be close to the barometric pressure (BARO) reading. As the engine runs, the reading should change with engine load and RPM. An unchanging or irrational value points to a problem. At idle, voltage should be around 1-1.5V, and at wide-open throttle, it should be near 4.5V.
- Test for Vacuum Leaks: If live data seems plausible, perform a smoke test to definitively rule out vacuum leaks from gaskets or hidden cracks in hoses. This is a critical step before replacing parts.
- Test the Sensor and Wiring: If no vacuum leaks are found, disconnect the MAP sensor. Test the connector for a 5V reference wire and a good ground. If those are good, test the sensor itself by applying vacuum with a hand pump and measuring the signal voltage to see if it responds correctly.
- Inspect for Carbon Buildup: On GDI models (2.4L, 2.0T, 1.6T), if other tests are inconclusive, remove the intake manifold to visually inspect the intake ports and valves for heavy carbon deposits, which is a known issue.
- Replace the MAP Sensor: If the sensor fails the test and other causes are ruled out, replace the MAP sensor.
- Clear Code and Test Drive: After any repair, clear the code with the scanner and take the vehicle for a test drive to ensure the code does not return.
Parts You'll Likely Need
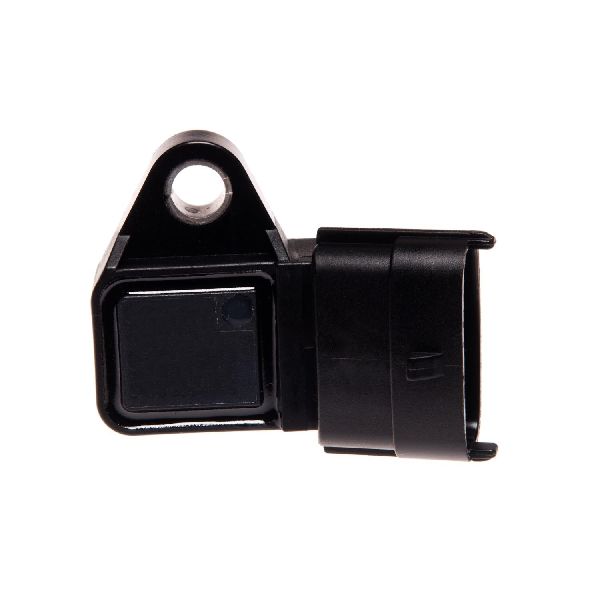
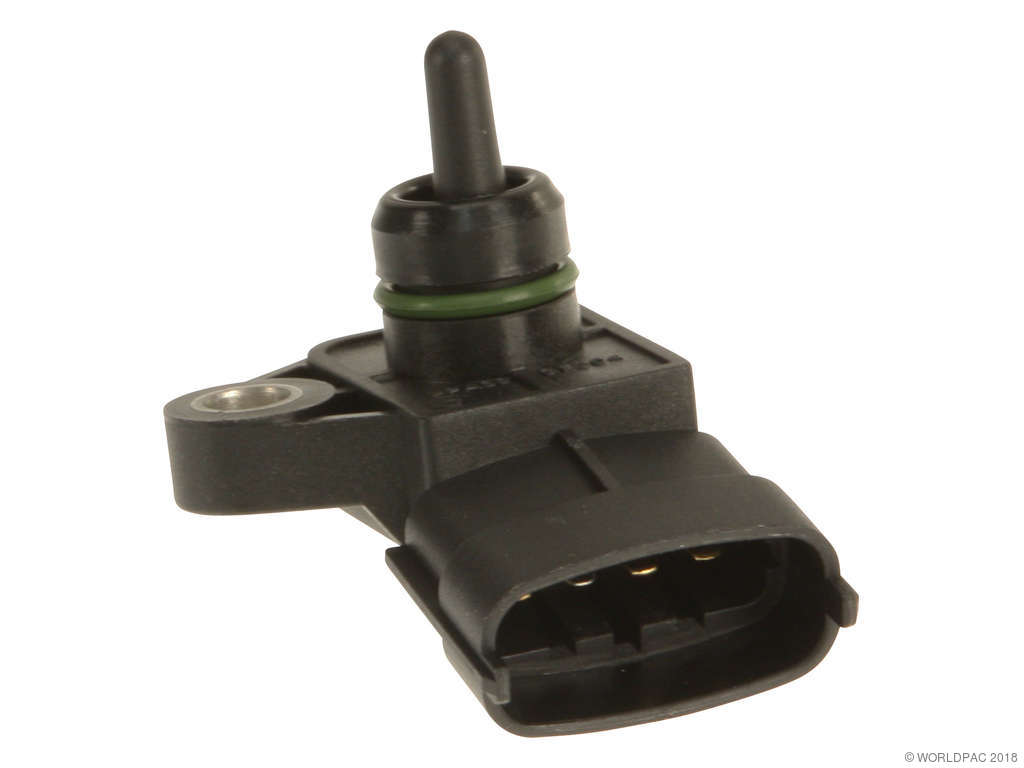
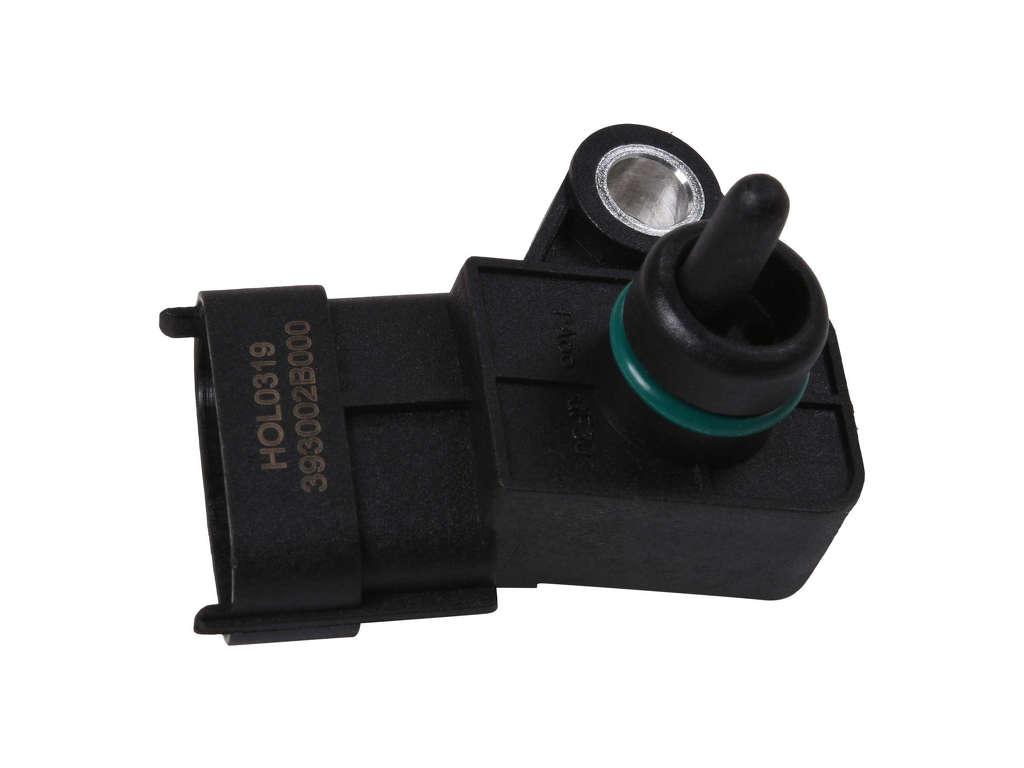
- Manifold Absolute Pressure (MAP) Sensor
(OEM #39300-2G000 or 39300-84400 (Verify by VIN))— This sensor is the most common failure point for a P0106 code, as it directly measures the pressure value that is reported as out of range.
Trusted brands: Bosch, Delphi, Standard Motor Products, NGK/NTK
OEM price range: $120-$160
Aftermarket price range: $70-$120
Related Codes That Often Appear With This One
- P0105 — This code indicates a MAP sensor circuit malfunction, often pointing directly to an electrical issue with the sensor or its wiring.
- P0107 — This code signifies 'MAP Sensor Circuit Low Input,' suggesting the sensor is sending a lower-than-expected voltage, which could be due to a bad sensor, wiring short, or a significant vacuum leak.
- P0108 — This code signifies 'MAP Sensor Circuit High Input,' indicating the sensor is sending a higher-than-expected voltage. This often points to a faulty sensor or a blockage in the vacuum port.
- P030x (e.g., P0301, P0302) — Cylinder misfire codes can accompany P0106 if the incorrect MAP reading leads to a poor air/fuel mixture, or if the root cause (like a vacuum leak or carbon buildup) is also causing misfires.
Technical Service Bulletins (TSBs) & Recalls
- While no specific TSB for the Optima and P0106 was found in the search, Kia has issued TSBs for other models like the Forte (TSB_FUE047) for P0106 caused by software logic issues, indicating that checking for a software update at the dealer is a valid diagnostic step.
Platform-Specific Known Issues
- Carbon Buildup on GDI Engines: The 2.4L and 2.0T GDI engines used in the Optima are prone to significant carbon accumulation on the back of the intake valves. This is because fuel is injected directly into the cylinder and never washes the valves. This buildup can restrict airflow, causing turbulence and incorrect pressure readings that trigger P0106. The solution often requires manual cleaning of the intake valves, such as walnut blasting.
Mechanic-Grade Diagnostic Values
- MAP Sensor 5V Reference Voltage — expected: Approximately 5 Volts DC. Failure: A reading significantly lower than 5V or 0V indicates an open or short in the reference circuit or a faulty PCM.
- MAP Sensor Ground Circuit Check — expected: Approximately 12 Volts (Battery Voltage). Failure: A reading of 0V indicates an open in the ground circuit between the sensor connector and the PCM.
- MAP Sensor Signal Voltage (Key On, Engine Off) — expected: Close to Barometric Pressure (BARO) reading on a scan tool. Voltage should be around 4.5V at sea level.. Failure: A voltage that does not correlate with atmospheric pressure suggests a faulty sensor.
- MAP Sensor Signal Voltage (Engine Idling) — expected: 1.0 - 1.5 Volts DC (high vacuum). Failure: Voltage that is too high at idle (e.g., over 2.0V) suggests a vacuum leak or a faulty sensor. Voltage that doesn't change with RPM is also a failure indicator.
Scan Tool Commands That Help
- Kia GDS or equivalent professional scanner: MAP/BARO Comparison — Use with the Key On, Engine Off. The MAP sensor reading should be nearly identical to the BARO sensor reading. A significant difference points towards a faulty MAP sensor. This is a primary logical test before physical inspection.
- Kia GDS or equivalent professional scanner: Clear Learned Values / Reset Adaptations — While not always mandatory for a MAP sensor replacement, performing this function can be beneficial, especially after a battery replacement or if other repairs were made. It forces the ECU to relearn fuel trims and sensor baselines immediately, which can resolve erratic idle issues that sometimes occur post-repair.
Wiring & Ground Locations
- MAP Sensor Connector — On the intake manifold, typically near the throttle body, attached to the MAP sensor.. This is the primary point of electrical failure. The connector or its pigtail can become brittle from heat, causing intermittent connections. The wiring harness retainer clip can break, allowing the harness to contact the radiator fan.
- Engine Control Module (ECM/PCM) Ground — Typically located on the vehicle's inner fender or firewall in the engine bay. A specific ground point identifier (e.g., G101) would require a factory service manual, but tracing the main negative bundle from the battery will lead to the primary chassis grounds.. A poor engine or PCM ground can introduce electrical noise or voltage offsets, causing the PCM to misinterpret the MAP sensor's signal and trigger a P0106, even if the sensor and its dedicated wiring are perfectly fine.
Real Owner Repair Stories
- Reddit user 'Tricktrick_' (2018 Kia Optima LX 2.4L with 166k miles) — Engine light with P0106, RPMs surging high at idle with a 'pop' sound.
❌ Tried (didn't work) Initial code scan and observation.
✅ What actually fixed it The root cause was discovered to be a melted hole in the plastic intake manifold, which created a massive unmetered air leak, causing the MAP sensor readings to be completely irrational. The fix required replacing the entire intake manifold. - Reddit user 'r/MechanicAdvice' (2010 Kia Optima LX 4-cyl with ~97k miles) — P0106 code appeared immediately after replacing a dead battery. Car would randomly stall and had an erratic idle.
❌ Tried (didn't work) Clearing the code with a scanner., Disconnecting the battery for 45 minutes to reset the computer.
✅ What actually fixed it The thread did not reach a definitive 'what fixed it' conclusion, but the strong implication is that the new battery or the subsequent voltage changes caused the ECU to require a full relearn cycle. The appearance of the code directly after the battery swap is a key diagnostic clue that the issue is related to the electronic reset rather than a sudden mechanical failure. - NHTSA ODI #11649485 — An owner reported that after an oil change and spark plug replacement, the car would not drive and triggered code P0106. Despite the vehicle being at a dealership, the technician could not initially determine the issue.
"I Checked Everything" — The Actual Cause
- A degraded PCV (Positive Crankcase Ventilation) valve diaphragm can leak crankcase vapors into the intake manifold, subtly altering pressure readings and triggering P0106. This type of leak is internal to the engine's breathing system and will not be found by a smoke test performed on the intake tract. A quick test is to remove the hose from the valve cover and attempt to blow through it; it should only allow flow in one direction.
- A faulty or sticking brake booster check valve can cause an intermittent vacuum leak that only manifests when the brake pedal is applied or released. This can be missed during a standard smoke test if the brake system is not actuated or tested separately.
OEM Part Supersession History
39300-2G000→39300-84400— This is a common part update across multiple Hyundai/Kia platforms. The new part number is the current replacement for the original.
Heads up: The two parts are generally interchangeable, but it is always recommended to use the latest revision (39300-84400) for any new replacement.
Model Year Variations Within This Range
- 2011-2015 (Gen 3) vs 2016-2020 (Gen 4): While the function is identical, the intake manifold design and sensor placement can have minor variations between the TF (Gen 3) and JF (Gen 4) chassis, especially with the introduction of the 1.6L Turbo engine in the fourth generation. The primary part numbers (39300-2G000/39300-84400) are shared across many engines, but verifying by VIN is always the safest practice.
Diagnostic Flowchart
Real Owner Stories
Aggregated from forums and TSBs cited above. Mileages and costs reflect what owners reported in those sources.
2018 Kia Optima LX 2.4L — 166000 miles
Symptoms: While parked with the engine running, the RPMs started going up slightly, then the check engine light came on. Also experienced high revving and popping noises.
What fixed it: Replaced the physically cracked intake manifold.
Source hint: r/askcarguys and r/MechanicAdvice on Reddit
2010 Kia Optima
Symptoms: P0106 code appeared immediately after a battery replacement, accompanied by an unstable idle.
What fixed it: Suspected ECU relearn issue or voltage sensitivity.
Source hint: r/MechanicAdvice on Reddit
NHTSA ODI #11649485
Symptoms: After receiving an oil change and new spark plugs, the vehicle would not drive and displayed code P0106.
What fixed it: The owner reported that the dealer was initially unable to determine the exact cause of the failure.
Related OBD-II Codes
Frequently Asked Questions
Why is my 2.4L or 2.0T GDI Optima prone to P0106 even after replacing the MAP sensor?
Is there a software update or TSB for the P0106 code on my Kia Optima?
Can a cracked intake manifold cause a P0106 on the 2011-2020 Optima?
I just replaced the battery on my Optima and got a P0106 code and unstable idle. Is this normal?
Does the Hyundai Sonata share this same P0106 issue?
Helpful Videos

We Have This Part in Stock


The information in this article is provided for general reference and educational purposes only. Vehicle specifications, procedures, and part compatibility can vary by production date, trim level, and region. Always consult your vehicle's factory service manual and verify part numbers before purchasing or performing repairs. Safety-critical components such as airbags, seat belts, and braking systems should be installed by a qualified professional.
- Kia Optima:
- 🧭 Diagnostic Flowchart
- 🎬 Helpful Videos
- 🛍️ Shop This Part
- What's Unique About the 2011-2020 Kia Optima
- Symptoms You May Notice
- Most Likely Causes
- Rare But Worth Checking
- Diagnosis Steps
- Parts You'll Likely Need
- Related Codes That Often Appear With This One
- Technical Service Bulletins (TSBs) & Recalls
- Platform-Specific Known Issues
- Mechanic-Grade Diagnostic Values
- Scan Tool Commands That Help
- Wiring & Ground Locations
- Real Owner Repair Stories
- "I Checked Everything" — The Actual Cause
- OEM Part Supersession History
- Model Year Variations Within This Range
- Real Owner Stories
- 2018 Kia Optima LX 2.4L — 166000 miles
- 2010 Kia Optima
- NHTSA ODI #11649485
- Related OBD-II Codes
- Frequently Asked Questions
- 🎟️ Get 5% Off