
P0107 on 2002-2006 Mini Cooper S (R53): MAP Sensor Low Voltage Causes and Fixes
On a 2002-2006 Mini Cooper S, code P0107 is most often caused by a failed T-MAP sensor on the intake manifold or a vacuum leak. Check for cracked vacuum lines, intake boots, and a broken T-MAP connector before replacing the sensor. A new sensor costs between $70 and $150.
- P0107 on a supercharged Mini Cooper S almost always relates to the T-MAP sensor on the intake manifold or a vacuum leak.
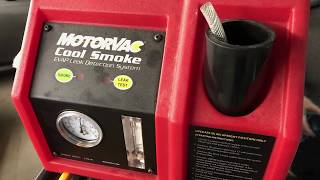
- Always perform a smoke test to check for vacuum leaks before replacing any parts. This is the most common cause.
- Inspect the T-MAP sensor's electrical connector for a broken clip, as a loose connection can trigger the code.
- The correct replacement part is the T-MAP sensor, OEM part number 12140872679.
- This code is often accompanied by P1688; fixing the root cause of P0107 will typically resolve both.
What's Unique About the 2002-2006 Mini Cooper
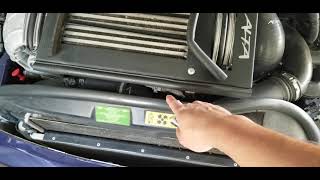
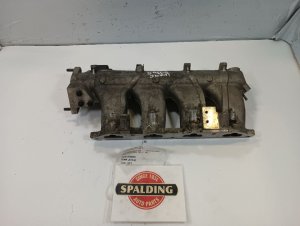
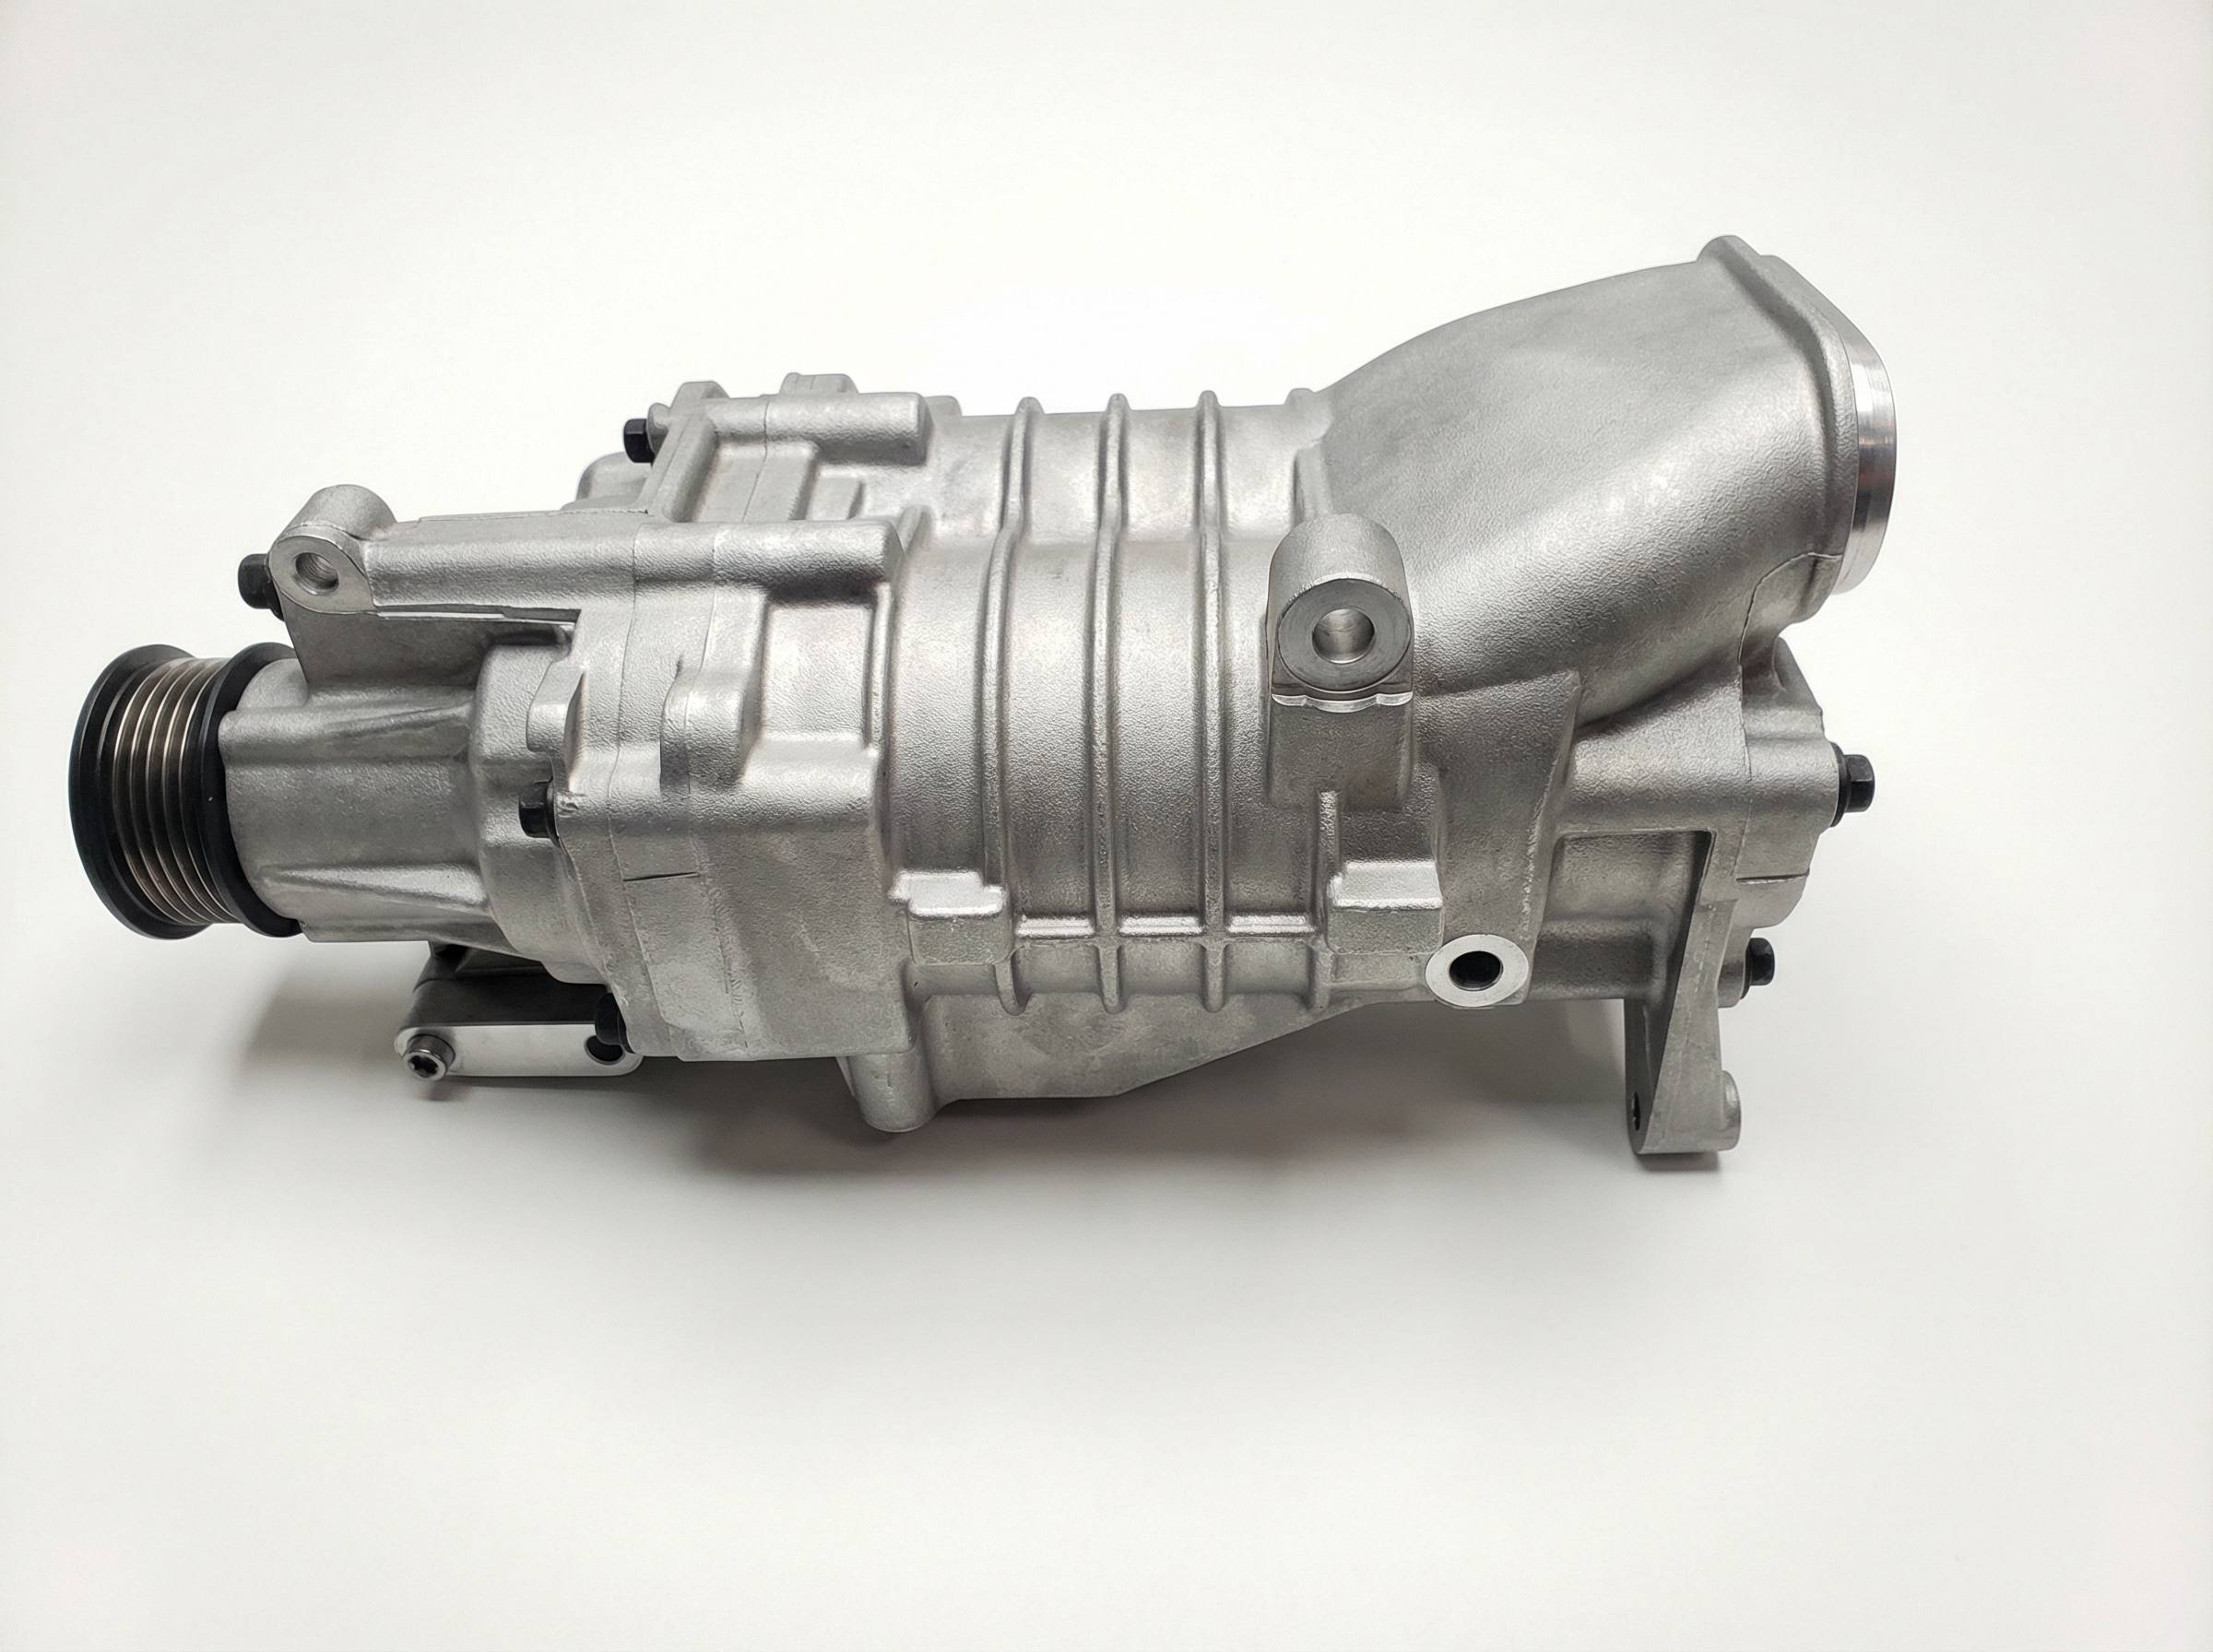
The supercharged W11 engine in the R53 Cooper S is unique because it uses two pressure sensors: a standard MAP sensor before the supercharger (near the thermostat housing) and a T-MAP (Temperature and Manifold Absolute Pressure) sensor after it, mounted directly on the intake manifold. 🎬 Watch: Locate your MAP and TMAP sensors on the R53. Code P0107 almost always points to an issue with the post-supercharger T-MAP sensor or a related vacuum leak. These engines are well-known for developing vacuum leaks from aged plastic and rubber components, which is a primary cause of this code, often more so than the sensor itself. A vacuum leak that persists can also cause the MAP sensors to burn out over time.
Symptoms You May Notice
- Check Engine Light (SES) is on
- DSC (Dynamic Stability Control) light is on
- Engine enters limp mode (severely reduced power)
- Rough or unstable idle
- Engine hesitates or stumbles during acceleration
- Stalling, especially after stopping or at idle
- Noticeable loss of power and poor performance
- Black smoke from the exhaust or running rich
- "Yo-yo" or surging sensation when coasting or at light throttle
- Sputtering or refusal to start after stopping
- Replacing the T-MAP sensor without first performing a smoke test. Many owners replace a perfectly good sensor when the root cause is a hidden vacuum leak.
- Replacing the crankshaft pulley/harmonic balancer. While a failing crank pulley often triggers P1688, it can sometimes appear with P0107, leading to a misdiagnosis if the MAP sensor circuit is the true root cause. 🎬 Watch: Fixing P0107 and P1688 codes on a Stage 2 Mini.
Most Likely Causes
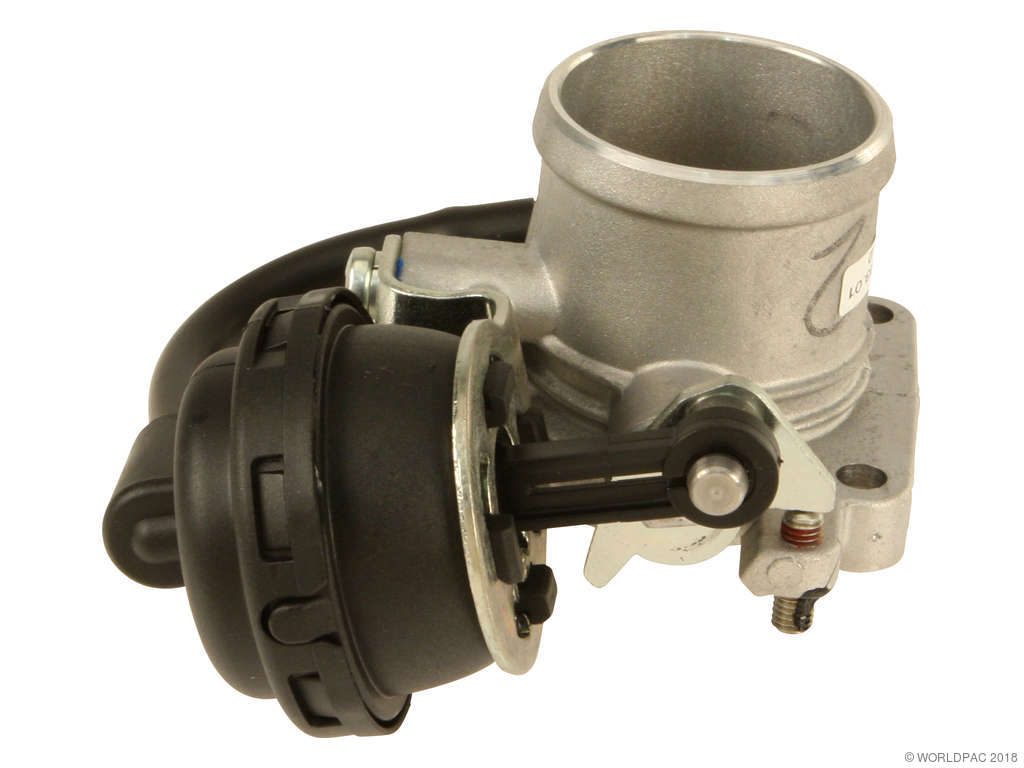
- Vacuum Leak 🔴 High Probability The engine bay heat and age cause plastic and rubber vacuum lines, intake boots, and gaskets to become brittle and crack. A small, often-overlooked vacuum hose that runs from the intake duct to the fuel pressure regulator is a frequent culprit. Another common leak point is the vacuum line for the supercharger bypass valve, which can get disconnected during airbox removal.
How to confirm: Perform a smoke test on the intake system. This is the most reliable method. 🎬 See how to perform a smoke test to find leaks. Pay close attention to the vacuum lines running to and from the intake manifold, the intercooler boots, the brake booster line, and the green supercharger intake gasket. A hissing sound near the bypass valve is a strong indicator of a leak. An OBD-II scanner showing low vacuum at idle also points to a leak.
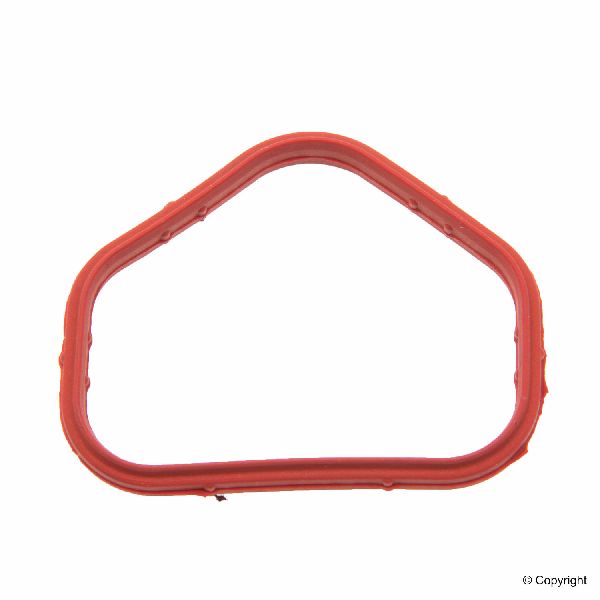
Typical fix: Replace the cracked hose, boot, or gasket. Common leak points include the green supercharger intake gasket, the intercooler boots, and the small black vacuum lines connected to the manifold and bypass valve.
Est. part cost: $10-$50 - Failed T-MAP Sensor (Post-Supercharger) 🔴 High Probability → Shop Manifold Absolute Pressure Sensor This sensor is located on the front of the intake manifold and is exposed to constant heat and pressure changes, which can cause it to fail electronically. The plastic housing can also become brittle, causing the electrical connector to fit loosely or the sensor itself to crack. Running the engine for an extended period with a vacuum leak can also burn out the sensor.
How to confirm: After ruling out vacuum leaks, inspect the sensor's connector for a secure fit and check for damage. With a multimeter, verify the sensor is receiving a 5-volt reference and has a good ground. Using a scan tool, monitor the sensor's voltage; if it's stuck at 0 or a very low value (<0.5V) with the engine running, the sensor has likely failed. A user on North American Motoring confirmed a fix by finding the signal wire on the TMAP had no voltage despite the supply side having 5v.
Typical fix: Replace the T-MAP sensor. It is held in by a single bolt and is accessible after removing the intercooler.
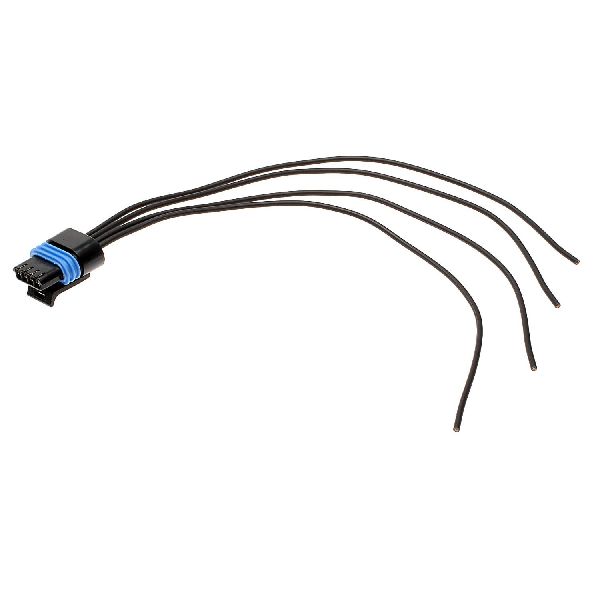
Est. part cost: $70-$150 - Damaged T-MAP Sensor Wiring or Connector 🟡 Medium Probability → Shop Manifold Absolute Pressure Sensor The connector's locking tab is known to break from heat and age, leading to a loose connection that can be affected by engine vibration. Wires in the engine harness can also become frayed or damaged, especially during other engine work like an engine swap.
How to confirm: Visually inspect the wiring harness leading to the T-MAP sensor. Wiggle the connector while the engine is idling to see if it causes the engine to stumble or the code to appear/disappear. A user on North American Motoring noted their plug came off "suspiciously easily" due to a crumbled plastic shroud, and re-securing it temporarily fixed the issue. Check for continuity between the sensor connector and the ECU plug if a wiring break is suspected.
Typical fix: Repair the damaged section of wire or replace the connector pigtail. The OEM part number for the socket housing is 12527511298. If the clip is broken, securing the connector with a zip tie can be a temporary fix.
Est. part cost: $15-$40
Rare But Worth Checking
- Failed Pre-Supercharger MAP Sensor: → Shop Turbocharger While P0107 usually points to the post-supercharger T-MAP sensor, a fault in the pre-supercharger MAP sensor (located near the thermostat) can sometimes cause confusing diagnostic data or contribute to the code. If the T-MAP sensor and its circuit are confirmed good, this sensor is the next logical item to inspect.
- Faulty Engine Control Unit (ECU/DME): This is extremely rare. The ECU should only be considered a potential cause after all other possibilities—sensors, wiring, and vacuum leaks—have been exhaustively tested and ruled out. One user on a forum suspected a faulty BCM/ECU due to water ingress, but this was not confirmed as the final cause.
Diagnosis Steps
- Read all stored fault codes with an OBD-II scanner. Note if P1688, P1109, or P1498 are present.
- Perform a visual inspection of the engine bay. Look for obviously disconnected hoses, cracked intake components (especially intercooler boots), or damaged wiring.
- Conduct a smoke test of the entire intake system. This is the most effective way to find the vacuum leaks common to this engine. Check around the bypass valve, fuel pressure regulator line, and intake gaskets.
- Inspect the T-MAP sensor on the front of the intake manifold. Check that its electrical connector is securely fastened and that the locking tab isn't broken. A loose connector is a very common cause.
- With the key on and engine off, use a multimeter to check for a 5-volt reference and a good ground at the T-MAP sensor connector.
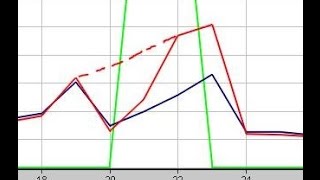
- Using a scan tool's live data function, monitor the T-MAP sensor voltage. At idle, voltage should be low (high vacuum). As you open the throttle, voltage should increase. If the voltage is stuck near zero or does not respond correctly, the sensor or its signal wire is faulty. Note: One user reported incorrect readings where voltage *dropped* with throttle, indicating a fault.
- If no vacuum leaks are found and the wiring is confirmed to be good, replace the T-MAP sensor.
- After repair, clear the codes and perform a test drive to ensure the issue is resolved.
Parts You'll Likely Need
- T-MAP Sensor (Post-Supercharger)
(OEM #12140872679)— This is the sensor that most frequently fails or provides the incorrect reading that triggers code P0107 on the R53.
Trusted brands: Bosch, Genuine MINI
OEM price range: $120-$180
Aftermarket price range: $70-$110 - Intake Manifold Vacuum Hose Kit — The small rubber/plastic vacuum lines become brittle and are a very common source of leaks that cause this code. The line to the fuel pressure regulator is a known failure point. Replacing them as a set is often good preventative maintenance.
Trusted brands: Genuine MINI, Rein
OEM price range: $30-$50
Aftermarket price range: $15-$30 - T-MAP Sensor Connector Pigtail
(OEM #12527511298 (Socket Housing))— The connector itself often fails, with the locking tab breaking off, causing a poor connection. Replacing the pigtail ensures a secure connection.
Trusted brands: Genuine MINI, Aftermarket Pigtail Kits
OEM price range: $25-$40
Aftermarket price range: $15-$30
Related Codes That Often Appear With This One
- P1688 — This code relates to a discrepancy between calculated and measured airflow (boost). A faulty MAP sensor or a significant vacuum leak directly causes the ECU to miscalculate airflow, often triggering P1688 alongside P0107.
- P1109 — This code for "Manifold air pressure too high in deceleration" can appear alongside P0107, indicating erratic readings from the MAP/TMAP system.
- P1498 — This code indicates an unmetered air leak between the supercharger and the throttle body. It is often caused by cracked intercooler boots or a bad supercharger intake gasket, which are vacuum leaks that can also trigger P0107.
Platform-Specific Known Issues
- source — A user on North American Motoring experienced the P0107 and P1688 code combination along with limp mode. After initially suspecting the crank pulley, they discovered the plastic shroud on the T-MAP sensor connector had crumbled, causing a loose fit. Pushing the connector back on firmly and ensuring a good connection resolved the codes and limp mode, highlighting the importance of checking the physical connection before replacing parts.
- source — A YouTube video by 'warrender' documented a repair on an R53 with P0107 and P1688. The root cause was a disconnected vacuum line under the supercharger bypass valve that had been pulled off during a previous airbox removal. Running the car with this leak for an extended period had burned out both the T-MAP and the pre-supercharger MAP sensor. The fix required replacing both sensors and reconnecting the vacuum line.
Mechanic-Grade Diagnostic Values
- T-MAP Sensor Supply Voltage — expected: ~5.0 Volts. Failure: Voltage significantly lower than 5.0V indicates a wiring or ECU issue.
- T-MAP Sensor Signal Voltage (Key On, Engine Off) — expected: ~4.0 - 5.0 Volts. Failure: Voltage near 0V or significantly below 4.0V suggests a faulty sensor or signal wire issue.
- T-MAP Sensor Signal Voltage (Engine at Idle) — expected: ~1.0 - 2.0 Volts. Failure: Voltage stuck at 0V, 5V, or not responding to throttle changes indicates a failed sensor or circuit. One user reported a faulty sensor that showed dropping voltage with throttle application, which is incorrect behavior.
- T-MAP Sensor Ground Circuit — expected: Continuity to chassis ground (audible beep on multimeter).. Failure: No continuity indicates a broken ground wire, which will cause incorrect sensor readings.
Scan Tool Commands That Help
- ISTA/INPA: Read Fault Memory & Test Plan — To read manufacturer-specific fault descriptions and follow guided diagnostic steps. ISTA+ is noted by users to be more user-friendly than INPA for diagnostics.
- ISTA: Clear Adaptations — After replacing a sensor or fixing a major vacuum leak, clearing engine adaptations can help the ECU relearn baseline values more quickly. One user noted trying this, though it did not solve their specific issue of an incompatible sensor.
- PCLink (for Link ECU): MAP Sensor Calibration — For vehicles with aftermarket ECUs like a Link, this function is used to calibrate the MAP sensor against the onboard barometric sensor to ensure accurate readings at key-on, engine-off.
Wiring & Ground Locations
- T-MAP Sensor Connector — On the front of the intake manifold, below the intercooler. It is a 4-pin connector.. This is the primary connector for the sensor that triggers P0107. The plastic locking tab is prone to breaking, causing a loose connection.
- DME Connector X60004 — The main engine control unit (DME/ECU) located in the engine bay plenum box.. The T-MAP sensor wires terminate here. A pinout guide shows pins for the 'Intake Vacuum Sensor', which allows for continuity testing of the harness from the sensor to the ECU.
- Main Engine Bay Ground Point — A ground stud on the passenger side firewall or fender well.. A poor engine or sensor ground can cause floating voltage levels and erratic sensor readings, potentially triggering a low voltage code. Ensuring the main grounds are clean and tight is a critical step.
- Bulkhead Cross Member Ground — On the bulkhead cross member, under the triangular stiffener plate below the master cylinders (on a RHD car). A large Phillips screw earths much of the front loom.. This is a major grounding point for the front wiring harness. Corrosion or a loose connection here can affect multiple sensor circuits, including the T-MAP.
Real Owner Repair Stories
- YouTube channel 'Warrior' (Modified R53 Mini Cooper S (17% pulley, injectors, decat, intercooler)) — Not running right, cutting out at idle, lumpy running, ABS and EML lights on, going into limp mode.
❌ Tried (didn't work) Initial diagnosis pointed to a vacuum leak.
✅ What actually fixed it Found multiple issues: 1) A vacuum line to the supercharger bypass valve was disconnected. 2) A throttle body bolt was loose, creating another vacuum leak. 3) Because the car ran with leaks for a while, both the pre-supercharger MAP and post-supercharger T-MAP sensors had burned out and required replacement. Replacing the sensors and fixing the leaks resolved all issues. - North American Motoring user 'mslatter' (2006 R53 JCW) — Engine bucks, then dies, and throws TMAP codes when a new sensor is installed. The old, crumbling sensor works fine.
❌ Tried (didn't work) Replacing the crumbling T-MAP sensor with a new OEM one from a vendor., Replacing that with a second new OEM one under warranty., Clearing adaptations with ISTA., Trying an NGK sensor from Rock Auto.
✅ What actually fixed it The user discovered that even though the part numbers were supposedly correct, the new sensors were physically different from the original and were the wrong part for the R53 (possibly for N20/N55 BMW engines). The final fix was to source the correct factory MINI sensor, which then worked properly. This highlights issues with part compatibility even when cross-references seem correct. - North American Motoring user (R53 Mini Cooper S) — P0107 code, hesitation at higher RPM.
❌ Tried (didn't work) Replacing the MAP sensor with a new OEM part., Taking it to a mechanic who couldn't diagnose it and incorrectly suggested walnut blasting.
✅ What actually fixed it The user was advised to differentiate between the MAP sensor (by the thermostat) and the T-MAP sensor (on the front of the intake manifold), as P0107 almost always points to the T-MAP. The final resolution was not posted, but the critical advice was to diagnose the correct sensor and use BMW's ISTA+ software for accurate troubleshooting.
"I Checked Everything" — The Actual Cause
- In a case where a user replaced a sensor and still had a '0V' signal reading, the issue was not a vacuum leak but a wiring problem. Even after replacing the T-MAP sensor, the signal wire remained at 0 volts, pointing to a break in the wire between the sensor and the ECU, or a faulty ECU driver, rather than a leak.
OEM Part Supersession History
12140872679→12140872679 (current)— The part number itself has remained stable, but the physical appearance and manufacturer may have changed over the years.
Heads up: Extreme caution is advised. Owners have reported receiving physically different, incompatible sensors under the correct part number, possibly intended for newer BMW engines (N20/N55). It is highly recommended to use Genuine MINI or a trusted OEM brand like Bosch and verify it matches the original sensor's appearance.
Model Year Variations Within This Range
- 2002 - July 2004 (Pre-Facelift): These models have a different ECU tune and a supercharger without Teflon-coated rotors compared to later models. While the T-MAP sensor part number is the same, the ECU's sensitivity or software logic could differ slightly.
- July 2004 - 2006 (Facelift): Facelift models feature a revised ECU, an updated supercharger with Teflon-coated rotors, and different gear ratios, resulting in a 7hp increase. These changes, particularly the ECU revision, could potentially alter how the system diagnoses and responds to sensor faults, although the P0107 code remains consistent across the entire generation.
Diagnostic Flowchart
Other Known Issues on This Vehicle
Issues unrelated to this code that are worth knowing about as an owner of this generation:
- Electro-Hydraulic Power Steering Pump Failure 🔴 High — Extremely common. The pump's cooling fan often fails first, causing the pump to overheat and lose function, resulting in a sudden loss of power assist. Can occur at any mileage. (Ref: NHTSA Recall 15V-660. MINI issued a recall in 2015 for 2002-2005 models and also extended the warranty to 13 years/150,000 miles.)
- Strut Tower Mushrooming 🟠 Medium — Very common, especially on vehicles with run-flat tires or aftermarket suspension. The sheet metal of the front strut towers deforms upward from impacts like potholes, affecting alignment and handling. (Ref: No recall, but a well-known issue. The common fix is to install aftermarket strut tower reinforcement plates.)
- Coolant Expansion Tank Leak 🔴 High — Extremely common. The plastic tank is prone to developing leaks along its seam due to heat and pressure cycles, leading to coolant loss and potential engine overheating. (Ref: No recall, but it is one of the most frequently replaced parts on the platform. Aftermarket aluminum tanks are a popular permanent solution.)
- Worn Lower Control Arm Bushings 🟠 Medium — Common wear item, often needing replacement by 60,000-80,000 miles. The fluid-filled bushings fail, causing vague steering, clunking noises, and uneven tire wear.
- Water Pump & Thermostat Housing Leaks 🟠 Medium — Common failure points around 60,000-100,000 miles. The water pump is driven by the supercharger and can leak from its weep hole. The plastic thermostat housing is also prone to cracking.
Used vs. New Parts: Buying Guide for This Vehicle
When a used part is the smart pick: Used parts are a reasonable choice for direct-replacement wiring connectors (pigtails) or undamaged vacuum hoses sourced from a low-mileage donor car. Structural components like brackets or fasteners are also perfectly fine to source used.
Donor-vehicle mileage cap: roughly under 80000 miles for the part to have meaningful remaining life.
What to inspect on the donor part:
- For wiring: Check for brittle plastic, broken locking tabs, or any signs of corrosion on the pins.
- For hoses: Squeeze the hose to ensure it is still pliable and not hard or cracked.
- For sensors: Visually inspect the plastic housing for cracks or crumbling, which is a common failure mode. However, buying used electronic sensors is generally risky as there is no way to know their remaining lifespan.
OEM-only on this vehicle (don't cheap out):
- T-MAP Sensor: Due to multiple documented cases of incorrect or incompatible aftermarket/cross-referenced parts causing immediate running issues, it is strongly recommended to use a Genuine MINI or OEM Bosch sensor from a reputable MINI specialist vendor.
Aftermarket brands forum-validated for this vehicle:
- Bosch (for the T-MAP sensor, as they are often the original equipment manufacturer)
Brands owners have reported issues with on this vehicle:
- Unbranded or generic sensors from online marketplaces. One owner reported an NGK-branded sensor, listed for a 2003 model, did not work on their 2006, suggesting potential incompatibility even with known brands if the specific application is wrong.
Real Owner Stories
Aggregated from forums and TSBs cited above. Mileages and costs reflect what owners reported in those sources.
2002-2006 Mini Cooper S (R53) W11
Symptoms: P0107 and P1688 codes, DSC light on, and the car entered limp mode. The owner initially suspected a bad crank pulley (damper).
What fixed it: Found the plastic shroud on the T-MAP sensor connector had crumbled. Firmly re-seating the connector resolved the codes and limp mode.
Source hint: North American Motoring thread: 'p1688-p0107-dsc-light-on-limp-mode-already-replaced-damper'
2002-2006 Mini Cooper S (R53) W11
Symptoms: P0107 and P1688 codes present. The issue started after an airbox removal.
What fixed it: Reconnected a vacuum line under the supercharger bypass valve that had been pulled off and replaced both the T-MAP and pre-supercharger MAP sensors which had burned out.
Source hint: YouTube video by 'warrender'
2002-2006 Mini Cooper S (R53) W11
Symptoms: P0107 code; the T-MAP sensor plug came off 'suspiciously easily' when inspected.
What fixed it: Re-secured the connector; the owner noted that the plastic shroud had crumbled and suggested a zip tie as a temporary fix if the clip is broken.
Source hint: North American Motoring forum citation
2002-2006 Mini Cooper S (R53) W11
Symptoms: P0107 code appearing after an engine rebuild.
What fixed it: Advised to perform a smoke test and check all vacuum connections, specifically around the intake ducting near the drive belt.
Source hint: Motoring Alliance forum citation
Related OBD-II Codes
Frequently Asked Questions
Why is my Mini Cooper S showing both P0107 and P1688 codes at the same time?
Can a simple airbox removal cause a P0107 code on my W11 engine?
My T-MAP sensor connector feels loose; is there a specific part number for the repair?
Is there a recall for the P0107 code or the T-MAP sensor on the 2002-2006 Mini Cooper?
Where exactly is the sensor located that triggers P0107 on my supercharged Mini?
Could a 'yo-yo' surging sensation while coasting be related to P0107?
Helpful Videos

Used OEM Parts in Stock
New Aftermarket Parts Available


The information in this article is provided for general reference and educational purposes only. Vehicle specifications, procedures, and part compatibility can vary by production date, trim level, and region. Always consult your vehicle's factory service manual and verify part numbers before purchasing or performing repairs. Safety-critical components such as airbags, seat belts, and braking systems should be installed by a qualified professional.
- Mini Cooper:
- 🧭 Diagnostic Flowchart
- 🎬 Helpful Videos
- 🛍️ Shop This Part
- What's Unique About the 2002-2006 Mini Cooper
- Symptoms You May Notice
- Most Likely Causes
- Rare But Worth Checking
- Diagnosis Steps
- Parts You'll Likely Need
- Related Codes That Often Appear With This One
- Platform-Specific Known Issues
- Mechanic-Grade Diagnostic Values
- Scan Tool Commands That Help
- Wiring & Ground Locations
- Real Owner Repair Stories
- "I Checked Everything" — The Actual Cause
- OEM Part Supersession History
- Model Year Variations Within This Range
- Other Known Issues on This Vehicle
- Used vs. New Parts: Buying Guide for This Vehicle
- Real Owner Stories
- 2002-2006 Mini Cooper S (R53) W11
- 2002-2006 Mini Cooper S (R53) W11
- 2002-2006 Mini Cooper S (R53) W11
- 2002-2006 Mini Cooper S (R53) W11
- Related OBD-II Codes
- Frequently Asked Questions
- 🎟️ Get 5% Off