
P0131 on 2012-2017 Kia Rio 1.6L: Causes and Fixes for O2 Sensor Low Voltage
This code almost always points to a failed upstream oxygen sensor (Bank 1, Sensor 1). The PCM logs this code when the sensor's voltage stays below a specified threshold (e.g., <0.4V) for an extended period. Replacing this sensor is the most common fix. Expect to pay $40-$80 for an aftermarket part or $100-$150 for an OEM sensor. It's a DIY-friendly job with the right 22mm (7/8") O2 sensor socket.
- P0131 on a 2012-2017 Kia Rio almost always means the upstream oxygen sensor (the one on the exhaust manifold) has failed.
- Before buying parts, check the sensor's wiring and connector for obvious damage and verify the O2 sensor fuse (often labeled 'SENSOR 1' in the engine bay fuse box) isn't blown.
- Use an OBD-II scanner to watch the live voltage data for Bank 1 Sensor 1; if it's stuck low (<0.2V) and unresponsive, you've confirmed the issue.
- This is a very manageable DIY repair. The sensor is easy to access in the engine bay, but you will likely need a special 22mm (7/8") O2 sensor socket to remove and install it without damaging the wire.
What's Unique About the 2012-2017 Kia Rio
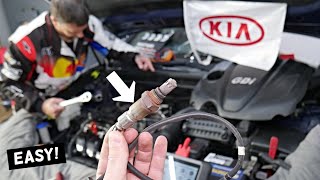
On the 1.6L Gamma GDI engine in the third-generation (2012-2017) Kia Rio, this code is straightforward. There is only one exhaust bank, so 'Bank 1' is the only one. 'Sensor 1' is the upstream O2 sensor, which is conveniently located at the front of the engine bay on the exhaust manifold, making it more accessible than on many other vehicles. 🎬 See exactly where the Bank 1 Sensor 1 is located. The issue is almost always the sensor itself failing from age and heat cycles. Due to the direct-injection nature of the engine, carbon buildup can sometimes contribute to sensor contamination.
Symptoms You May Notice
- Check Engine Light illuminated
- Decreased fuel economy
- Rough or erratic engine idle
- Engine hesitation or misfiring
- Strong smell from exhaust
- Black smoke from exhaust
- Replacing the downstream (Sensor 2) oxygen sensor. P0131 specifically refers to Sensor 1, the upstream sensor before the catalytic converter.
- Replacing the catalytic converter. A bad converter does not cause a P0131 code, though ignoring a P0131 code can eventually damage the converter.
Most Likely Causes
- Failed Upstream Oxygen Sensor (Bank 1, Sensor 1) 🔴 High Probability → Shop Oxygen Sensor Oxygen sensors are wear-and-tear items that degrade over time, typically having a lifespan of 70,000-100,000 miles. Contamination from oil, carbon, and constant heat cycles eventually causes them to fail and lose their ability to generate voltage.
How to confirm: Monitor the Bank 1 Sensor 1 voltage with an OBD-II scanner. A healthy sensor's voltage should fluctuate rapidly between ~0.1V and ~0.9V. If the voltage is stuck low (e.g., <0.2V) and does not respond to changes in engine RPM, the sensor is bad. 🎬 Watch this guide to diagnosing and fixing a P0131 code.
Typical fix: Replace the upstream oxygen sensor. A special 22mm (7/8") slotted socket is highly recommended for removal, along with penetrating oil as the sensor can be seized in the manifold.
Est. part cost: $40-$150 - Damaged Wiring or Connector 🟡 Medium Probability The wiring harness to the sensor is exposed to high heat in the engine bay, which can make it brittle over time. The connector can also suffer from corrosion or physical damage.
How to confirm: Visually inspect the entire length of the sensor's wiring harness from the sensor to the main engine harness. Check the connector for any signs of melting, chafing, breaks, or corrosion in the pins. Check for a secure connection.
Typical fix: Repair the damaged section of wire or clean/replace the connector. Ensure the repair is sealed from moisture.
Est. part cost: $5-$50 - Exhaust Leak ⚪ Low Probability Gaskets on the exhaust manifold can fail over time, or the manifold itself can develop hairline cracks. This is not exceptionally common but does occur.
How to confirm: Listen for ticking or hissing sounds from the exhaust manifold area, especially when the engine is cold. A mechanic can perform a smoke test to pinpoint the exact location of a leak before the O2 sensor. Soot marks around the manifold flange are also a key indicator.
Typical fix: Replace the leaking exhaust manifold gasket or repair/replace the cracked manifold/pipe.
Est. part cost: $20-$200
Rare But Worth Checking
- Low Fuel Pressure: If the engine is truly running lean, it could be due to a weak fuel pump or clogged injectors. This would likely be accompanied by other codes like P0171 (System Too Lean) and noticeable performance issues like hesitation under load.
- Blown O2 Sensor Heater Circuit Fuse: → Shop Oxygen Sensor The oxygen sensor has a heater to get it to operating temperature quickly. A blown fuse for this circuit can cause incorrect readings. In the 2012-2017 Rio, this is often a 10A or 15A fuse in the engine compartment fuse box, sometimes labeled 'SENSOR 1' or sharing a circuit with other engine components.
- Faulty Powertrain Control Module (PCM): In very rare cases, the PCM itself can be faulty, failing to correctly interpret the sensor's signal. This should only be considered after all other possibilities (sensor, wiring, leaks) have been exhaustively ruled out.
Diagnosis Steps
- Connect an OBD-II scanner and confirm P0131 is the active code. Note any other codes present, especially P0171 or P0030/P0031.
- Using the scanner's live data function, monitor the 'O2S B1S1' (Bank 1, Sensor 1) voltage. At idle on a warm engine, it should switch rapidly between approximately 0.1 and 0.9 volts. If it is stuck below 0.2 volts and does not respond when you rev the engine, proceed.
- Perform a thorough visual inspection of the oxygen sensor's wiring harness and connector for any obvious damage, melting, chafing, or corrosion.
- Check the fuse for the O2 sensor heater circuit. In the engine bay fuse box, look for a 10A or 15A fuse labeled 'SENSOR 1' or similar.
- Carefully inspect the exhaust manifold and the pipe leading to the sensor for any signs of cracks or black soot, which would indicate an exhaust leak.
- If the wiring, fuse, and exhaust system appear intact, the upstream oxygen sensor is the most probable cause of the fault.
- Replace the Bank 1, Sensor 1 oxygen sensor. Use a 22mm (7/8") O2 sensor socket. Apply anti-seize compound to the threads of the new sensor if not pre-applied.
- After replacement, clear the codes with the OBD-II scanner and perform a drive cycle to ensure the code does not return.
Parts You'll Likely Need
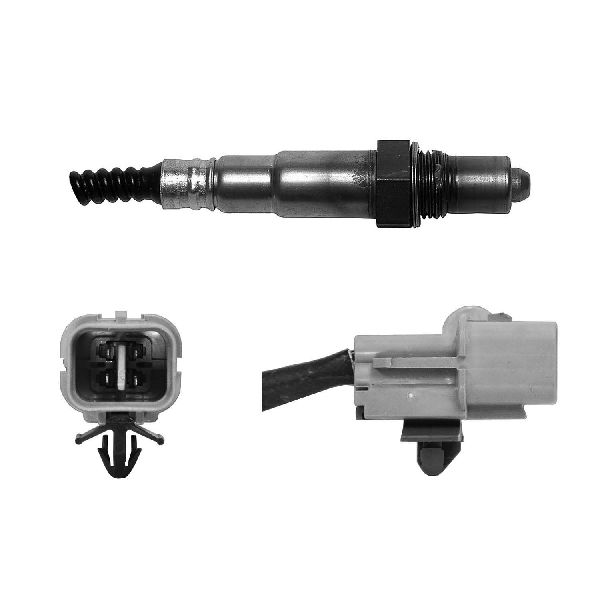
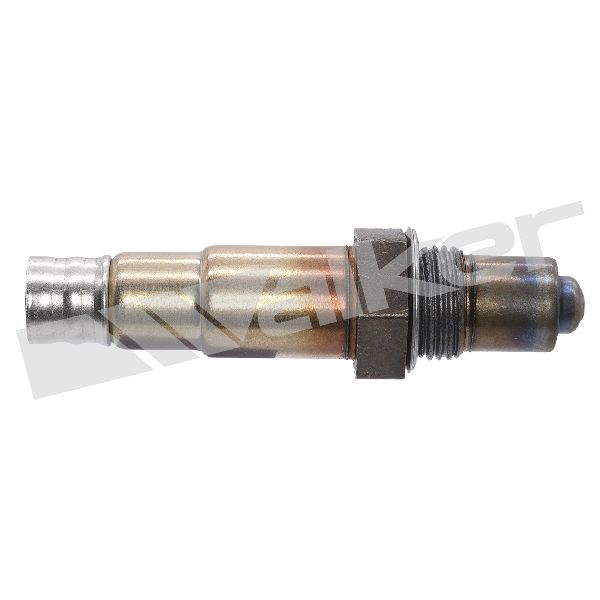
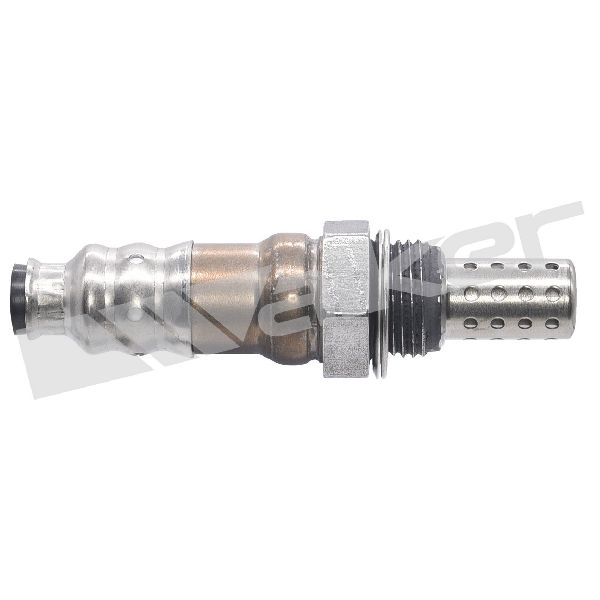
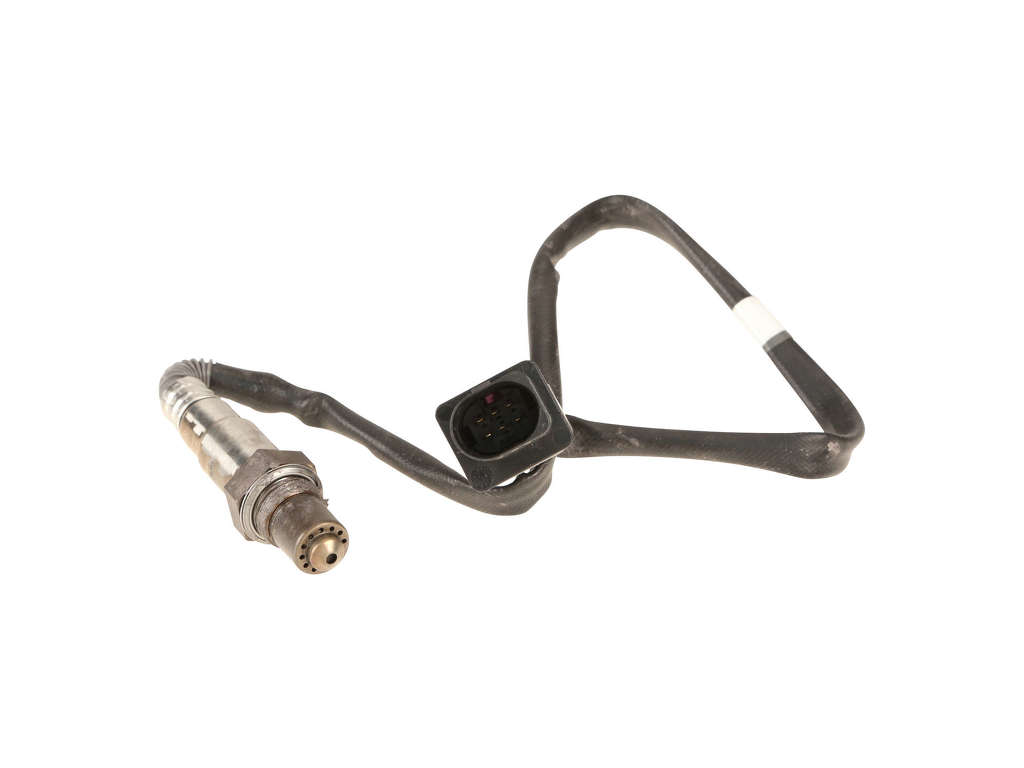
- Upstream Oxygen Sensor (Bank 1, Sensor 1)
(OEM #39210-2B210)— This is the sensor that generates the signal monitored by the P0131 code. It is the most common failure point.
Trusted brands: Kia (OEM), Denso (e.g., 234-5055), NGK/NTK (e.g., 27093), Bosch
OEM price range: $100-$150
Aftermarket price range: $40-$110 - O2 Sensor Socket — A special 22mm (7/8") socket with a cutout for the wire is often required to remove and properly torque the sensor without damaging the cable.
Trusted brands: Lisle, OEMTOOLS, GearWrench
Aftermarket price range: $10-$25
Related Codes That Often Appear With This One
- P0171 — P0171 means 'System Too Lean (Bank 1)'. A faulty O2 sensor reporting low voltage (false lean) or an actual exhaust/vacuum leak causing a lean condition can trigger both codes.
- P0130 — P0130 is a more general 'O2 Sensor Circuit Malfunction' code. It can appear alongside P0131 as the computer tries to diagnose the specific fault with the sensor's signal.
- P0030 / P0031 — These codes relate to the heater circuit within the same O2 sensor. It is very common for the internal heater to fail along with the sensing element, causing both a heater code and a circuit low voltage code to appear together.
Platform-Specific Known Issues
- Owner Repair Experience: A user on a Kia forum with a 2014 Rio reported multiple heater circuit and control solenoid codes (P0030, P0031, P0075, etc.) along with rough idling. The community confirmed that these codes, especially the heater circuit faults, strongly point towards needing to replace both the upstream and downstream O2 sensors.
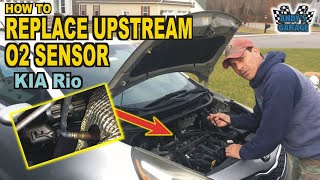
- DIY Replacement Video: A detailed YouTube video from 'Andy's Garage' shows the step-by-step replacement of the upstream O2 sensor on a Kia Rio, confirming its accessible location on top of the exhaust manifold and the need for the special socket. The video also shows how to disconnect the harness clip. 🎬 Watch: Andy’s Garage shows you how to replace the upstream sensor.
Mechanic-Grade Diagnostic Values
- Upstream O2 Sensor Heater Element Resistance — expected: 2.5 to 4.0 Ohms at room temperature. Failure: A reading outside this range, or an open circuit (infinite resistance), indicates a failed heater element within the sensor.
- Short-Term Fuel Trim (STFT) & Long-Term Fuel Trim (LTFT) — expected: Fluctuating near 0% at idle on a healthy, warm engine. Total trim (STFT + LTFT) should ideally be within +/- 10%.. Failure: A P0131 caused by a stuck-low sensor will often trick the PCM into commanding a rich mixture, causing fuel trims to become highly negative (e.g., -15% or more) as the PCM tries to compensate for the false lean signal. Conversely, if the code is from a true vacuum/exhaust leak, trims will be highly positive.
- ECM Voltage at O2 Sensor (Up) Heater Pin — expected: Approximately 720 mV (0.72V) with ignition on, engine off.. Failure: If the specified voltage is not present, it indicates a wiring issue between the ECM and the sensor connector or a faulty ECM driver.
Scan Tool Commands That Help
- Kia GDS (Global Diagnostic System): Actuation Test / Vehicle S/W Management — The OEM dealer tool can perform forced actuation tests on related components like the PCSV and provides guided diagnostic procedures with specific pass/fail values for sensor signals, which is useful for confirming if the sensor is truly bad before replacement.
Wiring & Ground Locations
- ECM Pin 31 (Green wire) — At the main Engine Control Module connector.. This is the pin for the Upstream Oxygen Sensor Heater control. A wiring diagram shows this pin directly controls the heater element, so checking for continuity and voltage here can isolate a wiring fault from a sensor fault.
- ECM Pin 77 & 78 (Black & Brown wires) — At the main Engine Control Module connector.. These are primary ground pins for the ECM and sensor circuits. A poor connection at these grounds can cause erratic sensor readings and low voltage codes.
- Engine Ground Strap (PN: 918611W210) — This is a primary engine-to-chassis ground strap.. A corroded or loose main engine ground can cause a variety of electrical issues, including floating grounds for sensors, which can lead to incorrect low voltage readings. Ensuring this strap is clean and tight is a crucial preliminary step.
- Transmission Ground Strap (PN: 918611W120) — Connects the transmission case to the chassis.. Similar to the main engine ground, this strap provides a ground path for components on the transaxle. While less likely to cause a B1S1 code, it's part of the overall ground system integrity check.
OEM Part Supersession History
39210-2B210→39210-2B220, 39210-2B410— Standard part revision and consolidation.
Heads up: An eBay listing indicates that 39210-2B210 is superseded by 39210-2B220 and interchanges with 39210-2B410 for the 2012-2017 1.6L engine, suggesting they are compatible replacements. However, always confirm with a dealer using your VIN.
Model Year Variations Within This Range
- 2015-2017: The Kia Rio received a mid-cycle facelift for the 2015 model year, which included revised front and rear bumpers, new wheel designs, and interior trim updates like a new center stack and optional touchscreen. However, the 1.6L Gamma engine and its management system remained unchanged, so the causes and fixes for P0131 are identical across the entire 2012-2017 range.
Diagnostic Flowchart
Other Known Issues on This Vehicle
Issues unrelated to this code that are worth knowing about as an owner of this generation:
- Engine Oil Consumption / Failure 🔴 High — More common in earlier 2012-2014 models, can lead to catastrophic failure if oil level is not checked frequently. Often related to carbon buildup on piston rings. (Ref: Related to a class-action lawsuit settlement for engine failures, which resulted in an extended warranty and a Knock Sensor Detection System (KSDS) software update.)
- Intake Valve Carbon Buildup 🟠 Medium — A common characteristic of all GDI engines, including the 1.6L Gamma. Becomes noticeable after 40,000-60,000 miles, causing reduced performance and potential for other issues.
- Starter Motor Failure 🟡 Low — Some owners report premature failure of the starter motor, typically before 100,000 miles.
- No Sound from Speakers 🟡 Low — A widely reported issue where the audio system stops producing sound, often requiring a reset or a head unit replacement.
- AC Compressor Failure 🟠 Medium — The AC compressor or its clutch can fail prematurely, resulting in no cold air.
- Soy-Based Wiring Insulation Attracting Rodents 🟡 Low — The wire coating can attract rodents, which may chew through harnesses and cause various electrical problems. This is not unique to Kia but has been noted by owners.
Used vs. New Parts: Buying Guide for This Vehicle
When a used part is the smart pick: For this specific repair, buying a used oxygen sensor is strongly discouraged. It is a wear-and-tear component with a finite lifespan, and a used part may fail shortly after installation. A used exhaust manifold or wiring connector from a low-mileage donor vehicle could be a cost-effective option if those parts are the cause of the fault.
Donor-vehicle mileage cap: roughly under 50000 miles for the part to have meaningful remaining life.
What to inspect on the donor part:
- For a wiring connector: Check for intact locking tabs, no signs of melting or brittleness, and clean, corrosion-free pins.
- For an exhaust manifold: Inspect carefully for hairline cracks, especially around the flange and O2 sensor bung. Ensure all mounting studs are intact and not stripped.
OEM-only on this vehicle (don't cheap out):
- No parts for this specific code are strictly OEM-only, as high-quality aftermarket sensors are widely available and perform well.
Aftermarket brands forum-validated for this vehicle:
- NTK (often the original equipment manufacturer)
- Denso
- Bosch
Brands owners have reported issues with on this vehicle:
- Avoid unbranded, generic 'white-box' sensors from online marketplaces. While cheap, they are known for high failure rates, incorrect voltage ranges, and short service life, often causing the code to return quickly.
Real Owner Stories
Aggregated from forums and TSBs cited above. Mileages and costs reflect what owners reported in those sources.
2014 KIA Rio LX Sedan 4dr 1.6l 4 cylinder GDI
Symptoms: idles rough, and seems to get progressively worse as it runs. It starts fine, but if you let it sit and idle for too long, or drive it briefly (~5-10 minutes) and get to a stop sign/light and have to sit for a minute, it will just shudder with my foot on the break. Acting like it wants to pull forward.
What fixed it: Replacing both the upstream and downstream O2 sensors (Bank 1 Sensor 1 and Bank 1 Sensor 2).
Source hint: Reddit r/MechanicAdvice and Kia-Forums.com thread 'just-purchased-a-used-2014-kia-rio-that-needs-a-few-things-idling-rough-o2-sensors'
Related OBD-II Codes
Frequently Asked Questions
Where is the upstream oxygen sensor located on the 2012-2017 Kia Rio 1.6L?
What specific tools do I need to replace the O2 sensor on my Rio?
Is there a specific OEM part number I should look for when replacing the sensor?
My 2014 Rio is idling rough and has P0131 along with heater circuit codes. Should I replace both sensors?
Could an exhaust leak cause a P0131 code on my Kia Rio?
Does the Kia Rio engine warranty extension cover O2 sensor failure?
Helpful Videos

We Have This Part in Stock


The information in this article is provided for general reference and educational purposes only. Vehicle specifications, procedures, and part compatibility can vary by production date, trim level, and region. Always consult your vehicle's factory service manual and verify part numbers before purchasing or performing repairs. Safety-critical components such as airbags, seat belts, and braking systems should be installed by a qualified professional.
- Kia Rio:
- 🧭 Diagnostic Flowchart
- 🎬 Helpful Videos
- 🛍️ Shop This Part
- What's Unique About the 2012-2017 Kia Rio
- Symptoms You May Notice
- Most Likely Causes
- Rare But Worth Checking
- Diagnosis Steps
- Parts You'll Likely Need
- Related Codes That Often Appear With This One
- Platform-Specific Known Issues
- Mechanic-Grade Diagnostic Values
- Scan Tool Commands That Help
- Wiring & Ground Locations
- OEM Part Supersession History
- Model Year Variations Within This Range
- Other Known Issues on This Vehicle
- Used vs. New Parts: Buying Guide for This Vehicle
- Real Owner Stories
- 2014 KIA Rio LX Sedan 4dr 1.6l 4 cylinder GDI
- Related OBD-II Codes
- Frequently Asked Questions
- 🎟️ Get 5% Off