
P0134 on 2008-2016 Audi A4 2.0T: Causes and Fixes for O2 Sensor Inactivity
On a 2008-2016 Audi A4 2.0T, code P0134 almost always means the upstream oxygen sensor (Bank 1, Sensor 1) has failed. The most common fix is to replace the sensor itself. Before replacement, check the associated fuse. Expect to pay around $70-$150 for a quality aftermarket part (like Bosch or NTK) and $180-$280 for an OEM part.
- P0134 on your A4 2.0T almost always points to a failed upstream (pre-catalyst) oxygen sensor.
- Before buying a new sensor, always check the fuse for the O2 heater circuit first—it's a quick and cheap potential fix.
- Use a scan tool to watch the live sensor data. A flat, unchanging voltage reading confirms the 'No Activity' fault.
- When replacing the sensor, choose a quality brand like Bosch (OEM), NTK, or Denso for reliability.
- Do not ignore this code. Driving for extended periods can lead to reduced fuel economy and expensive catalytic converter damage.
What's Unique About the 2008-2016 Audi A4
The 2.0T TFSI engine in the B8 generation A4 relies on a sophisticated wideband oxygen sensor (often called an Air/Fuel Ratio sensor) for precise fuel control. While the P0134 code itself is standard, its most common cause on this platform is simply the failure of the sensor's internal heater circuit or the aging of the sensing element itself. Unlike some vehicles where wiring or exhaust leaks are equally probable, on the A4, the sensor is the primary suspect. It's a common wear-and-tear item, and owners often see this code appear as the vehicle approaches 80,000-100,000 miles. Chronic oil consumption issues on this engine can also contaminate the sensor, leading to premature failure.
Generation note: The 2008-2016 model years cover the Audi A4 B8 generation, which includes a facelift around 2013 (often called the B8.5). For the P0134 code, the causes, diagnosis, and repair are consistent across both the pre-facelift (2008-2012) and post-facelift (2013-2016) models with the 2.0T engine.
Symptoms You May Notice
- Check Engine Light is on
- Reduced fuel economy
- Rough or unstable idle
- Engine hesitation or misfires
- Failing an emissions test
- Smell of unburnt gasoline from the exhaust
- Replacing the catalytic converter. The P0134 code is for the sensor *before* the converter and is not related to converter efficiency (which would be a P0420 code).
- Replacing the downstream (post-catalyst) O2 sensor. The code specifically points to Sensor 1, which is the upstream sensor.
Most Likely Causes
- Failed Upstream Oxygen Sensor (Bank 1, Sensor 1) 🔴 High Probability → Shop Oxygen Sensor Oxygen sensors are consumable parts that wear out over time. The internal heater element, which is required to get the sensor to operating temperature quickly, is a frequent point of failure, leading directly to a 'no activity' code. Oil or coolant contamination can also shorten the sensor's life.
How to confirm: Use an OBD-II scanner to monitor live data for 'O2 Sensor Voltage Bank 1 Sensor 1'. A healthy sensor's voltage will fluctuate rapidly. If the voltage is flat, stuck (e.g., around 0.45V), or shows no reading, the sensor is inactive and has failed. Also, inspect the sensor's electrical connector for oil contamination, which can indicate a failed sensor leaking internally.
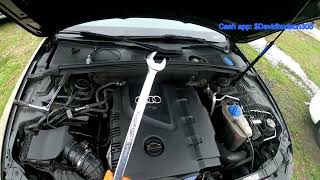
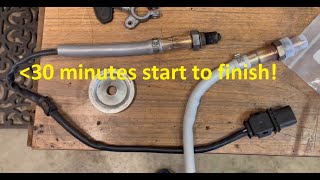
Typical fix: Replace the upstream oxygen sensor. This sensor is located on the exhaust system before the catalytic converter. 🎬 Watch: Locate the upstream and downstream sensors on your A4. An O2 sensor socket (typically 22mm) is required for removal. 🎬 See this easy DIY walkthrough for replacing the upstream sensor.
Est. part cost: $70-$280 - Blown Fuse for O2 Sensor Heater 🟡 Medium Probability → Shop Oxygen Sensor An electrical short in the sensor or its wiring can cause the corresponding fuse to blow. Without power to the heater circuit, the sensor cannot warm up and will not become active, directly causing a P0134.
How to confirm: Check the fuse box in the engine bay and the panel on the driver's side of the dashboard. Consult the owner's manual to identify the fuse for 'emissions', 'engine electronics', or 'oxygen sensor'. Visually inspect the fuse or test for continuity with a multimeter.
Typical fix: Replace the blown fuse. If the new fuse blows immediately, it indicates a short circuit in the wiring or the sensor itself that must be diagnosed and repaired.
Est. part cost: $1-$5 - Damaged Wiring or Connector ⚪ Low Probability The sensor's wiring harness is routed near hot exhaust components. Over time, the protective loom can become brittle, and wires can get chafed, melted, or corroded, leading to an open or short circuit.
How to confirm: Visually inspect the entire wiring harness from the O2 sensor to its connection point on the engine harness. Look for any signs of melting, chafing, or broken wires. Check the connector for corrosion, backed-out pins, or oil contamination.
Typical fix: Repair the damaged section of wiring or replace the connector pigtail. Ensure the repaired harness is properly secured away from heat sources.
Est. part cost: $10-$50
Rare But Worth Checking
- Exhaust Leak: A significant crack or leak in the exhaust manifold or turbocharger gasket before the O2 sensor can allow fresh air to enter the exhaust stream. This can sometimes cause a 'no activity' code, although it more commonly triggers lean or rich condition codes (P0171/P0172).
- Faulty Engine Control Module (ECM): → Shop Engine Control Module (ECM) This is extremely rare. The ECM itself can fail, but this should only be considered after all other possibilities (sensor, wiring, fuses) have been exhaustively ruled out by a professional.
Diagnosis Steps
- Connect an OBD-II scanner and confirm P0134 is the primary code. Note any other codes, especially P0135.
- Check the fuse for the O2 sensor heater circuit in the appropriate fuse box. Replace if blown and re-test.
- Using the scanner's live data function, monitor the voltage for 'Bank 1 Sensor 1'. The reading should fluctuate rapidly on a warm engine. If it is static or unresponsive (e.g., stuck near 0.45V), this confirms the 'no activity' fault.
- Perform a thorough visual inspection of the O2 sensor's wiring harness and connector, looking for any signs of melting, chafing, or corrosion. Unplug the connector and check for oil or moisture inside.
- If the fuse is good, the wiring appears intact, and the sensor voltage is flat, the oxygen sensor itself is the most likely culprit and should be replaced.
Parts You'll Likely Need
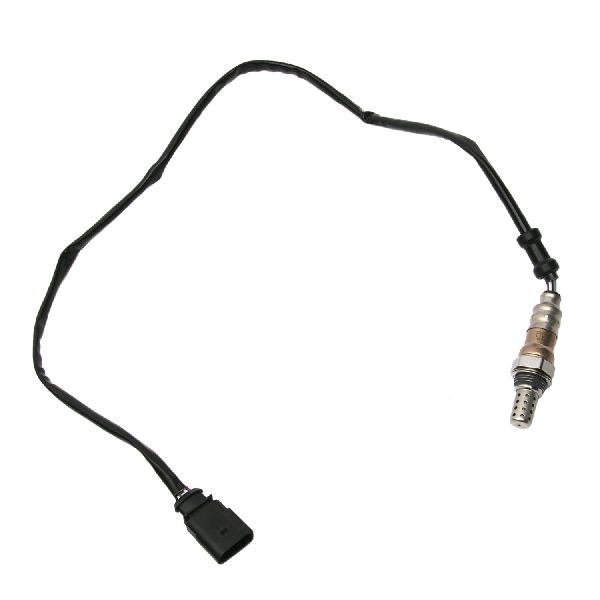
- Upstream Oxygen Sensor (Air/Fuel Ratio Sensor)
(OEM #06J906262AA)— This is the component that has failed in the vast majority of P0134 cases. It is a critical wear item for fuel control and emissions.
Trusted brands: Bosch (OEM Supplier), NTK, Denso
OEM price range: $180-$280
Aftermarket price range: $70-$150
Related Codes That Often Appear With This One
- P0135 — P0135 indicates a fault in the O2 sensor's heater circuit. Since a failed heater is a primary cause of the sensor not showing activity, it's very common to see P0134 and P0135 together, strongly suggesting the sensor itself has failed.
- P2251 — This code for 'O2 Sensor Negative Current Control Circuit/Open' points to an electrical fault within the same sensor. Seeing it with P0134 reinforces that the sensor or its wiring is the problem.
Technical Service Bulletins (TSBs) & Recalls
- TSB 2027731 / 17 15 67 - While this TSB is for addressing excessive oil consumption, the underlying issue of oil burning can lead to premature O2 sensor failure.
Platform-Specific Known Issues
- While not directly causing P0134, the 2.0T TFSI engine is known for potential oil consumption issues which can, over a long period, contaminate and foul O2 sensors, leading to their eventual failure.
Mechanic-Grade Diagnostic Values
- Upstream O2 Sensor Heater Circuit Resistance — expected: 2.5 to 10.0 Ω at approx. 20°C (68°F). Some sources state a broader range of 2-20 Ω.. Failure: A reading of infinite resistance (open circuit) or significantly outside the specified range indicates a failed heater element within the sensor.
- O2 Sensor Heater Circuit Voltage Supply — expected: Battery voltage (approx. 12.5V or higher) at the sensor's harness connector with the ignition on.. Failure: No voltage indicates a problem upstream, such as a blown fuse or a break in the wiring from the ECM.
- Long Term Fuel Trim (VCDS Measuring Block 032) — expected: Close to 0%, ideally within +/- 5%.. Failure: While not a direct test for P0134, a sensor with no activity will prevent the ECU from learning fuel trims, which may be stuck at 0% or a default value, unable to adapt to engine conditions.
Scan Tool Commands That Help
- VCDS (VAG-COM): Basic Settings > IDE00466 - Resetting of oxygen sensor adaptation values — After replacing the upstream O2 sensor (G39), this function should be run to clear the old learned values from the ECU. This ensures the system starts fresh with the new sensor. The procedure is typically done with the key on, engine off.
- VCDS (VAG-COM): Measuring Blocks > Group 031 or 034 — To monitor the live activity of the Bank 1 Sensor 1. In Group 031, you can graph the voltage and lambda values to visually confirm if the sensor is inactive (flat line) or functioning correctly (rapidly fluctuating). Group 034 shows the results of the O2 sensor aging test.
Wiring & Ground Locations
- G12 / G18 — In the engine compartment, on the left side near the ignition coils or on the engine block itself.. The main engine ground connections are critical for all sensors to have a stable reference. A corroded or loose engine ground can cause erratic sensor readings or a complete loss of signal, potentially mimicking a failed sensor.
- Upstream O2 Sensor Connector (G39) — The upstream sensor is a 6-pin connector. The connector itself is typically mounted on a bracket on the engine or firewall, near the top of the engine, for easy access.. This is the primary point for testing. The heater circuit resistance (typically pins 3 & 4) and voltage supply can be checked here. The connector is also a common failure point due to heat and vibration.
- Fuse SB15 (Engine Bay Fuse Box) — In the fuse box located in the engine compartment plenum (under the plastic cowl near the windshield).. According to service manual information, fuse SB15 often supplies power to the O2 sensor heater circuit. A blown fuse here is a common cause for heater-related O2 sensor codes, including P0134.
Real Owner Repair Stories
- AudiWorld Forum User (2013 Audi A4) — P0016 (Crank/Cam correlation) code, plus misfires on cylinders 1 and 3 (P0301, P0303).
❌ Tried (didn't work) Replaced timing chain, tensioner, and guides., Replaced fuel injectors., Performed extensive carbon cleaning., Replaced PCV valve., Replaced Camshaft and Crankshaft position sensors., Verified timing was correct a second time., Checked the camshaft adjuster magnet/solenoid.
✅ What actually fixed it The user's P0016 code, which can be related to sensor inactivity, was caused by a clogged screen in the camshaft bridge. Debris from a failing timing chain tensioner can block this screen, affecting oil pressure to the cam adjuster and disrupting timing, which in turn can lead to codes that seem unrelated. Removing the screen resolved the issue.
OEM Part Supersession History
06F906262AC, 06F906262R→06J906262AA— Part revision and update by the manufacturer for improved reliability or to consolidate part numbers across different models.
Heads up: 06J906262AA is the widely accepted replacement for earlier part numbers on the 2.0T engine for this platform. Using the latest revision is recommended.
Model Year Variations Within This Range
- 2008-2012 (B8.0) vs 2013-2016 (B8.5): The B8.0 models primarily used the 'CAEB' engine code. The B8.5 facelift introduced the 'CPMA' and 'CPMB' (flex-fuel capable) and 'CAED' engine codes. While the function and replacement of the Bank 1 O2 sensor for a P0134 code remain the same, there are minor differences in intake manifolds and fuel systems between these engine generations. However, the upstream O2 sensor part number (06J906262AA) generally remains consistent across these 2.0T variants.
Diagnostic Flowchart
Other Known Issues on This Vehicle
Issues unrelated to this code that are worth knowing about as an owner of this generation:
- Excessive Oil Consumption 🔴 High — Very common, especially in 2009-2012 models. Can start as early as 30,000-50,000 miles. Caused by faulty piston ring design. (Ref: TSB 2027731 / 17 15 67)
- Timing Chain Tensioner Failure 🔴 High — A critical issue primarily affecting pre-2013 models with the original tensioner design. Failure can occur without warning, often between 70,000-120,000 miles, leading to catastrophic engine damage. (Ref: Subject of a class-action lawsuit (TimingChainLitigation.com))
- Water Pump Failure 🟠 Medium — Common across all B8 2.0T models. The plastic housing can crack or the gasket can leak, typically between 60,000 and 100,000 miles.
- PCV Valve / Oil Separator Failure 🟠 Medium — The diaphragm inside the PCV can tear, leading to high oil consumption, rough idle, and other driveability issues. A common failure item.
- Intake Manifold Runner Flap Issues 🟡 Low — The intake manifold runner position sensor can fail or the flaps can get stuck due to carbon buildup, triggering a check engine light (e.g., P2015).
Used vs. New Parts: Buying Guide for This Vehicle
When a used part is the smart pick: For this repair, buying a used oxygen sensor is strongly discouraged. O2 sensors are consumable wear-and-tear items with a finite lifespan. The cost savings are minimal compared to the high risk of receiving a part that is already near the end of its life or completely non-functional.
Donor-vehicle mileage cap: roughly under 20000 miles for the part to have meaningful remaining life.
What to inspect on the donor part:
- If forced to buy used, insist on seeing the mileage of the donor car; anything over 20,000-30,000 miles is a significant gamble.
- Inspect the sensor tip for heavy, black, sooty deposits (rich running) or white, chalky deposits (oil/coolant contamination). A clean, light-gray tip is ideal.
- Check the wiring and connector for any signs of melting, brittleness, or corrosion.
OEM-only on this vehicle (don't cheap out):
- While not strictly 'OEM-only', using the OEM supplier (Bosch) is highly recommended for oxygen sensors on this vehicle. Cheaper, unbranded sensors are notorious for failing prematurely or having incorrect heater resistance, causing the code to return.
Aftermarket brands forum-validated for this vehicle:
- Bosch (OEM supplier)
- NTK
- Denso
Brands owners have reported issues with on this vehicle:
- Generic, unbranded sensors from online marketplaces are frequently cited in forums as being unreliable and a waste of money for this specific application.
Real Owner Stories
Aggregated from forums and TSBs cited above. Mileages and costs reflect what owners reported in those sources.
2010 Audi A4 2.0T TFSI
Symptoms: The P0134 code was intermittent at first before becoming a permanent fault.
What fixed it: Replacement of the upstream oxygen sensor.
Source hint: https://www.audiforums.com/forum/b5-models-69/p0134-144703/
2012 Audi A4 2.0T TFSI — ~40000 miles
Symptoms: Excessive oil consumption leading to premature sensor fouling.
What fixed it: Service related to TSB 2027731 / 17 15 67 for piston ring design issues.
Source hint: TSB 2027731 / 17 15 67
2011 Audi A4 2.0T (B8 platform)
Symptoms: Check engine light with P0134; forum discussions confirmed this is a secondary but common maintenance item compared to timing chains.
What fixed it: Replacement of the upstream O2 sensor with a Bosch OEM unit.
Source hint: reddit.com/r/AudiA4
Related OBD-II Codes
Frequently Asked Questions
Could my Audi's excessive oil consumption be causing the P0134 code?
Which replacement brand is recommended for the upstream oxygen sensor on a B8 A4?
Where is the fuse for the O2 sensor heater located on a 2008-2016 Audi A4?
Is it worth buying a used O2 sensor from a salvage yard to fix this code?
My P0134 code comes and goes; does this mean the sensor is still good?
What tool do I need to remove the Bank 1 Sensor 1 oxygen sensor?
Helpful Videos


We Have This Part in Stock


The information in this article is provided for general reference and educational purposes only. Vehicle specifications, procedures, and part compatibility can vary by production date, trim level, and region. Always consult your vehicle's factory service manual and verify part numbers before purchasing or performing repairs. Safety-critical components such as airbags, seat belts, and braking systems should be installed by a qualified professional.
- Audi A4:
- 🧭 Diagnostic Flowchart
- 🎬 Helpful Videos
- 🛍️ Shop This Part
- What's Unique About the 2008-2016 Audi A4
- Symptoms You May Notice
- Most Likely Causes
- Rare But Worth Checking
- Diagnosis Steps
- Parts You'll Likely Need
- Related Codes That Often Appear With This One
- Technical Service Bulletins (TSBs) & Recalls
- Platform-Specific Known Issues
- Mechanic-Grade Diagnostic Values
- Scan Tool Commands That Help
- Wiring & Ground Locations
- Real Owner Repair Stories
- OEM Part Supersession History
- Model Year Variations Within This Range
- Other Known Issues on This Vehicle
- Used vs. New Parts: Buying Guide for This Vehicle
- Real Owner Stories
- 2010 Audi A4 2.0T TFSI
- 2012 Audi A4 2.0T TFSI — ~40000 miles
- 2011 Audi A4 2.0T (B8 platform)
- Related OBD-II Codes
- Frequently Asked Questions
- 🎟️ Get 5% Off