
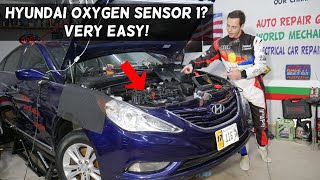
P0134 on 2000-2006 Hyundai Accent: O2 Sensor No Activity Causes and Fixes
This code almost always points to a failed upstream oxygen sensor (Bank 1, Sensor 1). Expect to pay between $30-$70 for an aftermarket sensor and around $100-$150 for an OEM part. It's a straightforward DIY replacement for many home mechanics. Before replacing, check the sensor's fuse and inspect the wiring for melting or damage, as this is also a common failure point.
- P0134 on a 2000-2006 Accent almost always means the upstream oxygen sensor (on the exhaust manifold) has failed.
- Before replacing the sensor, always perform a quick visual check of the wiring and connector for obvious melting or damage, and check the related fuse.
- A scan tool that can read live data is invaluable for confirming a dead sensor by observing a flat voltage reading.
- The issue is highly likely to be the sensor, its wiring, or its fuse; more complex causes like the ECM are extremely rare.
What's Unique About the 2000-2006 Hyundai Accent
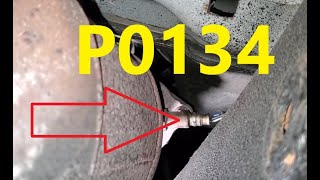
For the 2000-2006 (LC generation) Hyundai Accent, this code is straightforward. Since the 1.5L and 1.6L engines are four-cylinders, there is only one cylinder bank, so 'Bank 1' is the only bank. 'Sensor 1' is the upstream sensor, which is easily accessible on the exhaust manifold. 🎬 Watch: Locate the Bank 1 Sensor 1 on your Hyundai. The issue is typically electrical, either the sensor's internal heating element has failed, the sensor itself has aged out, or the wiring is damaged. The wiring harness is susceptible to heat damage from the exhaust manifold, which can cause melting and short circuits.
Symptoms You May Notice
- Check Engine Light is on
- Decreased fuel economy
- Rough or unstable idle
- Engine hesitation or lack of acceleration
- Failure to pass an emissions test
- Excessive smoke from exhaust
- Replacing the downstream (post-catalytic converter) oxygen sensor. P0134 specifically refers to Sensor 1, which is the upstream sensor.
- Immediately replacing the ECM without thoroughly testing the sensor, wiring, and fuses first.
Most Likely Causes
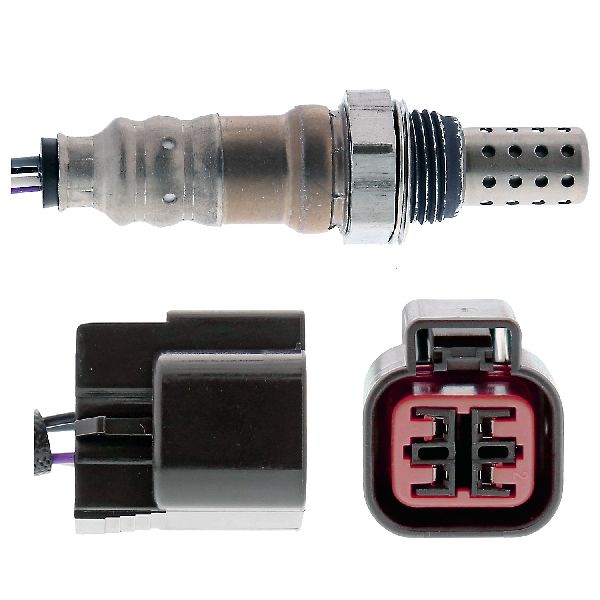
- Failed Upstream Oxygen Sensor (Bank 1, Sensor 1) 🔴 High Probability → Shop Oxygen Sensor Oxygen sensors are wear items and typically fail after 80,000-100,000 miles due to age and constant exposure to extreme exhaust temperatures. The internal heating element, which is required for the sensor to work quickly and efficiently, is a common point of failure. A failed heater will prevent the sensor from reaching its operational temperature, causing the ECM to register 'no activity'.
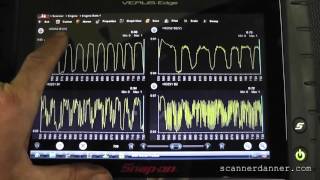
How to confirm: Use a scan tool to monitor the live data for 'HO2S B1S1'. A healthy sensor's voltage should fluctuate rapidly between approximately 0.1V and 0.9V. If the voltage is flat, stuck at a specific number (e.g., 0.45V), or shows no reading, the sensor has likely failed. You can also test the heater circuit's resistance with a multimeter; a typical reading is between 5-15 ohms, while infinite resistance means the heater is burned out.
Typical fix: Replace the upstream oxygen sensor. This sensor is located on the exhaust manifold and can usually be removed with a special 22mm O2 sensor socket or a wrench. 🎬 Watch: A step-by-step guide to replacing your oxygen sensor.
Est. part cost: $30-$150 - Damaged Wiring or Corroded Connector 🟡 Medium Probability The wiring harness leading to the oxygen sensor is routed very close to the hot exhaust manifold. Over time, the protective loom can degrade, allowing wires to melt and short against each other or the engine block. The connector pins can also corrode due to moisture and heat.
How to confirm: Visually inspect the entire length of the wiring from the sensor to the main harness. Check for melted sections, chafing, or breaks. Disconnect the sensor and inspect the connector terminals for corrosion, moisture, or bent pins. Use a multimeter to check for continuity on the signal and heater circuit wires from the ECM connector to the sensor connector.
Typical fix: Repair the damaged section of wire or clean the connector terminals. If the damage is severe or close to the connector, a new pigtail connector may need to be spliced in. If the connector itself is damaged, it should be replaced.
Est. part cost: $5-$30 - Blown Fuse for O2 Sensor Heater Circuit ⚪ Low Probability → Shop Oxygen Sensor The O2 sensor's internal heater draws power through a fused circuit. An electrical short in the heater element or its wiring (a common issue on this vehicle) can cause the fuse to blow.
How to confirm: Locate the fuse box in the engine compartment. Check the owner's manual or the fuse box lid for a fuse labeled 'SENSOR 1' or similar. On many Hyundai models, this is a 10A or 15A fuse. Visually inspect the fuse to see if it has blown.
Typical fix: Replace the blown fuse with a new one of the same amperage. If the new fuse blows immediately, it indicates a persistent short circuit in the heater element of the O2 sensor or its wiring that must be diagnosed and repaired before replacing the fuse again.
Est. part cost: $1-$5
Rare But Worth Checking
- Exhaust Leak Before the Sensor: A crack in the exhaust manifold or a leaking gasket can allow outside air to enter the exhaust stream. This extra oxygen can cause the O2 sensor to read a constant lean condition (low voltage), which the ECU might interpret as 'no activity' because it isn't switching as expected. Check for audible ticking noises from the manifold, especially when the engine is cold.
- Faulty Engine Control Module (ECM): → Shop Engine Control Module (ECM) In very rare cases, the driver circuit for the oxygen sensor within the ECM can fail. This should only be considered after all other possibilities (sensor, wiring, fuses, exhaust leaks) have been definitively ruled out. This is an expensive last resort and is often misdiagnosed.
- Contaminated Sensor: An internal engine leak, such as a coolant leak from a bad head gasket or oil burning past piston rings, can contaminate the oxygen sensor tip. This contamination can 'insulate' the sensor from the exhaust gas, preventing it from reading correctly and leading to a P0134 code. Using non-sensor-safe silicone sealant for other engine repairs can also lead to contamination.
Diagnosis Steps
- Scan for Codes: Connect an OBD-II scanner to confirm P0134 is the only code present. If other codes exist, address them first as they may be related.
- Inspect Wiring and Connector: Perform a thorough visual inspection of the Bank 1 Sensor 1 oxygen sensor's wiring harness and connector. Pay close attention to the area near the exhaust manifold for signs of melting or heat damage.
- Check the Fuse: Locate and inspect the fuse for the O2 sensor heater circuit in the engine bay fuse box. Replace if blown.
- Analyze Live Data: Use a scan tool to view the live data stream for the 'HO2S B1S1' voltage. Warm up the engine to operating temperature. The voltage should be actively switching between ~0.1V and ~0.9V. If the voltage is flat (e.g., stuck at 0.45V) or shows no reading, this points to a faulty sensor or circuit.
- Test the Sensor Heater: With the engine off and sensor disconnected, use a multimeter to test the resistance of the heater circuit within the sensor itself. A good sensor will typically have a resistance between 5-15 Ohms. A reading of infinite resistance (OL) indicates an open circuit and a failed heater.
- Test for Power at the Connector: With the key on and engine off, use a multimeter to verify there is 12V power at the heater circuit pin on the vehicle's harness connector. This confirms the fuse and relay are working.
- Check for Exhaust Leaks: With the engine running, listen for any ticking or hissing sounds from the exhaust manifold that would indicate a leak before the sensor.
- Replace the Sensor: If the wiring, fuse, and connector are good, and the live data shows no activity, the oxygen sensor is the most likely culprit and should be replaced.
Parts You'll Likely Need
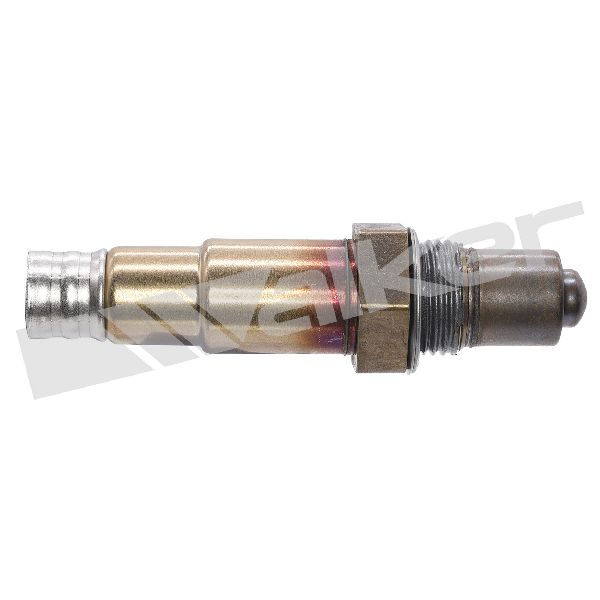
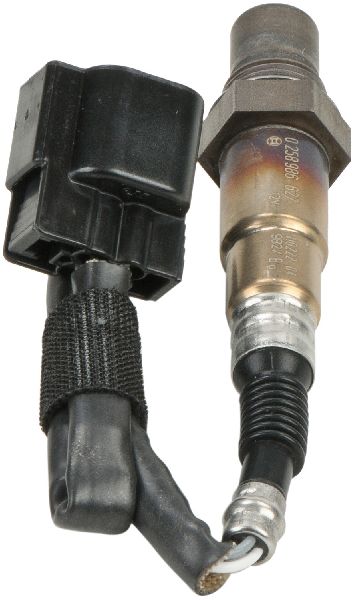
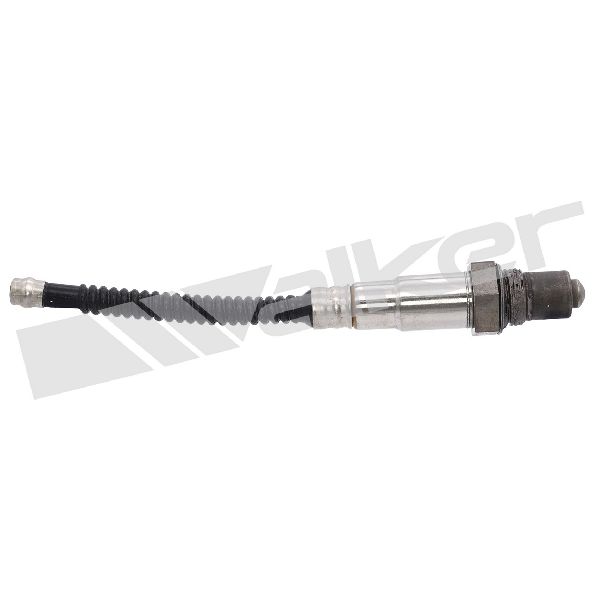
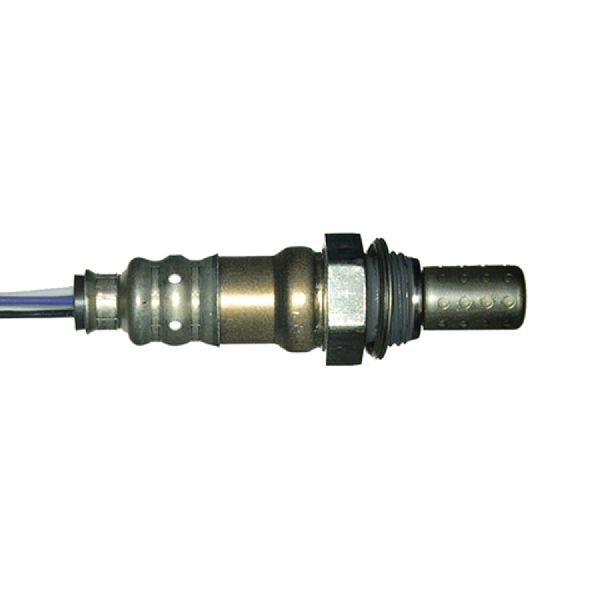
- Upstream Oxygen Sensor
(OEM #39210-22620, 39210-22610, 39210-26620, 39210-26610)— This is the component that directly measures exhaust oxygen content and is identified by the code as having no activity. It is a common wear-and-tear item, and its internal heater is a frequent failure point.
Trusted brands: Bosch, NGK/NTK, Denso, Walker Products
OEM price range: $100-$180
Aftermarket price range: $30-$70
Platform-Specific Known Issues
- Melted Wiring Harness: A recurring theme in owner forums is the discovery of a melted wiring harness for the upstream O2 sensor. Due to its proximity to the exhaust manifold, the protective plastic loom can fail, causing the wires to short out. This can blow the sensor fuse or damage the sensor itself. Always inspect the wiring carefully before replacing the sensor.
Mechanic-Grade Diagnostic Values
- O2 Sensor Heater Circuit Resistance — expected: Approximately 9.0 Ω at 20°C (68°F). Failure: Infinite resistance (Open Loop/OL) or a value significantly outside the 5-15 Ohm general range indicates a failed heater element.
- ECM Power Ground Voltage Drop — expected: Max. 50 mV at idle. Failure: A voltage reading significantly higher than 50mV indicates a poor ground connection for the ECM, which can affect sensor readings.
- Upstream O2 Sensor (B1S1) Live Data Voltage — expected: Rapidly oscillating between ~0.2V and ~0.8V (200mV-800mV) when the engine is in closed loop.. Failure: A flat, unchanging voltage (e.g., stuck at 0.45V) or no voltage reading indicates no activity.
Hidden / Shadow Codes Worth Checking
- Mode $06, TID/CID: Advanced scan tools can access Mode $06 data, which shows results from the PCM's non-continuous self-tests. For O2 sensors, out-of-spec values can indicate a problem before a standard DTC is set. On a 2004 Accent, a failing O2 sensor test was reported under the hexadecimal component ID '$32'. These manufacturer-specific codes require a lookup chart to decipher. (see via An advanced OBD-II scanner with Mode $06 capability. The data is presented as Test IDs (TIDs) and Component IDs (CIDs) or Monitor IDs (MIDs).)
Scan Tool Commands That Help
- Hyundai GDS (Global Diagnostic System): Vehicle Diagnosis & Data Analysis — The GDS is the OEM dealer tool used for comprehensive diagnostics. For P0134, it would be used to view live data streams for HO2S(B1S1), check for related codes in other modules, and access integrated workshop manuals and wiring diagrams specific to the vehicle's VIN. While it has bidirectional capabilities (actuation tests), for P0134 its primary use is for superior data monitoring and information access.
Wiring & Ground Locations
- ECM Connector Pins (Example) — At the Engine Control Module (ECM), typically located in the engine bay or behind the dashboard.. Allows for testing the circuit directly at the control module. Based on a relevant wiring diagram, Pin 7 may be the Heater Control output and Pin 8 the Sensor Signal input. Pins 3 and 4 are often Power Grounds for the ECM. Verifying signal, control, and ground integrity at these pins can definitively rule out wiring issues between the sensor and the ECM. Pin numbers can vary by year and engine, so consulting the correct diagram is critical.
OEM Part Supersession History
39210-22600→39210-22610— Standard part revision and update by the manufacturer.
Model Year Variations Within This Range
- 2000-2006: The engine was updated from the 1.5L DOHC 'Alpha' engine to the 1.6L DOHC 'Alpha II' engine starting in model year 2003. While the P0134 diagnostic principle remains the same and the sensor part number is often cross-compatible, the ECM and wiring harness may have changed. This can result in different pin locations at the ECM connector. A technician must verify the correct wiring diagram for the specific model year and engine to ensure accurate pin-point testing.
Diagnostic Flowchart
Real Owner Stories
Aggregated from forums and TSBs cited above. Mileages and costs reflect what owners reported in those sources.
2000 Hyundai Accent 1.5L SOHC
Symptoms: Check engine light was lit. Live data showed airflow rate was very high (12.2 g/s at idle), and the oxygen sensor was at a bias voltage of around 450 mV, indicating an open circuit. Two previous shops had replaced the mass airflow sensor and the oxygen sensor, but the problem was not fixed.
What fixed it: A signal ground wire was jumped from another sensor to provide a ground for the mass air flow sensor and the oxygen sensor. The proper fix would be to repair the ECM ground or replace the ECM.
Source hint: YouTube comment by 'Auto Repair' on video 'Hyundai Accent 2000 Airflow sensor problem | P0103, P0134, P0112, P0135, faults diagonosis & repair'
2004 Hyundai Accent
Symptoms: Experienced a P0134 code.
What fixed it: Replaced the upstream O2 sensor. The repair was straightforward for a DIY mechanic.
Source hint: Hyundai-Forums thread titled 'P0134 code'
Related OBD-II Codes
Frequently Asked Questions
Why does the wiring harness melt on my 2000-2006 Hyundai Accent causing a P0134?
What fuse should I check for the O2 sensor heater circuit on my Hyundai Accent?
Can I use the same oxygen sensor from a Kia Rio for my Hyundai Accent?
How long do oxygen sensors typically last on this generation of Hyundai Accent?
What should the live data voltage read for a healthy Bank 1 Sensor 1 on my Accent?
Helpful Videos

We Have This Part in Stock


The information in this article is provided for general reference and educational purposes only. Vehicle specifications, procedures, and part compatibility can vary by production date, trim level, and region. Always consult your vehicle's factory service manual and verify part numbers before purchasing or performing repairs. Safety-critical components such as airbags, seat belts, and braking systems should be installed by a qualified professional.
- Hyundai Accent:
- 🧭 Diagnostic Flowchart
- 🎬 Helpful Videos
- 🛍️ Shop This Part
- What's Unique About the 2000-2006 Hyundai Accent
- Symptoms You May Notice
- Most Likely Causes
- Rare But Worth Checking
- Diagnosis Steps
- Parts You'll Likely Need
- Platform-Specific Known Issues
- Mechanic-Grade Diagnostic Values
- Hidden / Shadow Codes Worth Checking
- Scan Tool Commands That Help
- Wiring & Ground Locations
- OEM Part Supersession History
- Model Year Variations Within This Range
- Real Owner Stories
- 2000 Hyundai Accent 1.5L SOHC
- 2004 Hyundai Accent
- Related OBD-II Codes
- Frequently Asked Questions
- 🎟️ Get 5% Off