
P0134 on 2012-2017 Toyota Camry: Causes and Fixes for No O2 Sensor Activity
On a 2012-2017 Toyota Camry, code P0134 almost always means the upstream Air/Fuel Ratio sensor (Bank 1, Sensor 1) has failed. This is a common DIY repair, especially on the 2.5L engine. Expect to pay $100-$180 for a quality Denso replacement part, which is the original equipment manufacturer.
- P0134 on your Camry points directly to the upstream Air/Fuel Ratio sensor on Bank 1.
- The most likely fix is replacing this sensor. Always use a quality brand like Denso to avoid future issues.
- On the 2.5L engine, this is a very accessible, DIY-friendly job. On the 3.5L V6, the sensor is on the firewall side and is much more difficult to access.
- Before buying parts, always check the 'A/F HTR' fuse and visually inspect the sensor's wiring for obvious damage.
- Ignoring this code will hurt your fuel economy and can eventually damage your catalytic converter.
What's Unique About the 2012-2017 Toyota Camry
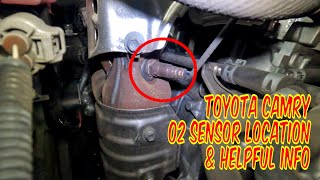
On the Toyota Camry, this code almost always points to a simple failure of the Bank 1 Air/Fuel sensor, particularly its internal heater. The key difference between the two available engines is the location and accessibility of this sensor. On the 2.5L 4-cylinder (2AR-FE), it's conveniently located on the front of the exhaust manifold, making for a quick repair that is very accessible. 🎬 Watch: Locate the Bank 1 sensor on the 2.5L engine On the 3.5L V6 (2GR-FE), Bank 1 is the cylinder bank against the firewall. Accessing this sensor is significantly more difficult, often requiring the removal of the cowl and wiper assembly to reach it from above, which increases labor time and cost significantly.
Symptoms You May Notice
- Check Engine Light is on
- Decreased fuel economy
- Rough or unstable idle
- Engine hesitation during acceleration
- Failure to pass an emissions test
- Black smoke from the exhaust or a smell of rotten eggs
- Replacing the wrong oxygen sensor. P0134 is for Bank 1, Sensor 1 (upstream). Do not replace the downstream sensor (Sensor 2) or, on the V6, the sensor for Bank 2 (front of the engine).
- Replacing the sensor without checking the A/F HTR fuse first. A blown fuse will cause the new sensor to also show no activity.
Most Likely Causes
- Failed Air/Fuel Ratio Sensor (Bank 1, Sensor 1) 🔴 High Probability → Shop Oxygen Sensor The sensor's internal heater element is a common failure point due to age and constant heat cycles. This prevents the sensor from reaching its required operating temperature of over 600°C (1200°F), resulting in no signal activity.
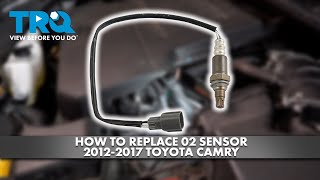
How to confirm: Using a scan tool with live data, observe the voltage for 'B1S1'. If it is flat, unresponsive, or stuck at a specific voltage when the engine is warm, the sensor is bad. You can also test the resistance of the heater circuit pins on the sensor connector (usually the two wires of the same color). A healthy sensor should have a low resistance, typically between 0.8 and 8.0 ohms at room temperature. An open circuit (infinite resistance) confirms failure. 🎬 See how to test and replace an air fuel sensor
Typical fix: Replace the Bank 1, Sensor 1 Air/Fuel Ratio sensor. It is highly recommended to use the OEM brand, Denso, to ensure compatibility and avoid immediate or future issues.
Est. part cost: $100-$180 - Damaged Wiring or Corroded Connector 🟡 Medium Probability The wiring harness is exposed to engine heat and road debris, which can cause wires to become brittle, frayed, or shorted over time. The connector can also accumulate dirt and corrosion, leading to a poor connection.
How to confirm: Visually inspect the entire wiring harness from the sensor to where it joins the main engine harness. Look for melted plastic, frayed wires, or green/white corrosion inside the connector pins. Check for continuity on each wire with a multimeter.
Typical fix: Repair the damaged section of wire or clean the connector terminals with electrical contact cleaner. If the damage is severe, a new connector pigtail may need to be spliced in.
Est. part cost: $5-$30 - Blown A/F Sensor Heater Fuse ⚪ Low Probability
How to confirm: Locate the fuse box in the engine bay, near the battery. Check the diagram on the fuse box lid for the fuse labeled 'A/F HTR' (typically a 15A or 20A fuse). Pull the fuse and visually inspect if the internal filament is broken or test for continuity.
Typical fix: Replace the blown fuse with a new one of the exact same amperage. If the new fuse blows immediately, it indicates a short circuit in the wiring to the sensor that must be found and repaired.
Est. part cost: $1-$5 - Exhaust Leak Upstream of the Sensor ⚪ Low Probability
How to confirm: With the engine running, listen for any ticking or puffing sounds from the exhaust manifold area. You can also look for black soot marks around manifold gaskets or flanges, which indicate a leak. An exhaust leak can introduce extra oxygen, confusing the sensor and potentially leading the ECM to interpret it as 'no activity'.
Typical fix: Replace the leaking exhaust manifold gasket or tighten the loose flange bolts.
Est. part cost: $20-$50
Rare But Worth Checking
- Faulty Engine Control Module (ECM): → Shop Engine Control Module (ECM) This is extremely rare. The ECM should only be considered after all other possibilities, including the sensor, wiring, and fuses, have been thoroughly tested and ruled out.
Diagnosis Steps
- Read the code with an OBD-II scanner to confirm P0134 is present and note any other codes.
- Visually inspect the Bank 1, Sensor 1 A/F sensor and its wiring harness for any obvious signs of damage, such as melting, chafing, or loose connections.
- Check the 'A/F HTR' fuse in the engine bay fuse box.
- Use a scan tool to view live data for the 'B1S1' A/F sensor. With the engine warm, a healthy sensor's voltage should fluctuate rapidly. If the voltage is flat and unchanging (e.g., stuck near 3.3V), the sensor has likely failed.
- If the sensor appears inactive, disconnect it and test the resistance between the two heater pins (usually the two wires of the same color). A reading of 'OL' or infinite resistance on a multimeter means the internal heater is broken. A good heater should read between 0.8 and 8.0 ohms.
- If the sensor's heater circuit tests good, check for 12V power and a good ground at the vehicle's harness connector with the key on, engine off.
- If all wiring and the sensor test good, carefully check for exhaust leaks between the cylinder head and the sensor.
- After repairs, clear the code with the scanner and perform a test drive, including highway speeds, to ensure the Check Engine Light does not return.
Parts You'll Likely Need
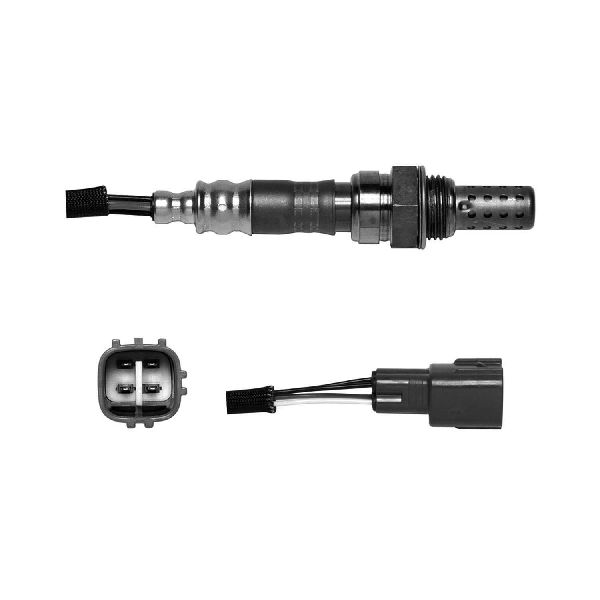
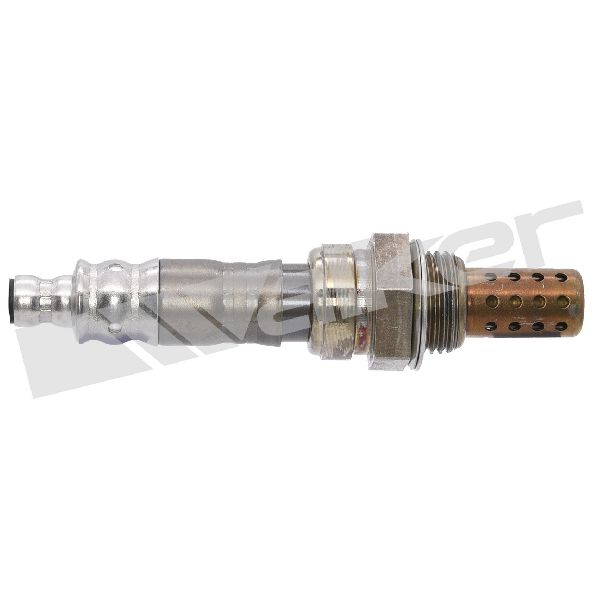
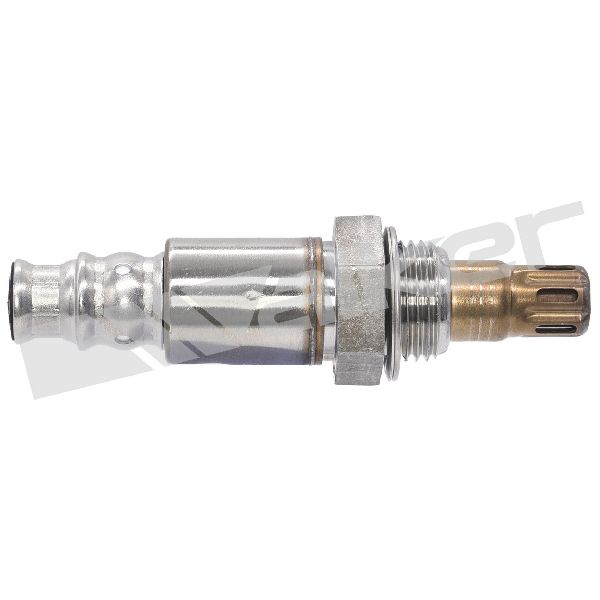
- Air/Fuel Ratio Sensor (Bank 1, Sensor 1) for 2.5L 2AR-FE
(OEM #89467-06160)— This is the upstream sensor that fails most often, triggering the P0134 code. 🎬 Watch this step-by-step guide to replacing your Camry's sensor The 2.5L engine uses this specific part.
Trusted brands: Denso (234-9128), NGK/NTK (24828)
OEM price range: $160-$200
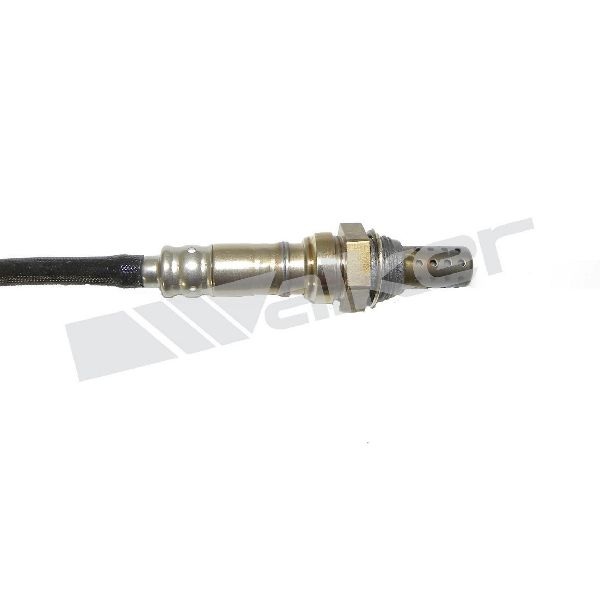
Aftermarket price range: $100-$150 - Air/Fuel Ratio Sensor (Bank 1, Sensor 1) for 3.5L 2GR-FE
(OEM #89467-06140)— This is the upstream sensor for the rear cylinder bank (Bank 1) on the V6 engine. It is different from the 4-cylinder part. For 2015-2017 models, the part number may be 89467-06190.
Trusted brands: Denso (234-9155), NGK/NTK (24851)
OEM price range: $170-$220
Aftermarket price range: $110-$180
Related Codes That Often Appear With This One
- P0135 — P0135 indicates a fault in the 'Heater Circuit' for the same sensor. Since a failed heater is the most common reason for the 'No Activity' of P0134, these two codes frequently appear together.
- P0031 — This code also points to a problem with the heater control circuit for Bank 1, Sensor 1, specifically low current. It often accompanies P0134 and P0135.
Platform-Specific Known Issues
- V6 Rear Sensor Access: Owners on forums frequently comment on the difficulty of replacing the Bank 1 sensor on the 3.5L V6. A common tip is to remove the plastic cowl cover and wiper motor assembly to gain much-needed access from the top of the engine bay, rather than attempting to reach it from underneath the car.
Mechanic-Grade Diagnostic Values
- A/F Sensor Live Data Voltage (at stoichiometric) — expected: Centered around 3.3V on a scan tool like Techstream.. Failure: A flat, unchanging voltage indicates no activity. If the sensor circuit is open, voltage may be stuck at exactly 3.30V. If shorted, it may be stuck at 2.8V or less, or 3.8V or more.
- A/F Sensor Heater Circuit Resistance — expected: 8-12 ohms at 20°C (68°F) is a more specific range for some Toyota sensors, though the 0.8-8.0 ohm range is also commonly cited.. Failure: Infinite resistance (Open Loop) on a multimeter across the two heater pins (typically same-colored wires) confirms a broken heater element.
- A/F Sensor Torque Specification (2GR-FE) — expected: 40 Nm (30 ft-lbs) if using an O2 sensor socket (SST), or 44 Nm (32 ft-lbs) if using a standard wrench.. Failure: Improper torque can lead to exhaust leaks (if too loose) or damaged threads (if too tight).
Hidden / Shadow Codes Worth Checking
- Mode $06, TID $81, CID $11 (or similar): This refers to the non-continuous monitor test results for the Bank 1 Sensor 1 Oxygen Sensor Heater. A technician can view this data to see if the sensor's warm-up time is approaching the maximum allowable limit, even before a P0134 or P0135 code is set. (see via A professional scan tool capable of displaying Mode $06 data. The specific Test ID (TID) and Component ID (CID) can vary by year and ECU calibration, so a service manual is needed for exact translation.)
Scan Tool Commands That Help
- Toyota Techstream: Active Test: 'Control the Injection Volume for A/F Sensor' — This function allows a technician to command the engine to run rich or lean (e.g., +25% or -12.5% fuel). While watching the A/F sensor voltage on the live data graph, a healthy sensor should respond almost immediately (within 1.1 seconds) by showing a voltage change (e.g., below 3.0V for rich, above 3.35V for lean). A lazy or dead sensor will not respond, confirming it is faulty.
Wiring & Ground Locations
- Engine Ground Points (2GR-FE V6) — There are two primary harness grounds on top of the valve covers. One on the front cover and one on the rear, which then connect to the chassis near the strut towers. The Camry harness also has a specific sensor ground bundle that attaches directly to the front valve cover.. A poor ground connection at these points can introduce electrical noise or incorrect reference voltage for the ECU and sensors, including the A/F sensor, potentially causing erratic readings or a no-activity code.
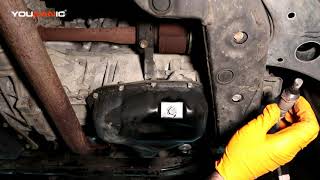
- A/F Sensor Connector (2GR-FE) — The Bank 1 sensor is on the rear exhaust manifold against the firewall. The connector is typically clipped to a bracket in that area. The Bank 2 sensor is on the front manifold.. This is the primary point of inspection for corrosion, bent pins, or wiring damage. The connector for Bank 1 on the V6 is difficult to reach and inspect without removing the cowl.
OEM Part Supersession History
89467-06140→89467-06190 (for some 2015-2017 models)— Part revision or update by the manufacturer.
Heads up: Part listings for the 3.5L V6 show that part number 89467-06140 is specified for models up to September or October 2014. Later models may use a different part. Always confirm fitment with a VIN.
Model Year Variations Within This Range
- 2015-2017: The Camry received a significant mid-cycle refresh for the 2015 model year with almost all-new exterior styling and revised interior. While the 2AR-FE and 2GR-FE engines remained, some part numbers, like the V6 A/F sensor, changed during this period.
Diagnostic Flowchart
Other Known Issues on This Vehicle
Issues unrelated to this code that are worth knowing about as an owner of this generation:
- Torque Converter Shudder 🟠 Medium — Common in 2012-2014 models, typically felt between 25-50 mph under light acceleration. Feels like driving over rumble strips. (Ref: Toyota issued TSB-0158-17 recommending a transmission fluid flush and LSC E03 which included an ECM update and potential torque converter replacement.)
- Excessive Oil Consumption (2AR-FE) 🟠 Medium — Some owners of earlier 2.5L engines report higher than normal oil consumption, potentially due to piston ring design. This is exacerbated by extended 10,000-mile oil change intervals.
- Melting/Sticky Dashboard 🟡 Low — While more prevalent on the prior generation (2007-2011), some owners of early XV50s in high-heat, high-humidity climates reported this. (Ref: Toyota initiated a Warranty Enhancement Program (ZE6) for the 2007-2011 models, but the issue is less documented for 2012+.)
- Timing Cover Oil Leak (2GR-FE) 🟠 Medium — The 3.5L V6 is known to develop a slow oil seep from the timing chain cover at higher mileage (typically over 100,000 miles). It is a costly repair due to the labor involved.
Used vs. New Parts: Buying Guide for This Vehicle
When a used part is the smart pick: For this specific repair, a used part is almost never a good choice for the sensor itself. However, sourcing a used wiring harness connector pigtail from a junkyard is a viable option if the original connector is damaged.
Donor-vehicle mileage cap: roughly under 100000 miles for the part to have meaningful remaining life.
What to inspect on the donor part:
- For a connector pigtail, ensure the plastic is not brittle or cracked.
- Check for any signs of corrosion (green or white powder) on the connector pins.
- Ensure there is at least 4-6 inches of wire attached to the connector for easier splicing.
OEM-only on this vehicle (don't cheap out):
- Air/Fuel Ratio Sensor: The consensus among Toyota technicians and enthusiasts is to use only the OEM Denso sensor. Aftermarket sensors, even from reputable brands like Bosch, have a high rate of incompatibility with Toyota's ECU, leading to persistent codes or poor performance.
Aftermarket brands forum-validated for this vehicle:
- Denso (This is the Original Equipment Manufacturer)
- NTK/NGK (Often considered a reliable alternative to Denso if the exact Denso part is unavailable)
Brands owners have reported issues with on this vehicle:
- Bosch (While a quality brand for European vehicles, forums and mechanics frequently report issues when using their sensors on Toyotas).
- Unbranded or generic 'white-box' parts from online marketplaces.
Real Owner Stories
Aggregated from forums and TSBs cited above. Mileages and costs reflect what owners reported in those sources.
Toyota Camry (Older model referenced for part comparison)
Symptoms: The owner faced a dilemma between choosing a cheaper aftermarket part versus the more expensive dealer part for a heater circuit code.
What fixed it: The community consensus recommended using the Denso-branded OEM part for reliability and compatibility with the Toyota ECU.
Source hint: reddit.com/r/Camry thread titled 'Question about denso vs toyota vs other oem based'
2012-2017 Toyota Camry 3.5L V6
Symptoms: Difficulty accessing the Bank 1 sensor from underneath the vehicle.
What fixed it: Removing the plastic cowl cover and wiper motor assembly to access the sensor from the top of the engine bay.
Source hint: Vehicle_specific_issues: V6 Rear Sensor Access
Related OBD-II Codes
Frequently Asked Questions
I have the 3.5L V6 Camry; why is the Bank 1 Sensor 1 so difficult to reach compared to the 4-cylinder?
Can I use a generic aftermarket sensor to fix P0134 on my 2012-2017 Camry?
Is there a specific fuse I should check for the P0134 code on this vehicle?
My Camry is hesitating and has a rough idle along with P0134; are these related?
What is the correct resistance for a healthy A/F sensor heater on a 2012-2017 Camry?
Does the torque converter shudder TSB-0158-17 have anything to do with my P0134 code?
Helpful Videos

We Have This Part in Stock


The information in this article is provided for general reference and educational purposes only. Vehicle specifications, procedures, and part compatibility can vary by production date, trim level, and region. Always consult your vehicle's factory service manual and verify part numbers before purchasing or performing repairs. Safety-critical components such as airbags, seat belts, and braking systems should be installed by a qualified professional.
- Toyota Camry:
- 🧭 Diagnostic Flowchart
- 🎬 Helpful Videos
- 🛍️ Shop This Part
- What's Unique About the 2012-2017 Toyota Camry
- Symptoms You May Notice
- Most Likely Causes
- Rare But Worth Checking
- Diagnosis Steps
- Parts You'll Likely Need
- Related Codes That Often Appear With This One
- Platform-Specific Known Issues
- Mechanic-Grade Diagnostic Values
- Hidden / Shadow Codes Worth Checking
- Scan Tool Commands That Help
- Wiring & Ground Locations
- OEM Part Supersession History
- Model Year Variations Within This Range
- Other Known Issues on This Vehicle
- Used vs. New Parts: Buying Guide for This Vehicle
- Real Owner Stories
- Toyota Camry (Older model referenced for part comparison)
- 2012-2017 Toyota Camry 3.5L V6
- Related OBD-II Codes
- Frequently Asked Questions
- 🎟️ Get 5% Off