
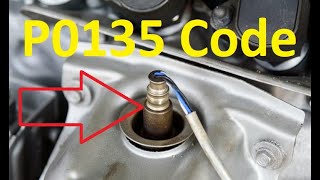
P0135 on 1998-2006 Audi TT 1.8T: O2 Sensor Heater Causes and Fixes
On a Mk1 Audi TT 1.8T, code P0135 is almost always a failed heater element inside the front oxygen sensor (Bank 1, Sensor 1). Before replacing it, check fuses 32, 34, and 43. Expect to pay ~$70-$150 for a quality Bosch replacement sensor, with a DIY difficulty of 3/5.
- P0135 points directly to a failure in the heater circuit of the front oxygen sensor.
- Before buying any parts, check fuses #32, #34, and #43 in the driver's side fuse panel.
- The most likely fix is replacing the front O2 sensor, but you MUST visually confirm if you have a 4-pin (early models, e.g., ATC engine) or 6-pin (late models, e.g., AWP engine) connector before ordering.
- Using a quality replacement sensor from a brand like Bosch is highly recommended for longevity and proper performance.
- Ignoring this code will lead to poor fuel mileage and can eventually damage your catalytic converter.
What's Unique About the 1998-2006 Audi TT
The first-generation (Mk1/8N) Audi TT had a key change during its production run that directly impacts this code. Early models (roughly pre-2001, with engine codes like AJQ, APP, ATC) typically used a 4-pin narrowband oxygen sensor. Later models (roughly 2001+, with the AWP engine code) switched to a more precise 6-pin wideband oxygen sensor, also known as an Air/Fuel Ratio sensor. Because the heater circuits and connectors are different, it is critical for owners to physically inspect their existing sensor's connector to ensure they purchase the correct replacement part.
Symptoms You May Notice
- Check Engine Light is on
- Reduced fuel economy
- Rough or uneven idle, especially when the engine is cold
- Hesitation or misfires during acceleration
- Failing a vehicle emissions test
- Louder than normal exhaust note or tapping sound from the catalytic converter area, as noted in some owner experiences.
- Replacing the rear (post-catalyst) oxygen sensor instead of the front (pre-catalyst) one.
- Replacing the oxygen sensor without first checking for a simple blown fuse.
- Confusing a rough idle caused by a vacuum leak or faulty MAF sensor with the O2 sensor issue.
Most Likely Causes
- Failed Oxygen Sensor Heater Element 🔴 High Probability → Shop Oxygen Sensor The internal heater element is a common failure point due to constant, extreme heat cycles over many years of service. It is the most frequent cause of P0135.
How to confirm: Disconnect the sensor and use a multimeter to test the resistance between the two heater circuit pins (typically the two same-colored wires, often white). A good heater should have a low resistance, generally between 2 and 30 Ohms. An infinite resistance reading (OL) indicates an open circuit and a failed heater.
Typical fix: Replace the Bank 1, Sensor 1 (front) oxygen sensor.
Est. part cost: $70-$180 - Blown Fuse 🟡 Medium Probability
How to confirm: Inspect the fuses in the panel on the driver's side of the dashboard. Specifically check fuses #32 (10A), #34 (10A, often labeled for Lambda probe), and #43 (15A).
Typical fix: Replace the blown fuse. If the new fuse blows immediately, it indicates a short circuit in the wiring or within the O2 sensor's heater element itself, which needs to be traced.
Est. part cost: $1-$5 - Damaged Wiring or Connector ⚪ Low Probability
How to confirm: Visually inspect the wiring harness and connector for the front O2 sensor. The harness is routed near the hot downpipe and turbo, so look for any signs of melting, chafing against engine components, corrosion in the connector pins, or broken wires.
Typical fix: Repair the damaged section of the wiring harness or replace the connector pigtail.
Est. part cost: $10-$40
Rare But Worth Checking
- Faulty Engine Control Module (ECU): → Shop Engine Control Module (ECM) This is very rare. The internal ECU driver that sends power to the heater circuit can fail. This should only be considered after all other possibilities (sensor, fuse, wiring) have been definitively ruled out by a professional.
Diagnosis Steps
- Read the fault codes with an OBD-II scanner to confirm P0135 is present. Note if it is listed as 'Intermittent'.
- Open the fuse panel on the driver's side of the dashboard and inspect fuses #32, #34, and #43. Replace if blown.
- If fuses are good, locate the front oxygen sensor on the exhaust downpipe, just after the turbo. Visually inspect its electrical connector and wiring for any obvious damage, such as melting from contact with the exhaust, chafing, or corrosion.
- Disconnect the sensor. Using a multimeter set to Ohms (Ω), measure the resistance across the heater circuit pins on the sensor side (usually the two white wires). A good sensor will read between 2-30 Ohms. A reading of infinite resistance (OL) confirms the sensor heater has failed.
- If the sensor's resistance is within spec, test for voltage at the harness connector with the ignition on and engine off. You should find battery voltage (approx. 12V) at the heater power supply pin. Lack of voltage points to a wiring or fuse issue upstream.
- If all tests pass but the code persists, the issue may be an intermittent wiring fault or, in very rare cases, the ECU itself.
- The most common outcome is a failed sensor. Replace the front oxygen sensor, clear the code, and perform a test drive.
Parts You'll Likely Need
- Front Oxygen Sensor (Bank 1, Sensor 1)
(OEM #Late (AWP Engine, Wideband 6-pin): 06A906262AJ / Early (ATC, etc., Narrowband 4-pin): 06A906262AF)— This is the sensor whose internal heater circuit has failed. It is crucial to visually verify if your car needs the 4-pin (early models) or 6-pin (late models, AWP engine) version before buying.
Trusted brands: Bosch (OEM supplier), NGK/NTK, Denso
OEM price range: $120-$180
Aftermarket price range: $70-$150
Technical Service Bulletins (TSBs) & Recalls
- While no TSB is specific to P0135, Service Action #SAC-28F2-REV was issued for failing ignition coils on these engines. Symptoms of a failing coil (rough idle, misfire) can sometimes overlap with O2 sensor symptoms, making correct diagnosis important.
- Manufacturer TSB Bulletin #01139020337671 addresses a MIL on condition specifically involving DTC P0135 (heater circuit fault lambda sensor) and provides repair authorization for related heater circuit faults.
Platform-Specific Known Issues
- Sensor Seizure: The O2 sensor is threaded into the cast iron downpipe and is subjected to thousands of heat cycles. It is often extremely difficult to remove. Soaking the threads with penetrating oil (like PB Blaster) overnight is highly recommended. A specialized 22mm O2 sensor socket, which allows clearance for the wires, is essential. In severe cases, heating the downpipe bung with a torch may be necessary to break it free.
- Access: While accessible from the top of the engine bay behind the engine, space is tight. Removing the plastic engine covers provides more room to work. Using a long extension and a swivel joint for your ratchet can be very helpful.
Mechanic-Grade Diagnostic Values
- O2 Sensor Heater Element Resistance (Narrowband, 4-pin) — expected: 4.5 - 5.2 Ohms at room temperature. Failure: Infinite resistance (OL) or zero resistance (short). Readings outside the expected range indicate a failing element.
- O2 Sensor Heater Element Resistance (Wideband, 6-pin) — expected: Less than 10 Ohms, typically 2-5 Ohms on a good sensor. Failure: Infinite resistance (OL) or a reading significantly outside the typical low-ohm range.
- Voltage at Harness Connector (Heater Power Pin) — expected: 12V (Battery Voltage) with Key On, Engine Off (KOEO). Failure: 0V or significantly low voltage points to a blown fuse or a break in the power wire from the relay/fuse box.
- VCDS/VAG-COM Readiness Test for Catalyst — expected: Test should complete and pass.. Failure: Running readiness test in [01-Engine] -> [04-Basic Settings] -> Group 046 may fail to complete or show a 'Test Not OK' status if the O2 sensor heater is not functioning, preventing the system from entering closed loop.
Scan Tool Commands That Help
- VCDS/VAG-COM: Readiness - 01 Engine, Basic Settings 04, Group 046 — After replacing the O2 sensor, this function can be used to run the catalyst monitor test. A prerequisite for this test is a functioning O2 sensor heater. If the test runs and passes, it helps confirm the heater circuit is now operating correctly.
Wiring & Ground Locations
- ECU Pin 5 (Aux Injector 5) — On the main Engine Control Unit connector.. On some 1.8T engine management systems (like those using aftermarket Link ECUs, which mirror OEM logic), this specific pin is designated to control the Oxygen Sensor #1 Heater. A fault trace could lead back to this pin for continuity checks.
- Ground Point 640 — A ground connection point located in the engine compartment on the left side.. This is a documented ground point in the engine bay. While not exclusively for the O2 sensor, poor grounding at this or other primary engine bay ground points can cause a variety of electrical issues, including intermittent sensor heater faults.
- Throttle Body Ground Point — A common grounding point for DIY grounding kits is a bolt on the throttle body.. Forum discussions about improving engine electronics performance often involve adding redundant grounds. A key location is from the throttle body or intake manifold to the chassis or battery negative. A poor factory ground in this area could potentially affect sensor readings, although it's not a direct cause of P0135.
Real Owner Repair Stories
- AliExpress User Review (2005 Audi A4 Quattro 1.8T (Similar engine/sensor logic)) — Recurring P0135 code within weeks of replacement.
❌ Tried (didn't work) Replaced the upstream O2 sensor with a generic aftermarket unit labeled 'fits P0135 applications'., Replaced the sensor a second time with another generic aftermarket unit.
✅ What actually fixed it The issue was resolved by installing an OEM-specification sensor (part number 06A906262AJ). The generic sensors failed to meet the OEM specifications for response time and heater resistance, causing the code to return. The OEM-spec sensor has worked without issue for over 18 months.
OEM Part Supersession History
06A906262BG→06A906262AJ— Standard part revision and supplier update.
Heads up: Both parts are functionally equivalent for the specified 1.8T wideband applications. However, using generic, non-OEM spec parts is a common cause of repeat failures.
Diagnostic Flowchart
Other Known Issues on This Vehicle
Issues unrelated to this code that are worth knowing about as an owner of this generation:
- Instrument Cluster Failure 🔴 High — Very common. Can occur at any mileage. Symptoms include failing gauges (fuel/temp), dead pixels in the central LCD, or complete, intermittent failure of the entire cluster. (Ref: No official US recall, but a class-action settlement occurred for 2000-2005 models which extended warranties and offered reimbursements. Audi UK reportedly replaced failed clusters free of charge.)
- Timing Belt and Water Pump Failure 🔴 High — This is a critical maintenance item. The original interval was often cited as high as 105k miles, but due to age and premature failures, a 60k-80k mile or 7-year interval is strongly recommended by experts. The original water pump used a plastic impeller which is a known failure point. (Ref: TSB #15-D-4-JZ and a related service campaign were issued regarding potential engine damage from a broken timing belt.)
- Front Control Arm Bushing Wear 🟠 Medium — The rubber bushings, particularly the rear position on the front control arms, wear out, causing clunking noises, poor alignment, and vague steering feel. This is a common wear item, often needing replacement by 80k-100k miles.
- Ignition Coil Pack Failure 🟠 Medium — Extremely common across all 1.8T engines. Leads to misfires, rough idle, and a flashing check engine light. Failure can be sudden. (Ref: Yes, multiple service campaigns/recalls were issued, such as #SAC-28F2-REV, to inspect and replace faulty ignition coils.)
- Haldex AWD System Service 🟠 Medium — Not a failure, but a critical maintenance point. The Haldex fluid and filter must be changed every 20,000-40,000 miles to prevent pump failure and loss of AWD. Neglect leads to binding on tight turns or the system defaulting to FWD.
Used vs. New Parts: Buying Guide for This Vehicle
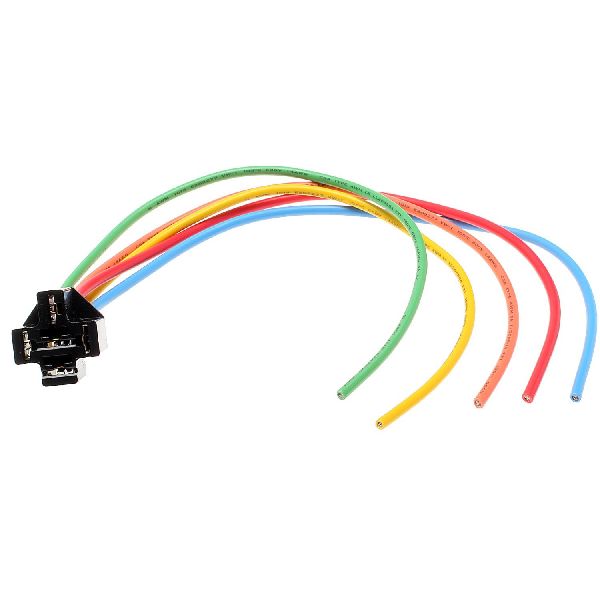
When a used part is the smart pick: For an electrical wear item like an oxygen sensor, a used part is almost never a smart choice. The heater element has a finite life, and a used sensor has an unknown history and remaining lifespan. A used wiring harness pigtail from a junkyard can be a good option if the original connector is melted or damaged.
Donor-vehicle mileage cap: roughly under 50000 miles for the part to have meaningful remaining life.
What to inspect on the donor part:
- For a wiring pigtail: ensure the connector is not cracked or brittle.
- Check for any signs of melting on the plastic connector body.
- Inspect the wire insulation to ensure it is flexible and not hardened or frayed.
- Ensure the locking tab on the connector is intact.
OEM-only on this vehicle (don't cheap out):
- Oxygen Sensor - While not strictly 'OEM-only', using a sensor from the Original Equipment Manufacturer (Bosch) is highly recommended. Forum and user experiences show that generic, low-cost sensors frequently fail prematurely or do not meet the ECU's strict parameters, causing the P0135 code to return.
Aftermarket brands forum-validated for this vehicle:
- Bosch (OEM for this application)
- NGK/NTK
- Denso
Brands owners have reported issues with on this vehicle:
- Generic, unbranded 'P0135 compatible' sensors from online marketplaces have a high reported failure rate for this specific application.
Real Owner Stories
Aggregated from forums and TSBs cited above. Mileages and costs reflect what owners reported in those sources.
2002 Audi TT 1.8T
Symptoms: VCDS scan showed code 16519 / P0135 intermittent, occurring alongside a secondary air injection fault.
What fixed it: Changed the forward oxygen sensor immediately due to a heater short.
Source hint: Ross-Tech.com: A 2016 thread titled 'AUDI TT 1.8T 2002 drive issues'
Related OBD-II Codes
Frequently Asked Questions
Does Service Action #SAC-28F2-REV mean Audi will fix my P0135 code for free?
I'm seeing code 16519 on my VCDS scan; is this the same as P0135?
Which fuses should I check on my Mk1 TT if I suspect a heater circuit issue?
Is the front O2 sensor easy to remove on the 1.8T engine?
Can I use a multimeter to confirm the sensor is dead before buying a new one?
Does the instrument cluster class action settlement cover my O2 sensor repair?
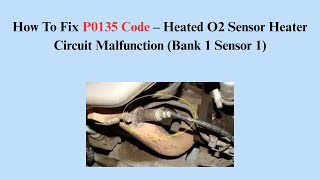
Helpful Videos
We Have This Part in Stock


The information in this article is provided for general reference and educational purposes only. Vehicle specifications, procedures, and part compatibility can vary by production date, trim level, and region. Always consult your vehicle's factory service manual and verify part numbers before purchasing or performing repairs. Safety-critical components such as airbags, seat belts, and braking systems should be installed by a qualified professional.
- Audi TT:
- 🧭 Diagnostic Flowchart
- 🎬 Helpful Videos
- 🛍️ Shop This Part
- What's Unique About the 1998-2006 Audi TT
- Symptoms You May Notice
- Most Likely Causes
- Rare But Worth Checking
- Diagnosis Steps
- Parts You'll Likely Need
- Technical Service Bulletins (TSBs) & Recalls
- Platform-Specific Known Issues
- Mechanic-Grade Diagnostic Values
- Scan Tool Commands That Help
- Wiring & Ground Locations
- Real Owner Repair Stories
- OEM Part Supersession History
- Other Known Issues on This Vehicle
- Used vs. New Parts: Buying Guide for This Vehicle
- Real Owner Stories
- 2002 Audi TT 1.8T
- Related OBD-II Codes
- Frequently Asked Questions
- 🎟️ Get 5% Off