
P0135 on 2010-2015 Chevrolet Camaro 3.6L: O2 Sensor Heater Circuit Causes and Fixes
This code almost always means the upstream oxygen sensor on the passenger side (Bank 1) has failed. The internal heater element burns out, which is a common issue. Replacing the sensor itself is the most likely fix, costing around $50-$120 for an aftermarket part and is a straightforward DIY job. Ensure you buy the correct part number, as it differs between 2010-2011 (LLT) and 2012-2015 (LFX) engines.
- P0135 points to a failure in the heater circuit of the upstream oxygen sensor on the passenger side of your Camaro's V6 engine.
- The most likely fix is to replace the Bank 1, Sensor 1 oxygen sensor. This is a common failure item.
- Before buying parts, always check the simple things first: inspect the fuse for the O2 sensor heaters and visually check the sensor's wiring for obvious damage.
- This is a manageable DIY repair for most home mechanics with basic tools and an O2 sensor socket.
What's Unique About the 2010-2015 Chevrolet Camaro
For the fifth-generation Camaro V6, the key challenge is correctly identifying Bank 1. Unlike many other GM V-engines where Bank 1 is on the driver's side, on the 3.6L V6 (both the 2010-2011 LLT and 2012-2015 LFX), Bank 1 corresponds to the cylinder bank on the passenger side of the vehicle. The failure itself is typical for many vehicles—a burned-out heater element in the sensor—but knowing the correct location is the most critical platform-specific detail. Additionally, the specific upstream O2 sensor part number is different for the 2010-2011 LLT engine versus the 2012-2015 LFX engine.
Symptoms You May Notice
- Check Engine Light is on.
- Reduced fuel economy.
- Rough idle or poor engine performance, especially when the engine is cold before the sensor warms up naturally.
- Failing a vehicle emissions test.
- In some cases, especially if other heater circuit codes are present, the engine may stumble or stall at idle.
- A "Reduced Propulsion" or similar performance warning message may appear on the dashboard in some GM vehicles when this code is triggered alongside other emissions faults (NHTSA ODI #11632222).
- Replacing the wrong oxygen sensor (e.g., the driver's side Bank 2 sensor, or the downstream Sensor 2 after the catalytic converter).
- Replacing the oxygen sensor without first checking the 'O2 HTR' fuse in the underhood fuse box.
- Purchasing the incorrect part number for the LLT vs. LFX engine.
Most Likely Causes
- Failed Bank 1, Sensor 1 Oxygen Sensor 🔴 High Probability → Shop Oxygen Sensor The internal heater element within the oxygen sensor is a common failure point due to constant, rapid heat cycles and age. It simply burns out like a light bulb filament.
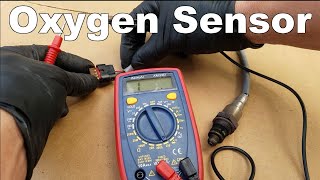
How to confirm: After checking the fuse and wiring, test the resistance of the heater circuit on the sensor itself using a multimeter. Disconnect the sensor and measure across the two heater pins (often the two same-colored wires 🎬 See this walkthrough on testing and replacing O2 heater circuits.). A good heater should have a resistance between 5 and 10 Ohms when cold. An open circuit (infinite resistance) or a direct short (near zero resistance) confirms the heater has failed.
Typical fix: Replace the upstream oxygen sensor on the passenger side. 🎬 Watch: How to fix a P0135 Bank 1 Sensor 1 code. This is often called Bank 1, Sensor 1.
Est. part cost: $50-$180 - Damaged Wiring or Connector 🟡 Medium Probability The wiring harness runs close to hot exhaust components and the transmission bellhousing. Wires can become brittle, melt, or chafe over time, causing a short or open circuit. This is especially common after installing aftermarket headers.
How to confirm: Visually inspect the wiring harness and connector leading to the sensor for any signs of melting, corrosion, or physical damage. Use a multimeter to check for 12-volt power and ground at the harness-side connector with the ignition on, engine off.
Typical fix: Repair the damaged section of wire or replace the connector pigtail.
Est. part cost: $15-$40 - Blown Fuse ⚪ Low Probability
How to confirm: In the underhood fuse block, locate the 15A fuse labeled 'O2 HTR' or 'EMISSIONS 1'. Check if it is blown. A manufacturer report (NHTSA ODI #11632222) noted that a blown fuse in the emissions circuit can be caused by a shorted EGR valve, which may trigger P0135 along with a long list of other codes.
Typical fix: Replace the blown fuse. If the fuse blows again immediately, it indicates a short circuit in the wiring or one of the O2 sensors that must be diagnosed.
Est. part cost: $1-$5
Rare But Worth Checking
- Faulty Powertrain Control Module (PCM/ECM): → Shop Engine Control Module (ECM) This is very uncommon. A forum member on Camaro5.com with a 2012 V6 reported that multiple, persistent O2 heater codes (including P0135, P0155, and others) were ultimately resolved by replacing the ECM after sensors and wiring were checked and found to be good. This should only be considered after all other possibilities have been definitively ruled out.
Diagnosis Steps
- Read the codes with an OBD-II scanner to confirm P0135 is present and note any other codes.
- Check the fuse for the O2 sensor heater circuit. In the underhood fuse block, inspect the 15A fuse for the O2 heaters (often labeled 'O2 HTR').
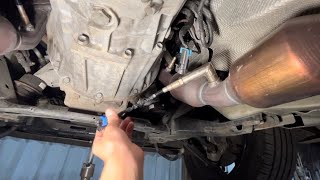
- Locate Bank 1, Sensor 1. On the 3.6L V6 Camaro, this is the upstream sensor (before the catalytic converter) on the passenger side.
- Visually inspect the sensor's wiring harness and connector for any signs of melting, chafing, corrosion, or loose pins. Pay close attention to where the harness runs near the exhaust manifold and transmission bellhousing.
- Disconnect the sensor. With the ignition key in the 'On' position (engine off), use a multimeter to test the harness-side connector for ~12-volt power and a good ground connection on the heater circuit pins.
- If power and ground are present, test the sensor itself. Set your multimeter to measure resistance (Ohms) and probe the two pins corresponding to the heater circuit on the sensor. A reading between 5-10 Ohms is typical for a good sensor. A reading of infinite resistance (OL) means the heater is burned out and the sensor must be replaced.
- If the sensor's resistance is within spec and the wiring has power/ground, the issue may be intermittent or, in rare cases, a problem with the PCM. Note that some technicians have reported codes like P0135 testing "good" during initial trouble tree diagnostics only for warnings to return the next day (NHTSA ODI #10156207).
- To replace the sensor, a special 7/8" (or 22mm) slotted oxygen sensor socket is required to fit over the wire.
Parts You'll Likely Need
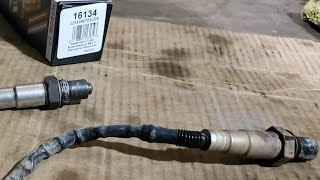
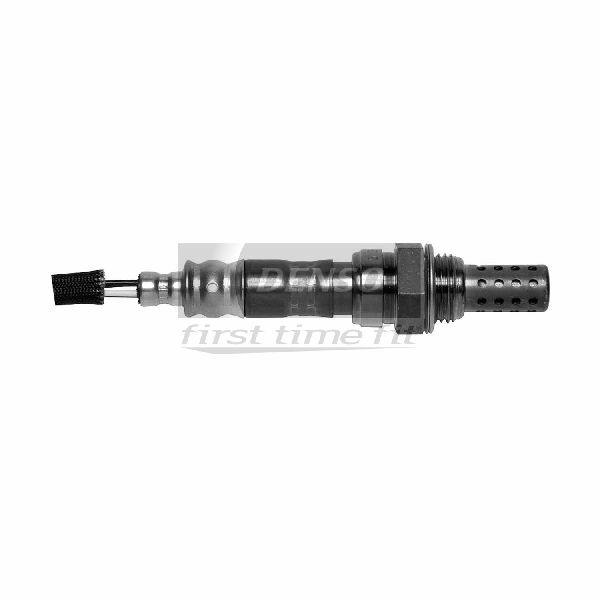
- Heated Oxygen Sensor (Bank 1, Sensor 1 for 2010-2011 LLT)
(OEM #ACDelco 213-4403 (GM 12612459))— The internal heater element failing is the most frequent cause of code P0135. This specific part is for the 2010-2011 LLT engine.
Trusted brands: ACDelco (OEM), Denso 234-4762, Bosch 17258, NTK/NGK 21546
OEM price range: $90-$150
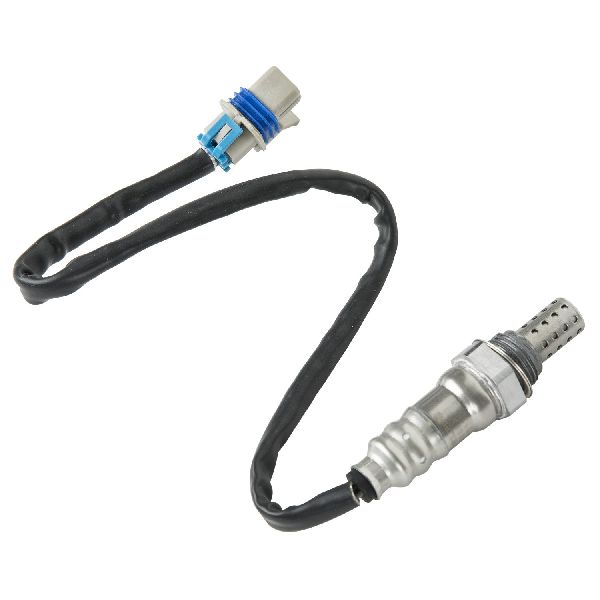
Aftermarket price range: $50-$100 - Heated Oxygen Sensor (Bank 1, Sensor 1 for 2012-2015 LFX)
(OEM #ACDelco 213-4574 (GM 12637168))— The internal heater element failing is the most frequent cause of code P0135. This specific part is for the updated 2012-2015 LFX engine.
Trusted brands: ACDelco (OEM), Denso 234-5152, Bosch 17287, NTK/NGK 21574
OEM price range: $120-$180
Aftermarket price range: $70-$120
Related Codes That Often Appear With This One
- P0155 — P0155 is the heater circuit code for Bank 2, Sensor 1 (driver's side upstream). Seeing both P0135 and P0155 together might point to a systemic issue like a shared power supply fuse ('O2 HTR') or a problem with the PCM, as seen in some owner reports.
- P0030 — This is another generic code for the Bank 1 Sensor 1 heater control circuit. It is functionally identical to P0135 and is often triggered at the same time for the same root cause.
- P0141 — P0141 is the heater circuit code for Bank 1, Sensor 2 (the downstream sensor). If a wiring issue or blown fuse affects the power supply to the O2 sensors on Bank 1, it could potentially trigger codes for both sensors on that bank.
- Systemic Faults — In some GM vehicles, P0135 can appear as part of a massive list of codes including P06DB, P0030, P0403, P0443, and P0597, often indicating a common circuit failure (NHTSA ODI #11681144).
Technical Service Bulletins (TSBs) & Recalls
- TSB #PIP5042: This bulletin addresses scenarios where multiple O2 sensor heater codes are set at once across different banks. It guides technicians to check for common power or ground circuit faults, including blown fuses or harness damage, before suspecting a faulty ECM. This is relevant when P0135 appears with codes like P0155.
Platform-Specific Known Issues
- source_type: forum | id_or_name: Camaro5.com Thread: 'O2 Sensor Replacement' | relevance: A user with a 2011 V6 noted that while replacing the Bank 1 Sensor 1 was mechanically simple, accessing the electrical connector was very difficult. The connector is clipped high on the transmission bellhousing, requiring long tools and patience to release it 🎬 Watch: A mechanic's guide to changing O2 sensors on this Camaro. from its bracket before it can be unplugged.
Mechanic-Grade Diagnostic Values
- O2 Sensor Heater Element Resistance — expected: 5 to 10 Ohms (when cold). Failure: Infinite resistance (OL) indicates an open circuit (burned out element). Near-zero resistance indicates an internal short.
- Heater Circuit Current Draw — expected: 0.5 to 2.0 Amps. Failure: Current higher or lower than this range will trigger the P0135 code.
Wiring & Ground Locations
- G107 — Left rear of the engine (for the 3.6L LLT V6).. A poor engine ground can cause a variety of electrical issues, including incorrect sensor readings and fault codes. This is one of several key engine grounds.
- G108 — Left side of the engine (for the 3.6L LLT V6).. This ground point is critical for various engine sensors. A loose or corroded connection here can lead to intermittent electrical problems.
- ECM Connector X2, Pin 12 — At the Engine Control Module (ECM), which is located in the right front of the engine compartment.. This is the specific pin for the HO2S Heater Low Control for Bank 1, Sensor 1. The wire color is typically Gray/White. Testing for a proper ground signal here can help differentiate a wiring problem from a faulty ECM.
- Underhood Fuse Block — Right side of the engine compartment.. This fuse block contains the fuse for the O2 sensor heaters (often labeled 'O2 HTR' or similar). This is the power source for the heater circuit.
Real Owner Repair Stories
- ScannerDanner Forum User (2011 Camaro 3.6L V6 LLT) — No crank, no start, rapidly flashing check engine light, U0100 code, and a blown 15A ECM fuse (#5).
❌ Tried (didn't work) Cleaning all engine compartment grounds.
✅ What actually fixed it The user traced a short to ground. The ECM fuse would blow when the key was turned. By disconnecting the ECM's X2 connector, the fuse stopped blowing, indicating the short was not in the main power feed to the ECM but rather in a circuit controlled by the ECM or the ECM itself. This type of diagnostic process is crucial when a fuse repeatedly blows, pointing away from a simple sensor failure to a wiring short. - NHTSA ODI #10207750 — An owner reported that after several start attempts, an OBDII scanner identified a failure associated with code P0135. Although the owner initially attributed the code to a crank position sensor, P0135 specifically identifies the O2 heater circuit.
- NHTSA ODI #11448862 — A GM vehicle owner reported the engine would eventually stop with a console message stating "engine offline" while throwing a cluster of codes including P0031, P0030, and P0135.
OEM Part Supersession History
GM 12612459→This part number appears to be current for the 2010-2011 LLT engine, but is also cross-referenced with aftermarket part numbers like Denso 234-4762 and Bosch 17258. Some listings also interchange it with 250-24704.— Standard part lifecycle and availability.
Model Year Variations Within This Range
- 2010-2011 vs 2012-2015: The primary difference is the engine change from the LLT (2010-2011) to the LFX (2012-2015). This requires different part numbers for the Bank 1, Sensor 1 oxygen sensor. For the LLT, use ACDelco 213-4403 (GM 12612459). For the LFX, use ACDelco 213-4574 (GM 12637168).
Diagnostic Flowchart
Other Known Issues on This Vehicle
Issues unrelated to this code that are worth knowing about as an owner of this generation:
- Premature Timing Chain Stretch (LLT Engine) 🔴 High — Very common on 2010-2011 models, typically appearing between 60,000 and 120,000 miles. Often caused by the original chain design and long oil change intervals. (Ref: TSB #12-06-01-009F)
- Intake Valve Carbon Buildup 🟠 Medium — An inherent issue for all direct-injection engines (LLT & LFX). Typically requires walnut blasting or manual cleaning after 60,000-100,000 miles to resolve rough idle, misfires, and performance loss. (Ref: TSB PIP5029E)
- High-Pressure Fuel Pump (HPFP) Failure 🟠 Medium — A common failure point on both LLT and LFX engines, often triggering code P0087.
- Water Pump Failure 🟡 Low — Some owners report coolant leaks from the water pump assembly, typically before 100,000 miles.
Used vs. New Parts: Buying Guide for This Vehicle
When a used part is the smart pick: For this repair, a used oxygen sensor is almost never a smart choice. O2 sensors are wear items with a finite lifespan, and the internal heating element that causes P0135 is the most common failure point due to age and heat cycles. The labor to install the part outweighs any potential savings.
Donor-vehicle mileage cap: roughly under 30000 miles for the part to have meaningful remaining life.
What to inspect on the donor part:
- If forced to use a donor, source from a very low-mileage, collision-damaged vehicle.
- Avoid sensors from vehicles with known engine issues (e.g., burning oil, coolant leaks) as contaminants can poison the sensor.
- Inspect the sensor tip for heavy black soot (rich running) or white deposits (coolant/oil contamination).
OEM-only on this vehicle (don't cheap out):
- While not strictly 'OEM-only', using a reputable OE-supplier brand is highly recommended for oxygen sensors to ensure proper performance and longevity.
Aftermarket brands forum-validated for this vehicle:
- Denso (often the OEM supplier in an AC Delco box)
- NTK (a division of NGK)
- Bosch (inventor of the O2 sensor, though some forum users report mixed results on GM platforms)
Brands owners have reported issues with on this vehicle:
- Generic, unbranded 'white-box' parts from online marketplaces should be avoided. Forum discussions frequently cite issues with these cheaper sensors failing quickly or not performing to OE specifications, causing persistent codes or poor fuel economy.
Real Owner Stories
Aggregated from forums and TSBs cited above. Mileages and costs reflect what owners reported in those sources.
2011 Chevrolet Camaro V6
Symptoms: The owner noted that replacing the sensor was mechanically simple, but the electrical connector was extremely difficult to access because it was clipped high on the transmission bellhousing.
What fixed it: Replacement of the Bank 1 Sensor 1 oxygen sensor after struggling with the bracket and connector.
Source hint: Camaro5.com Thread: 'O2 Sensor Replacement'
2012 Chevrolet Camaro V6
Symptoms: The vehicle was stalling at idle and displayed a flood of O2 heater codes including P0135, P0056, P0036, P0155, and P0142.
What fixed it: After checking sensors and wiring, the issue was determined to be a faulty ECM.
Source hint: Camaro5.com - Thread: '2012 V6, stalling on idle... O2 Sensor (P0056, P0036, P0155, P0142, P0135, etc...)'
2010-2015 Chevrolet Camaro 3.6L V6
Symptoms: The Check Engine Light was on with both P0135 and P0155 codes, and the O2 fuse kept blowing repeatedly.
What fixed it: The owner unplugged sensors one by one and diagnosed a short in the wiring harness itself rather than a faulty sensor.
Source hint: Camaro5.com - Thread: 'HELP please, O2 sensors not reading, got a CEL.'
Documented NHTSA Reports
Systemic GM Emissions Failures
Symptoms: Multiple owners have reported P0135 appearing alongside a long list of other codes such as P0030, P0403, and P0597. In some cases, this was accompanied by a "Reduced Propulsion" message on the dash.
What fixed it: NHTSA ODI #11632222 found a blown fuse for the EGR valve was the culprit, while NHTSA ODI #11681144 notes this as one of the most common failure patterns in certain Chevrolet propulsion systems.
Related OBD-II Codes
Frequently Asked Questions
Where is Bank 1, Sensor 1 located on my 3.6L V6 Camaro?
Which fuse should I check for a P0135 code on my Camaro?
I have multiple heater codes like P0135 and P0155 appearing at once. Does TSB #PIP5042 apply?
Is it true that the electrical connector for the O2 sensor is hard to reach on the 2011 V6?
Can I use a used O2 sensor from a donor Cadillac CTS or Buick LaCrosse?
My O2 fuse keeps blowing even after replacing the sensor. What could be the cause?
Helpful Videos
We Have This Part in Stock


The information in this article is provided for general reference and educational purposes only. Vehicle specifications, procedures, and part compatibility can vary by production date, trim level, and region. Always consult your vehicle's factory service manual and verify part numbers before purchasing or performing repairs. Safety-critical components such as airbags, seat belts, and braking systems should be installed by a qualified professional.
- Chevrolet Camaro:
- 🧭 Diagnostic Flowchart
- 🎬 Helpful Videos
- 🛍️ Shop This Part
- What's Unique About the 2010-2015 Chevrolet Camaro
- Symptoms You May Notice
- Most Likely Causes
- Rare But Worth Checking
- Diagnosis Steps
- Parts You'll Likely Need
- Related Codes That Often Appear With This One
- Technical Service Bulletins (TSBs) & Recalls
- Platform-Specific Known Issues
- Mechanic-Grade Diagnostic Values
- Wiring & Ground Locations
- Real Owner Repair Stories
- OEM Part Supersession History
- Model Year Variations Within This Range
- Other Known Issues on This Vehicle
- Used vs. New Parts: Buying Guide for This Vehicle
- Real Owner Stories
- 2011 Chevrolet Camaro V6
- 2012 Chevrolet Camaro V6
- 2010-2015 Chevrolet Camaro 3.6L V6
- Documented NHTSA Reports
- Systemic GM Emissions Failures
- Related OBD-II Codes
- Frequently Asked Questions
- 🎟️ Get 5% Off