
P0141 on 2006-2010 Hummer H3: O2 Sensor Heater Circuit Causes and Fixes
On a 2006-2010 Hummer H3, code P0141 almost always means the downstream oxygen sensor (Bank 1, Sensor 2) has failed. Before replacing it, check the 10A 'O2 SENS' fuse (#47) in the underhood fuse box. A new OEM-quality sensor costs about $50-$90. Using an ACDelco or Denso sensor is critical to avoid immediate code return. After replacement, a 'Heater Resistance Learn Reset' using a scan tool is recommended.
- P0141 on your H3 points to the downstream O2 sensor's heater circuit.
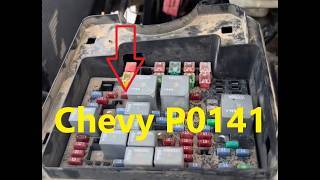
- Before buying parts, check the 10A fuse in slot #47 of the underhood fuse box, labeled 'O2 SENS'.
- The most likely fix is replacing the downstream O2 sensor (Bank 1, Sensor 2).
- To avoid repeat repairs, use an OEM ACDelco (213-3908) or a known-compatible Denso sensor. Avoid generic or questionable aftermarket brands.
- After replacing the sensor, use a scan tool to perform a 'Heater Resistance Learn Reset' or clear all codes to ensure the PCM properly controls the new sensor.
What's Unique About the 2006-2010 Hummer H3
The Hummer H3 shares its GMT355 platform, including the I5 engine and chassis, with the Chevrolet Colorado and GMC Canyon, making many emissions parts interchangeable. For this P0141 code, the most critical platform-specific issue is sensor compatibility. Forum discussions repeatedly show that using non-OEM sensors, particularly certain Bosch models, can cause the heater circuit code to return immediately. Owners consistently resolve the issue only after installing an original ACDelco or a compatible Denso sensor. Additionally, modern GM vehicles use a Resistance Calculated O2 Heater Temp (RCOHT) system, which requires a scan tool reset after sensor replacement to learn the new heater's resistance value.
Symptoms You May Notice
- Check Engine Light is on
- Vehicle will not pass an emissions test
- Potentially rough running or slightly decreased fuel economy in open-loop mode, though often not noticeable.
- Replacing the sensor with an incompatible aftermarket brand. Many owners report that certain aftermarket sensors, especially some Bosch models, do not work with the H3's computer and will not clear the P0141 code.
- Replacing the wrong sensor. P0141 is for Bank 1, Sensor 2, which is the downstream sensor (after the catalytic converter). On V8 models, Bank 1 is the driver's side.
- Failing to perform the 'HO2S Heater Resistance Learn Reset 🎬 Watch: How to perform the HO2S heater learn reset' after sensor replacement, which can lead to incorrect heater operation and a recurring code.
Most Likely Causes
- Failed Downstream Oxygen Sensor (Bank 1, Sensor 2) 🔴 High Probability → Shop Oxygen Sensor The internal heater element is a common failure point due to age and thousands of heat cycles. It is a standard wear-and-tear item.
How to confirm: After confirming the fuse and wiring are intact, the sensor is the default culprit. You can test the resistance across the two same-colored heater wires on the sensor; if it reads as an open circuit (infinite resistance), the heater has failed. 🎬 See how to diagnose the P0141 heater circuit malfunction A good heater typically has a resistance between 5 and 10 ohms, though a wider range of 3-25 ohms may be acceptable.
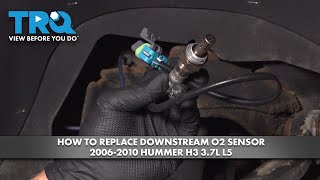
Typical fix: Replace the Bank 1, Sensor 2 oxygen sensor. 🎬 Watch: Step-by-step downstream O2 sensor replacement for the H3 It is strongly recommended to use an OEM ACDelco (GM Genuine) or a known-compatible Denso brand replacement to avoid compatibility issues. After replacement, perform a 'HO2S Heater Resistance Learn Reset' with a scan tool.
Est. part cost: $50-$90 - Blown O2 Sensor Heater Fuse 🟡 Medium Probability → Shop Oxygen Sensor A short circuit in the sensor's heater element or its wiring harness can cause the fuse to blow as a protective measure.
How to confirm: Inspect the fuse for the oxygen sensor heaters in the underhood fuse box. On I5 models, this is fuse #47, a 10A fuse labeled 'O2 SENS'. If the fuse is blown, it confirms an electrical fault in the circuit.
Typical fix: Replace the blown fuse. If the fuse blows again immediately, it indicates a persistent short circuit in the wiring or the sensor itself that must be found and repaired before installing a new sensor.
Est. part cost: $1-$5 - Damaged Wiring or Connector ⚪ Low Probability As an off-road capable vehicle, the H3's underbody wiring is exposed to potential damage from debris, water, and heat from the exhaust. A common point of failure is the harness chafing against the front driveshaft, leading to a short.
How to confirm: Visually inspect the wiring harness leading to the downstream O2 sensor. Look for signs of melting, chafing against the frame or driveshaft, or corrosion inside the electrical connector. Pay close attention to the area near the front driveshaft.
Typical fix: Per GM service information, do not attempt to repair the O2 sensor pigtail, connector, or terminals. The sensor draws its clean air reference through the wire strands, and repairs can block this path, degrading performance. If the pigtail is damaged, the entire sensor must be replaced. If damage is found further up the engine harness, repair the specific wire (e.g., the Pink power wire).
Est. part cost: $15-$40
Rare But Worth Checking
- Faulty Powertrain Control Module (PCM): → Shop Engine Control Module (ECM) This is extremely rare. The PCM's internal driver for the heater circuit can fail. This should only be considered after all other possibilities (sensor, wiring, fuse) have been exhaustively ruled out.
Diagnosis Steps
- Read the trouble codes with an OBD-II scanner to confirm P0141 is present. Note any other codes, such as P0036 or P0054.
- Open the underhood fuse box and inspect the O2 sensor heater fuse. For I5 engines, this is the 10A fuse in slot #47, labeled 'O2 SENS'. If it's blown, replace it and see if the code returns.
- If the fuse is good, safely raise the vehicle and locate the Bank 1, Sensor 2 oxygen sensor. It is on the exhaust pipe just after the catalytic converter.
- Thoroughly inspect the sensor's wiring harness and connector for any signs of melting, chafing (especially near the front driveshaft), corrosion, or loose pins.
- If the wiring looks good, disconnect the sensor. Use a multimeter to check for battery voltage (~12V) at the Pink wire on the vehicle-side of the connector with the ignition on.
- If power is present, the most likely cause is a failed sensor. You can confirm by measuring the resistance across the heater pins on the sensor itself (usually two same-colored wires). An open circuit (OL) or a reading outside the typical 5-10 ohm range confirms a failed heater.
- If all other tests pass, replace the oxygen sensor with a quality part (ACDelco or Denso recommended).
- After the repair, use a scan tool to perform the 'HO2S Heater Resistance Learn Reset' function, or clear all DTCs to perform the same reset. Then, perform a drive cycle to ensure the code does not return.
Parts You'll Likely Need
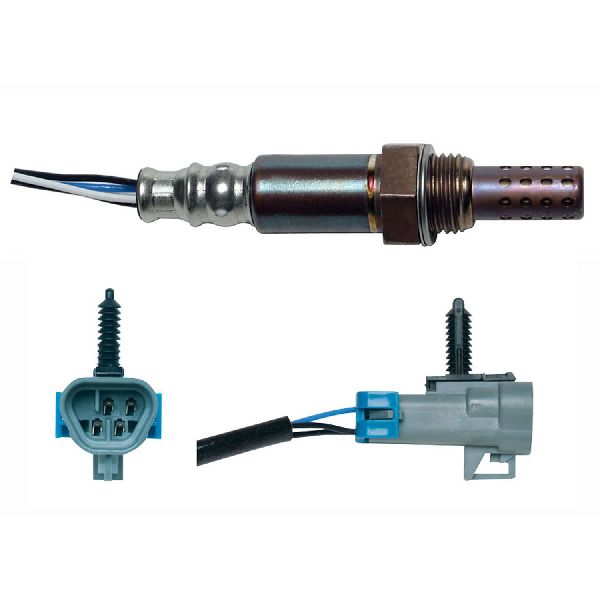
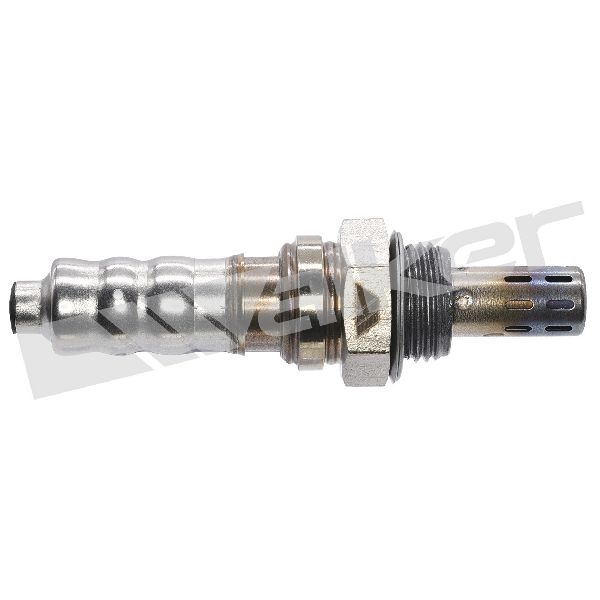
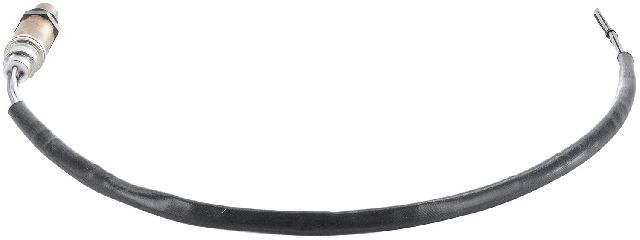
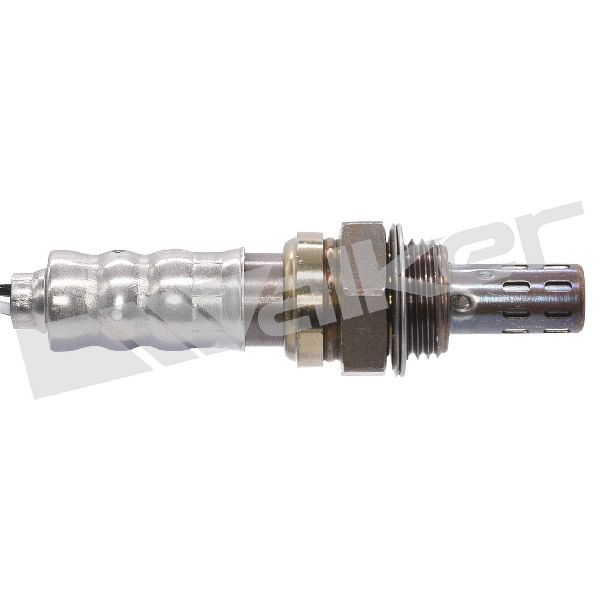
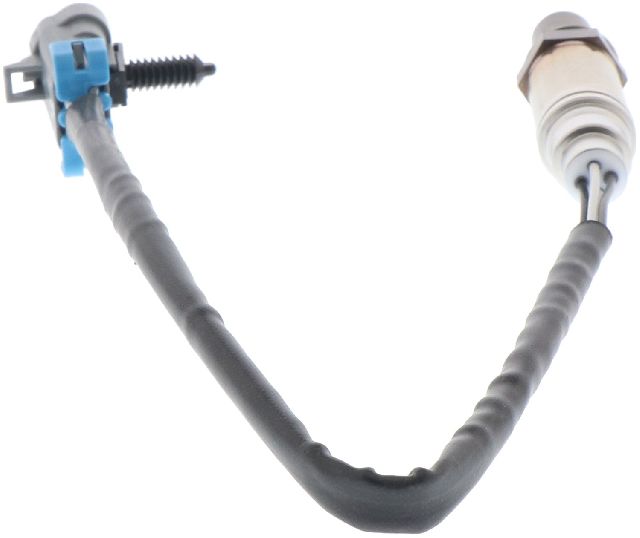
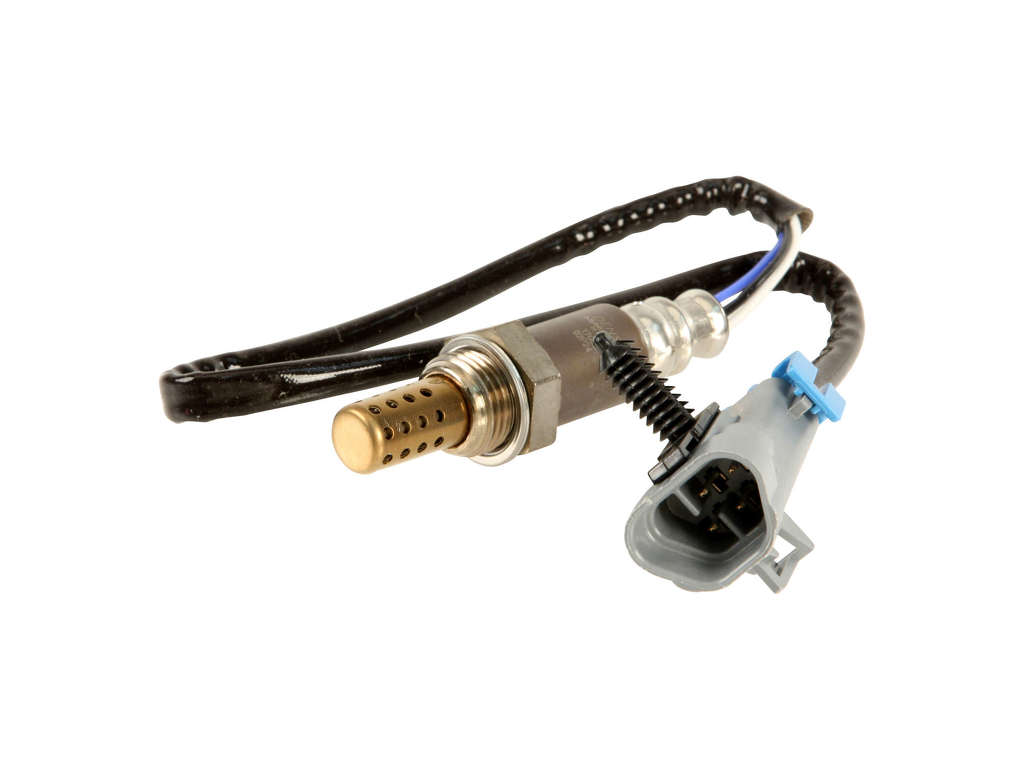
- Oxygen Sensor (Bank 1, Sensor 2)
(OEM #ACDelco 213-3908 (for 2007-2010 models))— This is the most common failure for code P0141. The internal heater element burns out over time.
Trusted brands: ACDelco (GM Genuine Parts), Denso (e.g., 234-4294 for 3.7L)
OEM price range: $70-$100
Aftermarket price range: $50-$80
Related Codes That Often Appear With This One
- P0036 — This is another code for the same O2 sensor heater control circuit (Bank 1, Sensor 2). They often appear together, pointing to the same physical fault.
- P0054 — This code indicates an issue with the heater resistance for Bank 1, Sensor 2. Seeing P0141, P0036, and P0054 together strongly indicates the heater element inside the sensor has failed.
Mechanic-Grade Diagnostic Values
- O2 Sensor Heater Element Resistance — expected: 5-10 Ohms (a wider range of 3-25 Ohms may be acceptable). Failure: Infinite resistance (OL) indicates an open circuit; very low resistance (<2 Ohms) indicates a short.
- Heater Circuit Power Supply Voltage — expected: ~12V (Battery Voltage). Failure: 0V or significantly low voltage at the Pink wire on the harness connector (Key On, Engine Off).
- Heater Circuit Current Draw (Scan Tool) — expected: 0.5 to 2.0 Amps when active. Failure: Current is below the PCM's expected threshold (e.g., < 0.3 Amps), indicating an open or high-resistance circuit.
Scan Tool Commands That Help
- GM Tech 2 / GDS2 / Professional Scan Tool: HO2S Heater Resistance Learn Reset — MUST be performed after replacing an O2 sensor. The PCM learns the specific resistance of the new heater on a cold start. Failing to reset this can lead to improper heater control, recurring codes, and potential premature failure of the new sensor.
- GM Tech 2 / GDS2 / Professional Scan Tool: Engine Output Controls > O2 Sensor Heater (Bidirectional Test) — To manually command the heater circuit ON and OFF. This is a definitive test to verify the integrity of the PCM driver, wiring, and ground circuit before condemning the sensor itself.
- OBD-II Scanner: Clear All DTCs — As an alternative to the specific 'Heater Resistance Learn Reset' function. Clearing all codes (even if none are present) will also perform the reset on these GM systems.
Wiring & Ground Locations
- B1S2 Connector - Heater Power — On the 4-pin vehicle-side harness connector for the downstream O2 sensor.. The Pink wire should have ~12V with the key on. This confirms power is getting from the fuse (#47) to the sensor circuit.
- B1S2 Connector - Heater Ground — On the 4-pin vehicle-side harness connector for the downstream O2 sensor.. This wire (often Black on similar GM trucks) is the ground control from the PCM. The PCM pulses this ground to control the heater. A break in this wire will cause a P0141.
- G102 / G103 / G104 — Bolted to the lower left (driver's) side of the engine block, near the starter motor.. These are primary engine block grounds. The PCM and its sensor circuits rely on a clean ground reference through the engine. A corroded or loose connection here can cause erratic sensor behavior and various electrical codes.
- O2 Sensor Pigtail Wires — The wires integrated into the oxygen sensor itself.. GM service information explicitly warns against repairing these wires. The sensor draws a clean air reference through the wire strands; any repair can block this path and degrade sensor performance, requiring full sensor replacement.
Real Owner Repair Stories
- Hummer4x4Offroad.com user 'Acer4LO' (2008 Hummer H3 Alpha (5.3L V8)) — Check Engine Light with codes P0036, P0054, and P0141.
❌ Tried (didn't work) Initial diagnosis pointed to Bank 1 Sensor 2.
✅ What actually fixed it The user was advised to replace the Bank 1 Sensor 2 (downstream, driver's side on the V8) and another user in the thread with a similar issue questioned if their aftermarket Bosch sensor was the cause of the persistent heater code, reinforcing the OEM-preference.
Model Year Variations Within This Range
- 2008-2010 (5.3L V8 'Alpha' models): On V8 models, there are two banks. Bank 1 (referenced in P0141) is the driver's side of the engine. The I5 engines only have one bank, so Bank 1 is the entire system. The physical sensor part number may be the same, but the location is different.
- 2007-2010 (3.7L I5): The 2007 model year introduced the 3.7L I5, replacing the 3.5L. While the P0141 diagnosis is identical, some wiring pinouts and part numbers are specific to the 2007+ engine management system. The primary downstream sensor is ACDelco 213-3908 for these years.
Diagnostic Flowchart
Other Known Issues on This Vehicle
Issues unrelated to this code that are worth knowing about as an owner of this generation:
- Cracked Plastic Radiator 🔴 High — Very common, especially on 2008 models, often occurring between 50,000 and 90,000 miles. The plastic end tanks are prone to cracking.
- GM Passlock II Anti-Theft System Failure 🟠 Medium — A frequent and highly frustrating issue where the vehicle fails to start for a mandatory 10-minute lockout period due to a faulty ignition lock cylinder sensor.
- HVAC Blower Motor Resistor and Harness Failure 🟠 Medium — Extremely common issue where the blower fan only works on the highest setting or not at all. The resistor and its wiring connector are known to overheat and melt. (Ref: GM Safety Recall 15042 (NHTSA Campaign 15V-421) was issued to replace the connector and harness.)
- Worn Front Differential Mount Bushing 🟠 Medium — The rubber bushings for the front differential, particularly the main crossmember bushing, wear out causing a distinct 'clunk' when shifting into drive/reverse or during acceleration/deceleration.
- Clogged Sunroof Drains 🟡 Low — The front (and sometimes rear) sunroof drain tubes have tips that clog easily with debris, causing water to back up and leak into the cabin, typically from the A-pillar or OnStar microphone, soaking the carpets.
- Cylinder Head Valve Seat Issues (2006 3.5L) 🔴 High — Primarily affecting the 2006 model year with the 3.5L I5 engine, this issue involves premature wear of the valve seats in the cylinder head, leading to misfires, low compression, and requiring a cylinder head replacement. (Ref: A special coverage adjustment was issued by GM for some vehicles, but it has since expired.)
Used vs. New Parts: Buying Guide for This Vehicle
When a used part is the smart pick: For this repair, a used part is almost never a smart choice. The primary failure is the internal heater element, which is a wear-and-tear item with a finite lifespan. A used sensor has an unknown number of heat cycles and could fail shortly after installation.
Donor-vehicle mileage cap: roughly under 20000 miles for the part to have meaningful remaining life.
What to inspect on the donor part:
- If forced to use a used part, source from a very low-mileage wreck.
- Inspect the pigtail wiring for any signs of brittleness, melting, or previous repairs. Per GM, any damage to the pigtail compromises the sensor.
- Ensure the connector is free of corrosion and the locking tab is intact.
OEM-only on this vehicle (don't cheap out):
- Oxygen Sensor
Aftermarket brands forum-validated for this vehicle:
- Denso (often the original OE manufacturer for GM)
Brands owners have reported issues with on this vehicle:
- Bosch (some specific models are reported by forum users to be incompatible with the H3's computer, causing immediate return of heater circuit codes)
- Generic 'no-name' or store-brand sensors
Real Owner Stories
Aggregated from forums and TSBs cited above. Mileages and costs reflect what owners reported in those sources.
2008 Hummer H3 Alpha
Symptoms: Scanned the vehicle and found codes P0036, P0054, and P0141 all appearing simultaneously.
What fixed it: The owner in the thread was investigating a Bank 1 Sensor 2 heater circuit failure, noting that these three codes often point to a single failure of that sensor's heater.
Source hint: Hummer4x4Offroad.com thread titled 'O2 Sensor' from 2018
Related OBD-II Codes
Frequently Asked Questions
Which fuse should I check for the O2 sensor heater on my Hummer H3 I5?
Can I use a Bosch oxygen sensor to fix the P0141 code on my H3?
Is there a specific area where the wiring harness usually fails on the H3?
Can I repair the wiring pigtail on the oxygen sensor itself?
What should I do after replacing the Bank 1, Sensor 2 oxygen sensor?
Does the Hummer H3 have a recall for the O2 sensor heater circuit?
Helpful Videos


We Have This Part in Stock

The information in this article is provided for general reference and educational purposes only. Vehicle specifications, procedures, and part compatibility can vary by production date, trim level, and region. Always consult your vehicle's factory service manual and verify part numbers before purchasing or performing repairs. Safety-critical components such as airbags, seat belts, and braking systems should be installed by a qualified professional.
- Hummer H3:
- 🧭 Diagnostic Flowchart
- 🎬 Helpful Videos
- 🛍️ Shop This Part
- What's Unique About the 2006-2010 Hummer H3
- Symptoms You May Notice
- Most Likely Causes
- Rare But Worth Checking
- Diagnosis Steps
- Parts You'll Likely Need
- Related Codes That Often Appear With This One
- Mechanic-Grade Diagnostic Values
- Scan Tool Commands That Help
- Wiring & Ground Locations
- Real Owner Repair Stories
- Model Year Variations Within This Range
- Other Known Issues on This Vehicle
- Used vs. New Parts: Buying Guide for This Vehicle
- Real Owner Stories
- 2008 Hummer H3 Alpha
- Related OBD-II Codes
- Frequently Asked Questions
- 🎟️ Get 5% Off