
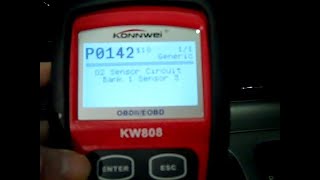
P0142 on 2007-2011 Toyota Camry 2.4L: Causes and Fixes for O2 Sensor 3 Circuit Malfunction
This code points to a fault in the rearmost oxygen sensor (Sensor 3), found on 2.4L models, often those with California emissions. The fix is usually a new sensor, but be prepared: the electrical connector is located inside the car under the driver's seat, requiring seat removal to access it.
- P0142 on a 2007-2011 Camry refers specifically to the rearmost oxygen sensor (Sensor 3) on 2.4L 4-cylinder models, usually those with California (PZEV) emissions.
- The most common fix is to replace the sensor, but the job is more complex than usual because the connector is inside the car, under the driver's seat.
- Before buying a part, confirm you are getting the rearmost sensor (Bank 1, Sensor 3) and check that the wire length is sufficient to reach into the cabin. The Denso aftermarket part is #234-4603.
- While the car is safe to drive with this code, it will fail an emissions test and should be addressed to prevent masking other potential exhaust system problems.
What's Unique About the 2007-2011 Toyota Camry
On the 2007-2011 Camry, this code is specific to the 2.4L 4-cylinder (2AZ-FE) engine, particularly models built to California (PZEV) emissions standards which use a three-sensor exhaust configuration. The V6 engine does not have a 'Sensor 3' and will not set this code. The most significant challenge for this repair is that the electrical connector for Sensor 3 is not under the car; it is routed through the floor via a grommet and plugs in under the driver's seat. This requires the seat to be unbolted and removed for access, a highly unusual design choice.
Symptoms You May Notice
- Check Engine Light is on
- Vehicle will fail an emissions or smog test
- Potential for slightly reduced fuel economy
- In some rare cases, a slight rough idle may be noticed
- Replacing the wrong oxygen sensor. It is critical to identify Sensor 3, which is the rearmost sensor on the 4-cylinder models, not Sensor 1 (in the manifold) or Sensor 2 (mid-pipe).
- Not realizing the connector is inside the car. Many DIYers and even some shops may waste time searching for a connector under the vehicle that does not exist.
- Assuming a new sensor will fix the problem without checking wiring. A persistent P0142 after a replacement often indicates a wiring fault between the connector and the PCM.
Most Likely Causes
- Failed Bank 1, Sensor 3 Oxygen Sensor 🔴 High Probability → Shop Oxygen Sensor Oxygen sensors are wear items that degrade over time from heat and contaminants in the exhaust stream. As the rearmost sensor, it is also exposed to the elements under the car.
How to confirm: After checking wiring, replacing the sensor is the most direct way to confirm. An advanced diagnostic would involve using a scan tool to watch the sensor's voltage (it should fluctuate slowly). You can also test the internal heater circuit resistance with a multimeter; a healthy sensor typically reads between 11-16 ohms at 68°F (20°C), while a failed one will show an open circuit (infinite resistance).
Typical fix: Replace the Bank 1, Sensor 3 oxygen sensor. This involves unbolting the four driver's seat bolts, tilting or removing the seat, pulling back the carpet to unplug the old sensor, removing the old sensor from the exhaust pipe with a 22mm (7/8") O2 sensor socket, and then installing the new one.
Est. part cost: $70-$150 - Damaged Wiring or Connector 🟡 Medium Probability The sensor's wiring harness runs along the underbody of the car, where it is exposed to road debris, water, and corrosion, which can cause breaks or short circuits. The connector under the seat can also be damaged by moisture if the floor gets wet.
How to confirm: Perform a thorough visual inspection of the wiring from the sensor all the way to the grommet where it passes through the floor. Also inspect the connector under the driver's seat for corrosion, moisture, or bent pins. Check for continuity on the signal and heater circuit wires with a multimeter.
Typical fix: Repair or replace the damaged section of the wiring harness. If the connector is corroded, it may need to be cleaned with electrical contact cleaner or replaced entirely.
Est. part cost: $10-$50 - Exhaust Leak ⚪ Low Probability Rust can cause leaks at the flange gaskets or welds in the exhaust pipe before the sensor. A leak allows outside oxygen to enter the exhaust, which the sensor will read as a lean condition, potentially confusing the PCM.
How to confirm: Listen for a ticking or hissing noise from the exhaust when the engine is cold. You can also use a smoke machine to pressurize the exhaust and look for visible smoke escaping from leaks.
Typical fix: Repair the leak. This may involve replacing a gasket or welding a crack in the pipe.
Est. part cost: $5-$100
Rare But Worth Checking
- Faulty Powertrain Control Module (PCM): → Shop Engine Control Module (ECM) This is extremely rare. All other possibilities, especially the sensor and its wiring, should be exhaustively ruled out before considering the PCM as the cause. A user on Reddit reported this code persisting after two new Denso sensors, pointing towards a more complex wiring or PCM issue.
Diagnosis Steps
- Confirm the code is P0142 using an OBD-II scanner.
- Visually inspect the exhaust system for any obvious leaks, cracks, or damage, particularly in the area before the rearmost O2 sensor.
- Trace the wiring harness from the rearmost O2 sensor to the point where it enters the cabin through a rubber grommet in the floor. Look for any signs of melting, chafing, or physical damage.
- Remove the four 14mm bolts holding the driver's seat to the floor and tilt the seat back or remove it completely.
- Lift the carpet near the transmission tunnel to locate the O2 sensor's electrical connector.
- Disconnect the sensor and inspect the connector terminals for corrosion, moisture, or damage. Clean if necessary.
- Optional but recommended: Test the heater circuit of the old sensor with a multimeter set to ohms. A reading of 'OL' (open loop) confirms a failed heater element. A good sensor should read between 11-16 ohms at 68°F (20°C).
- If no visible wiring issues are found and the sensor heater is confirmed bad, replace the Bank 1, Sensor 3 oxygen sensor.
- After replacement, clear the trouble code with the scanner and perform a drive cycle to ensure the Check Engine Light does not return.
Parts You'll Likely Need
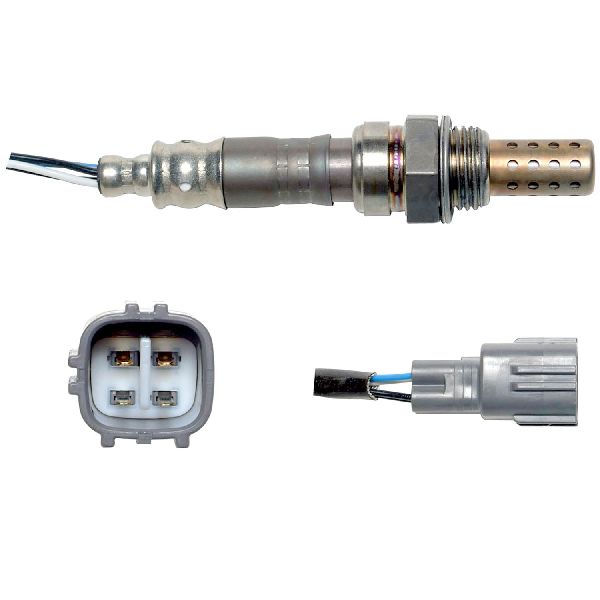
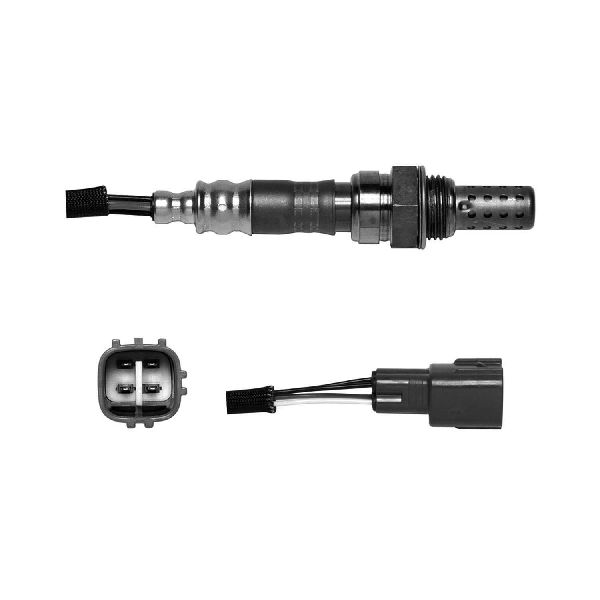
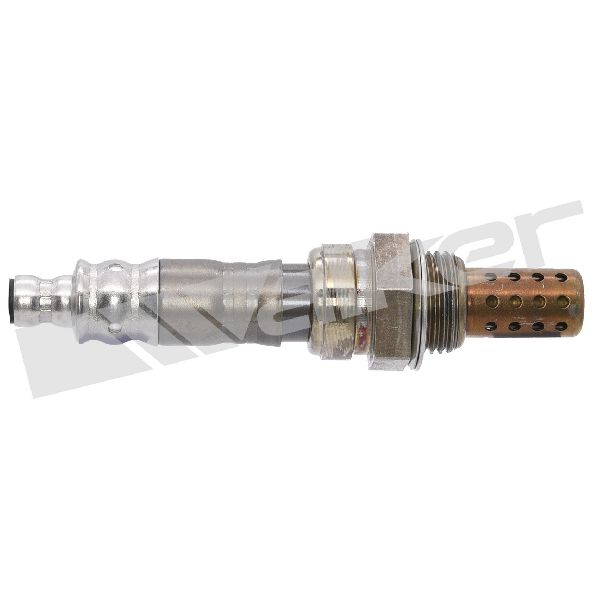
- Oxygen Sensor (Bank 1, Sensor 3)
(OEM #89465-06150)— This is the rearmost oxygen sensor that monitors the final catalytic converter. It is a common failure point and the direct cause of the P0142 code. Ensure the replacement has the correct wire length and floor grommet to reach the interior connector. This part is specific to California-spec (PZEV) models.
Trusted brands: Denso (OEM supplier) - Part #234-4603, NTK, Bosch
OEM price range: $115-$165
Aftermarket price range: $70-$150
Platform-Specific Known Issues
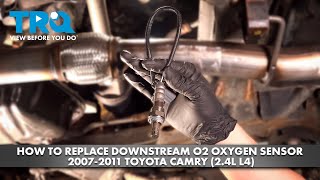
- The primary vehicle-specific issue is the location of the Sensor 3 electrical connector. It is found inside the cabin, under the driver's seat and carpet, requiring seat removal for access. 🎬 Watch: A complete walkthrough of the P0142 diagnosis and seat removal. Aftermarket sensors may not come with the correct floor grommet, requiring you to carefully transfer the old one. A video shows a user needing to slit the new grommet to fit it over the wire.
Mechanic-Grade Diagnostic Values
- O2 Sensor Heater Circuit Resistance — expected: 11 - 16 Ω at 20°C (68°F). Failure: A reading of 'OL' (Open Loop/infinite resistance) or a value outside the specified range indicates a failed heater element.
- O2 Sensor Signal Voltage (Live Data) — expected: Relatively stable voltage, typically >0.5V when the catalyst is hot and efficient.. Failure: For a P0142 circuit code, the voltage will be stuck at 0V, a fixed non-fluctuating value, or have no reading at all.
Hidden / Shadow Codes Worth Checking
- INF 29: Open in Heater Circuit. This specifies the failure is an open circuit (like a broken wire or failed heater element) in the O2 sensor's heater. (see via Toyota Techstream software or other advanced, professional-grade scan tools.)
- INF 30: Short in Heater Circuit. This specifies the failure is a short circuit in the O2 sensor's heater wiring. (see via Toyota Techstream software or other advanced, professional-grade scan tools.)
- INF 97: Open in Sensor Signal Circuit. This points to a break in the wire that carries the voltage signal from the sensor to the ECM. (see via Toyota Techstream software or other advanced, professional-grade scan tools.)
- INF 98: Short in Sensor Signal Circuit. This indicates the sensor's signal wire is shorted to ground or another wire. (see via Toyota Techstream software or other advanced, professional-grade scan tools.)
Scan Tool Commands That Help
- Toyota Techstream: Active Test: O2 Sensor Heater — After confirming the P0142 code, this command allows the technician to manually turn the sensor's heater ON and OFF. By monitoring the circuit's current draw with an ammeter or on the live data screen, you can verify if the heater, relay, and wiring are capable of completing the circuit. No current draw when commanded ON points to an open circuit.
- Toyota Techstream: Data List — This function is used to monitor the live voltage output of the O2 sensor (O2S B1 S3). For a P0142, a technician would look for a signal that is absent, stuck at 0 volts, or stuck at a fixed voltage, which confirms the circuit is not operating correctly.
Wiring & Ground Locations
- ECM Connector E5 — The Engine Control Module (ECM) is located in the engine bay. Connector E5 is one of the main plugs into the ECM.. This connector contains the specific pins for the Bank 1 Sensor 3 circuit. Testing for voltage and continuity at these pins can isolate a wiring problem from a failed sensor or faulty ECM. The specific pins are: Pin 16 (HT3 - Heater Control), Pin 28 (OX3 - Sensor Signal), and Pin 27 (E2 - Sensor Ground).
- Ground Point EB — Located in the left side of the engine compartment, typically on the radiator support or inner fender.. This is a common grounding point for various engine bay components. A corroded or loose connection at this ground can introduce electrical noise or high resistance into sensor circuits, potentially causing erratic behavior or fault codes like P0142.
- Sensor 4-Pin Connector — Inside the cabin, under the driver's seat, beneath the carpet.. This is the primary disconnection point for the sensor. Pin assignments are typically: Pin 1 (B+ for heater), Pin 2 (HT for heater control), Pin 3 (E2 for sensor ground), Pin 4 (OX for sensor signal). Testing can be performed here to determine if the fault is in the sensor itself or in the harness going to the ECM.
Real Owner Repair Stories
- Forum discussions and mechanic reports (2007-2011 Toyota Camry 2.4L) — Persistent P0142 Check Engine Light.
❌ Tried (didn't work) Replacing the Bank 1 Sensor 3 oxygen sensor, sometimes multiple times.
✅ What actually fixed it A broken wire was found in the harness between the under-floor grommet and the sensor connector. The constant exposure to road debris, water, and vibration caused the wire to fatigue and break internally, creating an open circuit that a visual inspection might miss. Repairing the broken wire resolved the code.
OEM Part Supersession History
89465-33440→89465-06150— Part number consolidation and potential minor design updates by the manufacturer.
Heads up: The parts are generally interchangeable for the specified applications, but it is always best to use the latest part number (89465-06150) when ordering.
Diagnostic Flowchart
Other Known Issues on This Vehicle
Issues unrelated to this code that are worth knowing about as an owner of this generation:
- Excessive Oil Consumption 🔴 High — Very common on 2007-2009 models with the 2AZ-FE engine. Caused by a faulty piston ring design. Many owners report consuming 1 quart of oil every 1,000-1,200 miles. If left unchecked, it can lead to catastrophic engine failure. (Ref: Toyota issued TSB-0094-11 and later an extended warranty program (ZE7) to address this. The official fix involved replacing the pistons and piston rings. The acceptable consumption rate per Toyota was 1 quart per 1,200 miles.)
- Melting / Sticky Dashboard 🟡 Low — Extremely common in warm, humid climates. The dashboard material degrades under heat and sun exposure, becoming shiny, sticky, and sometimes cracking. (Ref: Toyota initiated Warranty Enhancement Program ZE6, which extended the warranty to cover dashboard replacement. This program has since expired, but it acknowledged the widespread defect.)
- Transmission Shudder/Hesitation 🟠 Medium — Some owners of 2007-2009 models report a hesitation or shudder, particularly in lower gears. This is sometimes attributed to old fluid, but can also be an early sign of torque converter issues.
- Water Pump Leak 🟠 Medium — The water pump on both the 4-cylinder and V6 engines can develop slow leaks with age. This is often identified by a pink, crusty residue near the front of the engine or a faint smell of coolant after driving.
Used vs. New Parts: Buying Guide for This Vehicle
When a used part is the smart pick: For this repair, using a used part is almost never a smart choice. The oxygen sensor is a wear-and-tear item with a finite lifespan. Given the significant labor involved (removing the driver's seat), the cost savings of a used sensor are not worth the risk of premature failure.
Donor-vehicle mileage cap: roughly under 50000 miles for the part to have meaningful remaining life.
What to inspect on the donor part:
- Verify the donor vehicle has low mileage (<50,000 miles).
- Inspect the sensor tip; it should be light tan, not coated in black soot or white ash.
- Ensure the wiring harness is intact, flexible, and has no signs of cracking, melting, or repairs.
- Confirm the electrical connector is clean, with no corrosion or bent pins.
Aftermarket brands forum-validated for this vehicle:
- Denso (OEM supplier)
- NTK
Brands owners have reported issues with on this vehicle:
- Universal sensors (that require splicing wires)
- No-name or unbranded sensors from online marketplaces
- Bosch sensors have a mixed reputation in Toyota applications and are best avoided for this specific repair to ensure compatibility.
Real Owner Stories
Aggregated from forums and TSBs cited above. Mileages and costs reflect what owners reported in those sources.
2005 Toyota Camry 2.4L
Symptoms: The P0142 check engine light would not go away, even after replacing the oxygen sensor twice with new Denso parts.
What fixed it: Sensor replacement did not resolve the issue, leading to the conclusion that the problem was likely a more complex wiring or PCM issue.
Source hint: Reddit r/MechanicAdvice - '2005 camry 4cyl P0142 will not go away!'
2005 Toyota Camry
Symptoms: Check Engine Light was on with code P0142.
What fixed it: The issue was resolved by replacing the Bank 1, Sensor 3 oxygen sensor. The repair required removing the driver's seat to access the sensor's electrical connector inside the car.
Source hint: YouTube - 'Toyota Camry Rear O2 Sensor P0142 Bank 1 Sensor 3 Diagnose & Replace'
Related OBD-II Codes
Frequently Asked Questions
Where is the electrical connector for the Bank 1, Sensor 3 oxygen sensor on my Camry?
What resistance should a good O2 sensor show when I test it?
I replaced the sensor but the P0142 code came back. What else could be wrong?
Do I need a special tool to replace this oxygen sensor?
Are there any issues with using an aftermarket sensor for this repair?
What other Toyota vehicles have this same P0142 sensor setup?
Helpful Videos

We Have This Part in Stock


The information in this article is provided for general reference and educational purposes only. Vehicle specifications, procedures, and part compatibility can vary by production date, trim level, and region. Always consult your vehicle's factory service manual and verify part numbers before purchasing or performing repairs. Safety-critical components such as airbags, seat belts, and braking systems should be installed by a qualified professional.
- Toyota Camry:
- 🧭 Diagnostic Flowchart
- 🎬 Helpful Videos
- 🛍️ Shop This Part
- What's Unique About the 2007-2011 Toyota Camry
- Symptoms You May Notice
- Most Likely Causes
- Rare But Worth Checking
- Diagnosis Steps
- Parts You'll Likely Need
- Platform-Specific Known Issues
- Mechanic-Grade Diagnostic Values
- Hidden / Shadow Codes Worth Checking
- Scan Tool Commands That Help
- Wiring & Ground Locations
- Real Owner Repair Stories
- OEM Part Supersession History
- Other Known Issues on This Vehicle
- Used vs. New Parts: Buying Guide for This Vehicle
- Real Owner Stories
- 2005 Toyota Camry 2.4L
- 2005 Toyota Camry
- Related OBD-II Codes
- Frequently Asked Questions
- 🎟️ Get 5% Off