
P0325 on 2009-2016 Audi A4 2.0T: Knock Sensor Circuit Malfunction Causes and Fixes
P0325 on a B8/B8.5 Audi A4 2.0T almost always indicates a failed knock sensor or its wiring harness. The part is inexpensive, but it is located under the intake manifold, making for a labor-intensive repair costing $700-$1300, mostly in labor.
- P0325 on a 2009-2016 Audi A4 2.0T indicates a fault in the knock sensor's electrical circuit, not necessarily an actual engine knock.
- The primary cause is usually a failed sensor or its wiring harness.
- The biggest challenge of this repair is the sensor's location; it is buried under the intake manifold, making it a labor-intensive job (4-6 hours).
- Due to the high labor cost, always replace the knock sensor, its wiring pigtail, and the intake manifold gaskets at the same time.
- The new knock sensor MUST be torqued to the correct specification (20 Nm or 15 ft-lbs) to function properly.
What's Unique About the 2009-2016 Audi A4
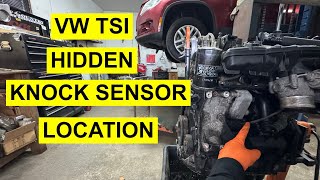
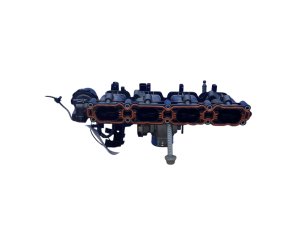
The primary challenge with a P0325 code on the Audi A4 with the 2.0T TFSI (EA888) engine is the physical location of the knock sensor. It is buried deep on the engine block, underneath the intake manifold and behind the water pump/thermostat assembly. This placement turns what would be a simple sensor replacement on many other cars into a significant, labor-intensive job that requires removing the throttle body, fuel rail, and intake manifold. Because of the high labor cost to access the sensor, it is standard practice to replace the sensor, its wiring pigtail, and the intake manifold gaskets at the same time.
Generation note: The 2009-2016 year range covers the Audi A4 B8 and B8.5 generations. The 2.0T TFSI engine (EA888 Gen 2) and the location of the knock sensor are consistent across these generations, so the causes and repair procedures are the same. Early B8 models (2009-2011) are particularly known for oil consumption issues which can create other engine problems, but the P0325 fault is consistent across the generation.
Symptoms You May Notice
- Check Engine Light is on
- Reduced engine power and sluggish acceleration
- Hesitation during acceleration
- Poor fuel economy
- Engine may run rough or idle unevenly
- Pinging or knocking noises from the engine (in rare cases when the sensor fails to detect a real knock event)
- Failing an emissions test
- Replacing the ECM when the actual fault is in the wiring or the sensor itself.
- Replacing spark plugs or ignition coils, assuming the reduced power is from a misfire, without addressing the P0325 code first.
- Assuming the code indicates actual engine knock, rather than a circuit fault. P0325 is an electrical code, not a performance code.
Most Likely Causes
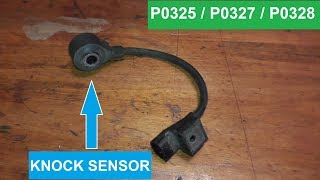
- Failed Knock Sensor 🔴 High Probability → Shop Ignition Knock (Detonation) Sensor The sensor is located in a high-heat area of the engine bay, and prolonged exposure to heat and vibration can cause the internal piezoelectric element to fail. Coolant leaks from the nearby plastic water pump or thermostat housing are extremely common and can drip directly onto the sensor and its connector, causing failure.
How to confirm: After gaining access to the sensor, test its internal resistance with a multimeter. A good sensor may have a very high resistance (e.g., 500-600 kΩ), while others should read as an open circuit. A definitive short or low resistance reading indicates a faulty sensor. The most reliable confirmation is substitution with a known-good sensor. One Audi-specific source states that you should read an open circuit between the two sensor pins; any resistance reading indicates a faulty sensor.
Typical fix: Replace the knock sensor. It is critical to use a torque wrench and tighten the new sensor to the manufacturer's specification of 20 Nm (15 ft-lbs) to ensure it functions correctly. Improper torque will lead to incorrect readings and a potential re-triggering of the code.
Est. part cost: $40-$150 - Damaged Knock Sensor Wiring or Connector 🔴 High Probability → Shop Ignition Knock (Detonation) Sensor The wiring harness and its green connector are located under the intake manifold, near the water pump and thermostat. This area is prone to heat damage, which makes the wiring brittle, and contamination from common coolant leaks, which can corrode the connector pins and wires. Rodents are also known to chew on these wires as they are made with soy-based materials.
How to confirm: Visually inspect the wiring for breaks, fraying, or signs of melting. Check the green connector for green or white crusty corrosion from coolant intrusion or loose pins. Perform a continuity test on the wires from the sensor connector to the ECM.
Typical fix: Repair the damaged section of the wire or replace the entire knock sensor wiring pigtail. Clean any corrosion from the connector with electrical contact cleaner. Due to the labor involved, it is almost always recommended to replace the pigtail when replacing the sensor.
Est. part cost: $25-$60
Rare But Worth Checking
- Loose Knock Sensor: → Shop Ignition Knock (Detonation) Sensor The knock sensor must be torqued to a specific value (20 Nm) to work correctly. If it was improperly installed or has loosened over time, it can't detect engine vibrations accurately, triggering a circuit fault code. Always check the bolt torque before replacing the sensor.
- Faulty Engine Control Module (ECM): → Shop Engine Control Module (ECM) While very rare, it is possible for the internal circuit of the ECM that processes the knock sensor signal to fail. This should only be considered after definitively ruling out the sensor and its entire wiring circuit with continuity and voltage tests.
- Poor Engine Ground Connection: A corroded or loose main engine ground strap can introduce electrical noise into the system, potentially causing the ECM to receive an erratic signal from the knock sensor. This is an easy check and should be performed early in the diagnosis.
Diagnosis Steps
- Scan the vehicle with an OBD-II scanner to confirm the P0325 code and check for any other related codes.
- Inspect the main engine ground straps for tightness and corrosion. Clean or tighten as necessary.
- Using a flashlight and mirror, attempt to locate the green knock sensor connector under the rear of the intake manifold. Inspect it for obvious damage, corrosion from coolant, or rodent chew marks.
- If the connector is accessible, disconnect it and test the sensor. The resistance between the two signal pins can vary, but a short circuit is a definitive failure. Some sources suggest a reading of 500-600 kΩ is normal for this type of sensor.
- If the sensor and connector appear okay, the next step requires significant disassembly. You will need to remove the intake manifold to access the sensor and its wiring directly. This is a 4-6 hour job.
- Once the intake manifold is removed, thoroughly inspect the knock sensor wiring harness for any signs of heat damage, brittleness, or breaks. Check for coolant residue stains indicating the source of a leak.
- Check that the knock sensor bolt is torqued correctly to 20 Nm (15 ft-lbs).
- If the wiring is good and the bolt is tight, the knock sensor itself is the most likely culprit.
- Replace the knock sensor and, due to the labor involved, it is highly recommended to also replace the wiring pigtail and intake manifold gaskets.
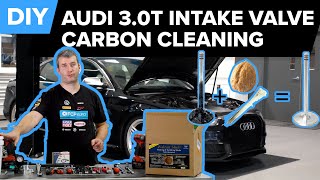
- While the intake manifold is off, this is the ideal time to perform a carbon cleaning service on the intake valves, which is a common maintenance item on the 2.0T TFSI engine.
- Reassemble the components, clear the trouble code, and perform a test drive to ensure the repair was successful.
Parts You'll Likely Need
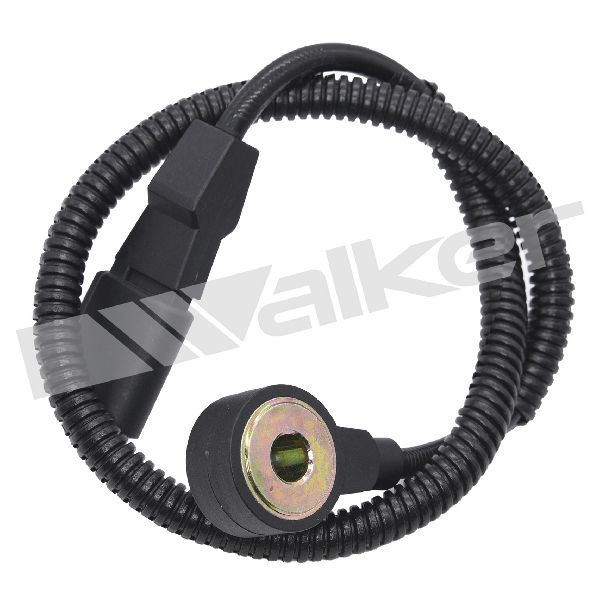
- Knock Sensor
(OEM #06H905377)— This is the most common failure point for code P0325. The sensor's internal components fail over time due to heat and vibration, or from contamination by leaking coolant.
Trusted brands: Bosch, NGK/NTK, Genuine VW/Audi
OEM price range: $100-$150
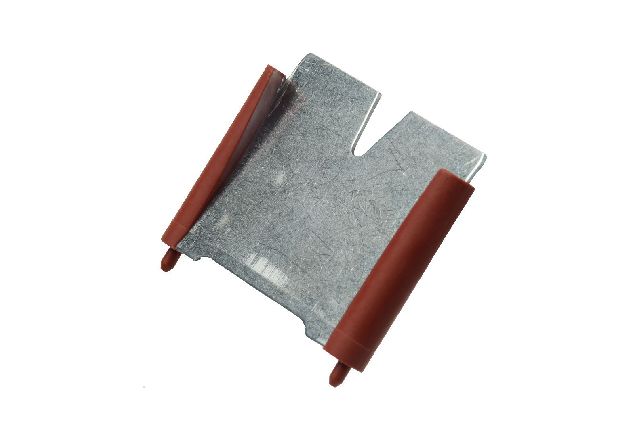
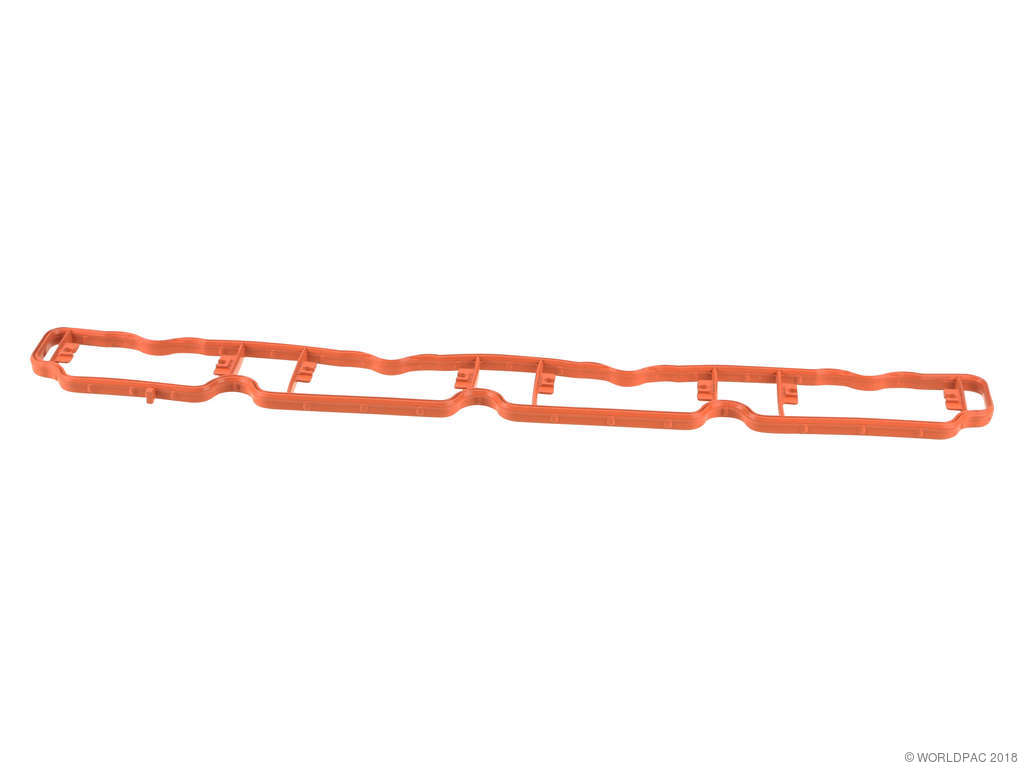
Aftermarket price range: $40-$80 - Intake Manifold Gasket Set
(OEM #06F129717D)— The intake manifold must be removed to access the knock sensor. The gaskets are a one-time use part and must be replaced to prevent vacuum leaks.
Trusted brands: Victor Reinz, Elring, Genuine VW/Audi
OEM price range: $30-$50
Aftermarket price range: $15-$30 - Knock Sensor Wiring Harness/Pigtail
(OEM #1J0973702)— The wiring is a frequent point of failure due to heat and potential oil/coolant contamination. It is highly recommended to replace it along with the sensor. The connector itself is part number 1J0973702.
Trusted brands: Bosch, Standard Motor Products, Genuine VW/Audi
OEM price range: $40-$60
Aftermarket price range: $25-$40
Related Codes That Often Appear With This One
- P0327 (Knock Sensor 1 Circuit Low)
- P0328 (Knock Sensor 1 Circuit High)
- Codes related to coolant temperature or system performance if a leak is the root cause of the sensor failure.
Platform-Specific Known Issues
- The knock sensor is located under the intake manifold, making replacement a labor-intensive job with 4-6 hours of book time.
- Due to the difficult access, it is common practice to perform other 'while-you're-in-there' services, such as intake valve carbon cleaning and replacing the nearby plastic water pump if it's original.
- Coolant leaks from the original plastic water pump (P/N 06H121026DD) are a very common failure point and a likely contributor to the knock sensor circuit failure by corroding the connector. Many owners upgrade to a metal-housed water pump.
- A YouTuber, NaptownTuner, who has extensive experience with this engine, notes that while he has replaced pistons for oil consumption over a thousand times, he has rarely had to replace a knock sensor on this platform unless the wiring was physically damaged by rodents or corrosion.
Mechanic-Grade Diagnostic Values
- Knock Sensor Internal Resistance — expected: Open circuit (infinite resistance) between the two pins.. Failure: Any resistance reading, including a short (0 ohms) or a specific value, indicates a faulty sensor according to Audi workshop manuals.
- Engine-to-Chassis Ground Voltage Drop — expected: Less than 0.15 volts at idle with the engine at operating temperature.. Failure: A reading higher than 0.15V indicates a degraded main engine ground strap, which can cause electrical noise and trigger sensor circuit codes.
- Knock Sensor Signal Voltage (Tapping Test) — expected: When tapping on the engine block near the sensor with a wrench (engine off), a small AC voltage should be generated, visible on a multimeter.. Failure: No voltage produced during the tapping test suggests the sensor's piezoelectric element is dead.
Scan Tool Commands That Help
- VCDS (VAG-COM): Advanced Measuring Values (Groups 020-029) — Use this to monitor the live signal from the knock sensor circuit. A technician can observe sensor voltage, ignition timing retardation per cylinder, and other knock control parameters in real-time. A static, zero, or out-of-range voltage reading confirms a circuit fault, helping to distinguish between a sensor/wiring issue and an actual engine knock problem.
Wiring & Ground Locations
- Knock Sensor 1 (G61) Connector — A green 2-pin connector located on the engine block, underneath the rear of the intake manifold, behind the water pump.. This is the primary connection point for the sensor. It is highly susceptible to corrosion from common coolant leaks from the water pump/thermostat housing directly above it, and heat damage from its location.
- G105 (Engine-to-Firewall Ground) — A ground strap connecting the engine block to the vehicle's firewall.. This is a primary ground path for the engine. Degradation from heat and vibration is common and can cause a voltage drop, leading to electrical noise that can interfere with sensitive sensor signals like the knock sensor, potentially triggering a circuit fault code.
- G104 (Transmission-to-Chassis Ground) — The primary ground located on the transmission bellhousing.. As the main ground for the engine/transmission assembly, corrosion or looseness here can cause a wide range of difficult-to-diagnose electrical issues, including sensor circuit faults.
Real Owner Repair Stories
- Go-Parts research article citing forum data (2009-2016 Audi A4 2.0T) — Check engine light with code P0325.
❌ Tried (didn't work) Not specified, but implies that simply clearing the code was ineffective.
✅ What actually fixed it Replacing the knock sensor and ensuring the new sensor's mounting bolt was torqued precisely to the 20 Nm specification. The user noted the importance of correct torque to avoid repeating the labor-intensive job.
OEM Part Supersession History
06H905377→06K905377E (or similar revisions like 06E905377J, 06E905377A)— Standard part revisions for improved reliability or manufacturing changes.
Heads up: While multiple part numbers exist (e.g., 06K905377B, 06E905377A), they are generally cross-compatible in terms of fit and function for this application. The key is to use a quality OEM or reputable aftermarket brand, as the physical dimensions and connector are consistent.
Model Year Variations Within This Range
- 2009-2016: For the North American market, all B8 and B8.5 A4 models used the EA888 Gen 2 engine. While many parts were revised throughout the production run, the fundamental engine architecture, knock sensor location, and repair procedure for P0325 remained consistent. The primary difference noted by owners is the severe oil consumption issue in early B8 models (2009-2011), which is a separate issue but can contribute to overall engine health problems.
Diagnostic Flowchart
Other Known Issues on This Vehicle
Issues unrelated to this code that are worth knowing about as an owner of this generation:
- Excessive Oil Consumption 🔴 High — Very common on 2009-2011 models (CAEB engine code). Caused by faulty piston ring design. Can require new pistons and rings to fix. Less common on 2012+ models after a design update. (Ref: Multiple TSBs were issued, and a class-action lawsuit resulted in an extended warranty for this issue for some owners.)
- Timing Chain Tensioner Failure 🔴 High — Common on earlier EA888 Gen 2 engines (pre-2013). The original tensioner design can fail, allowing the timing chain to jump, causing catastrophic engine damage. An updated tensioner was later released. (Ref: A TSB was released detailing the inspection and replacement procedure. A class-action lawsuit also addressed this issue.)
- Water Pump / Thermostat Failure 🟠 Medium — Extremely common. The original water pump has a plastic housing that cracks or the gasket fails, causing coolant leaks. Often fails between 30,000-80,000 miles.
- Intake Valve Carbon Buildup 🟠 Medium — Inevitable on all TFSI (direct injection) engines. Causes reduced power, rough idle, and misfires over time. Typically requires manual cleaning (walnut blasting) every 40,000-60,000 miles.
- PCV Valve Failure 🟡 Low — Common failure item. The diaphragm can tear, causing a large vacuum leak, a whistling noise, high oil consumption, and various lean or misfire codes. Relatively inexpensive and easy to replace.
Used vs. New Parts: Buying Guide for This Vehicle
When a used part is the smart pick: A used knock sensor is generally not recommended. The part is relatively inexpensive new, and its failure is often due to age, heat cycles, and vibration. A used sensor carries the same risk of failure. The primary cost of this repair is the 4-6 hours of labor to access the part, so installing a used sensor is a significant gamble that could lead to repeating the entire job. A used wiring pigtail could be a viable option if it is in excellent condition with no signs of brittleness or corrosion.
Donor-vehicle mileage cap: roughly under 50000 miles for the part to have meaningful remaining life.
What to inspect on the donor part:
- For wiring pigtail: Check for flexibility; the plastic should not be brittle or cracked.
- Inspect the connector for any signs of green or white corrosion from coolant leaks.
- Ensure the locking tab on the connector is intact and functional.
- Verify there are no signs of rodent damage or chewed wires.
OEM-only on this vehicle (don't cheap out):
- Knock Sensor: While top-tier aftermarket brands like Bosch or NTK are reliable, avoiding no-name, cheap online parts is critical. An out-of-spec sensor can fail to detect knock or trigger the code again, forcing a repeat of the expensive labor.
Aftermarket brands forum-validated for this vehicle:
- Bosch (often the OEM supplier)
- NGK/NTK
- Victor Reinz (for gaskets)
- Elring (for gaskets)
Brands owners have reported issues with on this vehicle:
- Unbranded, low-cost sensors from online marketplaces are frequently cited in forums as being unreliable or failing shortly after installation.
Real Owner Stories
Aggregated from forums and TSBs cited above. Mileages and costs reflect what owners reported in those sources.
2012 Audi A4 2.0T TFSI
Symptoms: The owner noted that while they have performed extensive engine work like piston replacements for oil consumption, they rarely see the sensor itself fail unless there is physical damage.
What fixed it: Repair of wiring physically damaged by rodents or corrosion.
Source hint: Vehicle specific issues citing YouTuber NaptownTuner
2010 Audi A4 2.0T TFSI — ~55000 miles
Symptoms: Coolant leaks from the original plastic water pump housing led to sensor circuit failure.
What fixed it: Replacement of the knock sensor and upgrading the water pump to a metal-housed version.
Source hint: Vehicle specific issues and Audizine Forums
Related OBD-II Codes
Frequently Asked Questions
Where is the knock sensor located on my 2009-2016 Audi A4 2.0T?
Why did my knock sensor fail shortly after my water pump started leaking?
What is the correct torque specification for the knock sensor bolt on the EA888 engine?
Should I replace the wiring pigtail when I replace the sensor?
Are there other services I should perform while the intake manifold is off for the P0325 repair?
Can I test the knock sensor with a multimeter before taking the engine apart?
Helpful Videos

![Carbon Cleaning Audi A5 (2013 B8.5) | Walnut Blasting! [Part 2]](https://img.youtube.com/vi/yIj4oWjfeBY/mqdefault.jpg)
Used OEM Parts in Stock
New Aftermarket Parts Available


The information in this article is provided for general reference and educational purposes only. Vehicle specifications, procedures, and part compatibility can vary by production date, trim level, and region. Always consult your vehicle's factory service manual and verify part numbers before purchasing or performing repairs. Safety-critical components such as airbags, seat belts, and braking systems should be installed by a qualified professional.
- Audi A4:
- 🧭 Diagnostic Flowchart
- 🎬 Helpful Videos
- 🛍️ Shop This Part
- What's Unique About the 2009-2016 Audi A4
- Symptoms You May Notice
- Most Likely Causes
- Rare But Worth Checking
- Diagnosis Steps
- Parts You'll Likely Need
- Related Codes That Often Appear With This One
- Platform-Specific Known Issues
- Mechanic-Grade Diagnostic Values
- Scan Tool Commands That Help
- Wiring & Ground Locations
- Real Owner Repair Stories
- OEM Part Supersession History
- Model Year Variations Within This Range
- Other Known Issues on This Vehicle
- Used vs. New Parts: Buying Guide for This Vehicle
- Real Owner Stories
- 2012 Audi A4 2.0T TFSI
- 2010 Audi A4 2.0T TFSI — ~55000 miles
- Related OBD-II Codes
- Frequently Asked Questions
- 🎟️ Get 5% Off