
P0460 on 2011-2023 Dodge Charger: Fuel Level Sensor Circuit Malfunction Causes and Fixes
This code indicates a problem with the fuel level sensor circuit. The most common fix is replacing the fuel level sending unit, which is located in the fuel tank and often part of the fuel pump module. Expect to pay $100-$200 for the part and 2-3 hours of labor.
- P0460 on a Dodge Charger means there's a fault in the primary fuel level sensor circuit.
- The most common cause is a failed fuel level sending unit, which is usually part of the driver's side fuel pump module.
- Symptoms are straightforward: an erratic or non-functional fuel gauge and a Check Engine Light.
- Diagnosis involves checking wiring under the rear seat before condemning the sending unit.
- This repair involves accessing the fuel tank and is best left to a professional due to the fire hazard.
What's Unique About the 2011-2023 Dodge Charger
The Dodge Charger uses a saddle-style fuel tank to accommodate the driveshaft for its rear-wheel-drive (and all-wheel-drive) layout. This design requires two separate fuel level sending units—one on the driver's side (often integrated with the main fuel pump) and a secondary one on the passenger's side. The P0460 code specifically points to the primary sensor, designated as 'A', but a failure in either sensor or the wiring to them can cause issues with the fuel gauge and trigger this code.
Generation note: The 2011-2023 year range covers the Dodge Charger (LD) platform, which received a major facelift for the 2015 model year. While the fundamental fuel system design is similar, specific part numbers for the fuel pump modules and sending units may differ between the 2011-2014 and 2015-2023 models. Always verify the correct part for your specific year and engine. A key change occurred with updated fuel pumps which require a new, repinned wiring connector to be spliced in.
Symptoms You May Notice
- Check Engine Light is on
- Fuel gauge behaving erratically (swinging from full to empty)
- Fuel gauge stuck in one position (e.g., always on full or always on empty)
- Low fuel warning light comes on intermittently or stays on even with a full tank
- Vehicle runs out of fuel unexpectedly despite the gauge showing fuel remaining
- Remote start feature is disabled
- Replacing the instrument cluster: The fuel gauge itself is rarely the problem. A scan tool can perform a 'gauge sweep test' to confirm the instrument cluster is working correctly before any parts are replaced.
- Replacing the wrong sending unit: Since the Charger has two fuel level sensors, it's important to diagnose which one ('A' or 'B' circuit) is causing the fault. P0460 specifically points to the 'A' circuit, which is typically the primary sensor on the driver's side.
Most Likely Causes
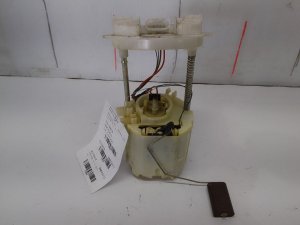
- Faulty Fuel Level Sending Unit 🔴 High Probability → Shop Fuel Tank Sending Unit The sending unit has a mechanical float and an electrical resistor that can wear out over time from constant movement and exposure to fuel, leading to erratic or incorrect readings.
How to confirm: A technician can use a scan tool to monitor the fuel level sensor's voltage or resistance in real-time. If the reading is stuck or doesn't change smoothly as the fuel level changes, the sending unit is likely bad. Resistance can also be tested directly at the unit with a multimeter; an open circuit (infinite resistance) or a value that doesn't change when the float is moved indicates failure. The expected resistance range for many Chrysler/Dodge vehicles is approximately 73 ohms at empty and 10 ohms at full.
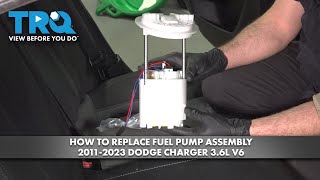
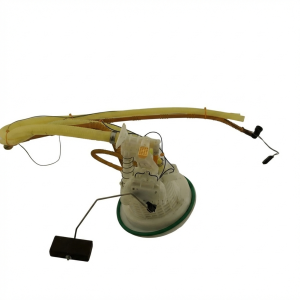
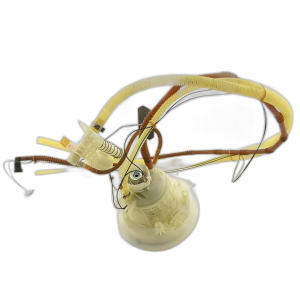
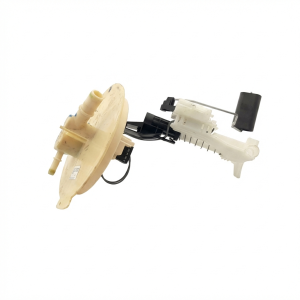
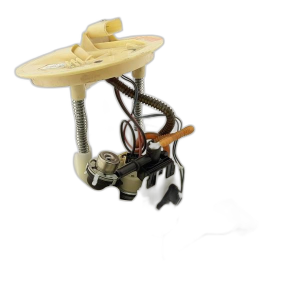
Typical fix: Replace the faulty fuel level sending unit. On the Charger, there are two units. The primary ('A' circuit) is often part of the driver's side fuel pump module, while the secondary is on the passenger side. It is common practice to replace the entire fuel pump module assembly. 🎬 See this step-by-step fuel pump replacement walkthrough
Est. part cost: $80-$250 - Damaged Wiring or Corroded/Melted Connectors 🟡 Medium Probability The wiring harness leading to the fuel tank is located underneath the vehicle, exposed to moisture and road debris, which can cause corrosion or physical damage over time. The connectors on top of the fuel tank access panels (under the rear seat) are a common failure point for corrosion and melting due to high resistance.
How to confirm: Visually inspect the wiring harness and connectors going to the fuel pump modules, which are accessible under the rear seat cushion. Check for chafed wires, bent pins, or green/white corrosion on the connector terminals. A melted plastic connector is a definitive sign of a poor connection causing high current draw or resistance. A multimeter can be used to check for continuity and shorts to power or ground in the signal circuit between the BCM and the fuel pump connector.
Typical fix: Repair the damaged section of the wire or replace the corroded/melted connector. In many cases, a new connector pigtail is required. TSB 08-152-23 details a required connector replacement when installing an updated fuel pump. 🎬 Watch: How to inspect and replace a damaged fuel pump connector
Est. part cost: $10-$50
Rare But Worth Checking
- Faulty Body Control Module (BCM) or Powertrain Control Module (PCM): → Shop Engine Control Module (ECM) This is very uncommon. Before condemning the BCM or PCM, all other possibilities, including the sending unit and wiring, must be exhaustively ruled out. In some cases, a software glitch can be the cause, and a dealer reflash may resolve the issue.
- Stuck Fuel Level Float: The mechanical float arm can get stuck due to debris in the tank or if the vehicle has been sitting for a very long time, preventing it from moving with the fuel level.
- BCM Software Glitch: On some Chrysler/Dodge vehicles, erratic electronic behavior, including gauge issues, can be traced to software problems within the Body Control Module. A dealer may need to reflash the BCM with updated software. TSB 08-022-14 is an example of such an update for various electrical issues.
Diagnosis Steps
- Scan the vehicle for all stored trouble codes. If P0462 or P0463 are present, they can help pinpoint the electrical nature of the fault (short vs. open circuit).
- Use a scan tool to observe the live data for 'Fuel Level Sensor A' voltage or resistance. The reading should be stable and correspond to the known amount of fuel in the tank.
- Gain access to the fuel pump modules by removing the rear seat bottom cushion. There are access panels on both the driver's and passenger's sides.
- Visually inspect the wiring and connectors on top of the fuel pump modules for any signs of damage, corrosion, or melting.
- If wiring looks good, disconnect the connector for the primary fuel pump module (driver's side) and test the signal and ground circuits for proper voltage and continuity back to the BCM/PCM, following the vehicle's service manual.
- If the wiring tests okay, the fault is most likely with the fuel level sending unit itself. Test the resistance of the sending unit directly at its terminals. The resistance should change as the float arm is moved. If it's out of spec (approx. 10-73 ohms for Mopar) or doesn't change, the unit has failed.
- Replace the faulty sending unit, which is typically sold as part of the complete fuel pump module assembly.
Parts You'll Likely Need
- Fuel Pump and Sending Unit Assembly (Driver Side/Primary)
(OEM #Varies by year/engine. Examples: 68103913AF (2011-2016 5.7L/6.4L), 68476689AB (2021-2023 V6/5.7L).)— This is the most common cause of P0460. The sending unit fails electrically or mechanically, and it is typically integrated with the main fuel pump in a single module.
Trusted brands: Mopar, Delphi, Spectra Premium, Carter
OEM price range: $150-$280
Aftermarket price range: $100-$180 - Fuel Level Sending Unit (Passenger Side/Secondary)
(OEM #Varies by year/engine. Example: 5136023AF (2015+ V6/V8).)— While P0460 points to the primary sensor, sometimes both sensors are replaced as a preventative measure, or if a P2065 code for the 'B' circuit is also present.
Trusted brands: Mopar, Dorman, Spectra Premium
OEM price range: $100-$150
Aftermarket price range: $80-$120 - Fuel Pump Module Connector Pigtail
(OEM #Included in revised fuel pump kits (e.g., K6855971 instruction sheet).)— The connector on top of the fuel pump module is a frequent failure point, suffering from corrosion or melting. Additionally, updated Mopar fuel pumps have a different pin layout and require this new connector to be spliced into the body harness per TSB 08-152-23.
Trusted brands: Mopar, Dorman
OEM price range: $20-$40
Aftermarket price range: $15-$30
Related Codes That Often Appear With This One
- P0462 — This code indicates 'Fuel Level Sensor 'A' Circuit Low Input,' meaning the signal voltage is below the expected range, often due to a short to ground in the wiring or a failed sensor.
- P0463 — This code indicates 'Fuel Level Sensor 'A' Circuit High Input,' meaning the signal voltage is higher than expected. This is commonly caused by an open circuit from a broken wire, a bad connector, or a completely failed sending unit.
- P2065 — This code refers to the 'Fuel Level Sensor 'B' Circuit,' which is the secondary sending unit on the passenger side of the fuel tank. Problems in the fuel tank wiring or a failing sensor can sometimes trigger faults for both circuits.
Technical Service Bulletins (TSBs) & Recalls
- TSB 08-022-14: This Technical Service Bulletin involves a software update for the Body Control Module (BCM) for a variety of electrical issues on 2014 models. While not directly for P0460, an updated BCM calibration can sometimes resolve erratic sensor readings.
- TSB 08-152-23: This bulletin is critical. It states that when replacing the fuel pump module, the wiring harness connector MUST also be replaced with an updated pigtail because the pin layout on the new pumps is different. Failure to do this will result in a no-start or immediate codes.
Platform-Specific Known Issues
- A known issue involves corrosion on the pins of the fuel pump module connector, located under the rear seat. Even if the wiring harness is intact, a corroded connector can cause an open or high-resistance circuit, triggering P0460. Careful inspection of the connector itself is critical.
- Another common failure is the connector melting due to high resistance and heat, causing an intermittent or total loss of connection to the fuel pump and sending unit.
Mechanic-Grade Diagnostic Values
- Fuel Level Sensor Resistance (Mopar Standard) — expected: Approximately 10 Ohms (Full) to 73 Ohms (Empty). Some sources cite ranges up to 220-250 Ohms for other Mopar applications, but 10-73 is the classic standard.. Failure: An open circuit (infinite resistance), a short (near zero ohms), or readings that do not change smoothly as the float arm is moved.
- Fuel Pump Module Connector Voltage (at BCM) — expected: The BCM provides a switched reference voltage. The return signal voltage will vary based on fuel level, typically between 0.5V (Empty) and 4.5V (Full).. Failure: Voltage stuck at 0V (short to ground), stuck near 5V (open circuit), or not changing with fuel level.
- Fuel Pump Motor Current Draw — expected: Typically 5-8 Amps for a healthy pump.. Failure: Very low amperage (e.g., under 3 Amps) may indicate the pump is spinning backward due to reversed polarity (a common issue with aftermarket pumps or incorrect wiring) or has an internal failure, even if it hums.
Hidden / Shadow Codes Worth Checking
- P0460-15: This is a manufacturer-specific sub-code. The '-15' suffix typically indicates 'Circuit Short To Battery or Open'. This strongly points to a wiring issue, such as a broken wire, a corroded/melted connector pin, or a completely failed sensor creating an open circuit. (see via Dealer-level scan tools like wiTECH or high-end professional scan tools that can read Chrysler-specific status bytes.)
Scan Tool Commands That Help
- wiTECH or equivalent professional scan tool: Instrument Cluster Gauge Sweep Test — Use this command to verify the physical fuel gauge in the dashboard is working correctly. The scan tool commands the gauge to sweep through its full range of motion. If it sweeps correctly, the instrument cluster is not the problem, and diagnosis should focus on the sensor and wiring.
- wiTECH or equivalent professional scan tool: Fuel Pump Relay Actuation — This bidirectional command allows the technician to manually turn the fuel pump on and off. It helps verify the integrity of the control circuit (BCM/PCM to relay) and the power circuit (relay to pump) independently of the ignition switch.
Wiring & Ground Locations
- Fuel Pump Module Connector (Driver's Side) — Under the rear seat cushion, on the driver's side, beneath a black circular access panel.. This is the primary connection for the 'A' circuit sensor. It is a known failure point for melting and corrosion. TSB 08-152-23 requires this connector to be replaced and re-pinned when installing a new Mopar fuel pump.
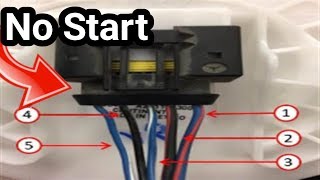
- Fuel Pump Connector Pins (New Style per TSB 08-152-23) — At the driver's side fuel pump module connector.. The new Mopar pumps have a different pinout. The new wiring is: Pin 3 = Fuel Pump Ground (-), Pin 4 = Fuel Level Sensor Signal, Pin 5 = Fuel Pump Control (+). The ground and signal wires are often swapped compared to the original connector, requiring a repin.
- BCM Connector C4, Pin 27 — At the Body Control Module (BCM), typically located in the passenger compartment.. This is a common pin for the Fuel Level Sensor Signal 1 input to the BCM. Testing for signal voltage or continuity here can confirm if the signal from the tank is reaching the module.
Real Owner Repair Stories
- YouTube channel 'Mechanic Mode' (2017 Dodge Charger R/T AWD (former police car)) — Car would sometimes start and die immediately, or crank but not start. This happened intermittently for over a month before becoming a hard no-start.
❌ Tried (didn't work) Owner towed the car to the shop after multiple failed start attempts.
✅ What actually fixed it The plastic connector on top of the driver's side fuel pump module had melted, causing a poor connection. The mechanic replaced the entire fuel pump assembly with a used unit that had an intact connector, which resolved the starting and running issue. - YouTube channel 'Steve's Garage' (2013 Dodge Charger) — Crank no-start. Customer had already replaced the fuel pump themselves but the car still wouldn't run. The pump could be heard humming.
❌ Tried (didn't work) Customer replaced the fuel pump and throttle body. Mechanic confirmed the pump was running but producing zero fuel pressure.
✅ What actually fixed it The wires inside the new (likely aftermarket) fuel pump assembly were reversed from the factory. The mechanic swapped the polarity of the two wires going directly to the pump motor inside the module. This made the pump spin in the correct direction and immediately restored fuel pressure, fixing the no-start condition. - Reddit user in r/MechanicAdvice (2014 Dodge Charger V6) — After replacing a bad fuel pump with an aftermarket unit, the car ran but threw code P0463 (Fuel Level Sensor 'A' Circuit High) and the fuel gauge read empty.
❌ Tried (didn't work) Replacing the fuel pump assembly.
✅ What actually fixed it The user was advised that the fuel level sensor on the new aftermarket pump was likely faulty or incompatible with the car's gauge. The solution is to either warranty the part for another one or purchase an OEM Mopar pump assembly, as aftermarket sensors are a common cause of gauge incompatibility issues.
When the Usual Fixes Don't Work
- While P0460 most often points to a failed sending unit, a significant number of real-world repairs show the root cause to be the electrical connector on top of the pump module. In one case, a 2017 Charger would not start reliably due to a melted connector, not a failed sensor. The fix was replacing the pump assembly to get a new, intact connector. In another case involving a 2013 Charger, a brand new aftermarket pump caused a no-start because the internal wiring to the pump motor was reversed, causing it to spin backward and generate no pressure. These instances highlight that before replacing the expensive pump module, one must meticulously inspect the connector for melting/corrosion and be wary of the quality and wiring of aftermarket parts.
OEM Part Supersession History
68103913AA, AB, AC, AD, AE→68103913AF— Part revision and update by the manufacturer.
Heads up: Crucially, installing the newer part numbers (like 68103913AD and later) requires replacing the vehicle's wiring harness connector with a new pigtail due to a change in the pinout on the pump module itself, as detailed in TSB 08-152-23.
Model Year Variations Within This Range
- 2011-2016: TSB 08-152-23 applies to these years, indicating that a fuel pump replacement will likely require splicing in a new wiring connector pigtail due to updated part designs with different pin layouts. Failure to do so will cause a no-start or immediate circuit codes.
- 2015+: The 2015 model year marked a major refresh for the Charger, including changes to the transmission (8-speed became standard) and some electrical architecture. While the dual-pump saddle tank concept remained, part numbers for pumps and modules may differ from the 2011-2014 models. Always verify by VIN.
Diagnostic Flowchart
Other Known Issues on This Vehicle
Issues unrelated to this code that are worth knowing about as an owner of this generation:
- 5.7L/6.4L Hemi Lifter Tick/Failure 🔴 High — Common issue, particularly on engines that experience prolonged idling or short trips. Can occur at various mileages, but often reported after 60,000 miles. Failure is due to oil starvation of the roller lifters.
- Uconnect 8.4" Screen Delamination & Ghost Touch 🟠 Medium — Extremely common on 2017 and newer models. The adhesive between the screen and digitizer fails, causing bubbling and phantom screen presses. (Ref: Though no formal recall exists, many owners report getting goodwill repairs from Dodge/Chrysler if the vehicle is just out of warranty.)
- Alternator Failure 🔴 High — Particularly noted on 2011-2014 models. Failure can be sudden and cause the vehicle to shut down while driving. A recall was issued for some vehicles. (Ref: NHTSA Campaign Number: 14V634000)
- Transmission Shifting Issues (8-Speed Auto) 🟠 Medium — Owners report rough shifting, hesitation, or clunky downshifts. Often, these issues can be improved or resolved with a software update to the Transmission Control Module (TCM). (Ref: TSB 21-013-14 (and subsequent revisions) addresses shift quality enhancements.)
- Water Pump & Radiator Leaks 🟠 Medium — Failures of the water pump seal and leaks from the plastic end tanks of the radiator are common cooling system problems.
- Oil Filter Housing/Cooler Leaks (3.6L V6) 🟠 Medium — The oil filter housing assembly, located in the engine valley, is made of plastic and is prone to cracking and leaking oil, which can be a significant repair.
Used vs. New Parts: Buying Guide for This Vehicle
When a used part is the smart pick: A used part is generally NOT recommended for the fuel pump module due to it being a critical wear item. However, if a diagnosis confirms the only fault is a melted or damaged WIRING HARNESS CONNECTOR, sourcing a used connector pigtail from a junkyard is a viable and cost-effective repair, provided the pigtail itself is in excellent condition.
Donor-vehicle mileage cap: roughly under 70000 miles for the part to have meaningful remaining life.
What to inspect on the donor part:
- For a used pump assembly: Ask for the donor vehicle's mileage. Anything over 70k miles has limited remaining life.
- For a connector pigtail: Inspect the plastic for any signs of melting, brittleness, or discoloration. Check every pin socket for corrosion (green or white powder) or signs of being spread too wide.
- Ensure at least 6-8 inches of wire is attached to the pigtail to make splicing easy.
OEM-only on this vehicle (don't cheap out):
- Fuel Pump and Sending Unit Assembly: While more expensive, Mopar OEM units are strongly recommended. Aftermarket units are notorious for having incompatible sending unit resistance ranges, leading to incorrect gauge readings and new trouble codes (like P0463) immediately after installation.
Aftermarket brands forum-validated for this vehicle:
- Delphi
- Spectra Premium
- Carter
- DeatschWerks (Performance/E85)
- Fore Innovations (Performance/E85)
Brands owners have reported issues with on this vehicle:
- Unbranded, 'white-box' parts from online marketplaces. These are frequently the source of issues like reversed internal wiring or incompatible sensor resistance, as seen in forum and video reports.
Real Owner Stories
Aggregated from forums and TSBs cited above. Mileages and costs reflect what owners reported in those sources.
2016 Dodge Charger
Symptoms: The owner reported an erratic fuel gauge and the Check Engine Light coming on with code P0460.
What fixed it: The issue was identified as a common fuel level sending unit failure, requiring replacement of the unit.
Source hint: ChargerForums.com: 'P0460 Fuel Level Sensor 'A' Circuit Malfunction'
2013 Dodge Charger
Symptoms: The dashboard showed no fuel level on the gauge and stored codes P0460-15 and P2065-15.
What fixed it: Diagnosis revealed a poor connection at the wiring connector, which required confirming the fault before part replacement.
Source hint: YouTube: 2013 Dodge Charger Not Fuel Level on Gauge Dashboard Poot connection P0460-15 P2065-15
Related OBD-II Codes
Frequently Asked Questions
I'm replacing the fuel pump on my Charger; do I really need to change the wiring according to TSB 08-152-23?
Why is my remote start disabled on my 2011-2023 Dodge Charger?
Where are the fuel level sensors located on the Charger, and do I have to drop the gas tank?
My fuel gauge is swinging from full to empty; is this a software issue or a mechanical part?
I see a melted plastic connector under my rear seat. Is this common?
What are the specific resistance values I should look for when testing the Mopar sending unit?
Helpful Videos

Used OEM Parts in Stock
New Aftermarket Parts Available


The information in this article is provided for general reference and educational purposes only. Vehicle specifications, procedures, and part compatibility can vary by production date, trim level, and region. Always consult your vehicle's factory service manual and verify part numbers before purchasing or performing repairs. Safety-critical components such as airbags, seat belts, and braking systems should be installed by a qualified professional.
- Dodge Charger:
- 🧭 Diagnostic Flowchart
- 🎬 Helpful Videos
- 🛍️ Shop This Part
- What's Unique About the 2011-2023 Dodge Charger
- Symptoms You May Notice
- Most Likely Causes
- Rare But Worth Checking
- Diagnosis Steps
- Parts You'll Likely Need
- Related Codes That Often Appear With This One
- Technical Service Bulletins (TSBs) & Recalls
- Platform-Specific Known Issues
- Mechanic-Grade Diagnostic Values
- Hidden / Shadow Codes Worth Checking
- Scan Tool Commands That Help
- Wiring & Ground Locations
- Real Owner Repair Stories
- When the Usual Fixes Don't Work
- OEM Part Supersession History
- Model Year Variations Within This Range
- Other Known Issues on This Vehicle
- Used vs. New Parts: Buying Guide for This Vehicle
- Real Owner Stories
- 2016 Dodge Charger
- 2013 Dodge Charger
- Related OBD-II Codes
- Frequently Asked Questions
- 🎟️ Get 5% Off