
P0463 on 2011-2020 Dodge Journey: Fuel Level Sensor Circuit High Input Causes and Fixes
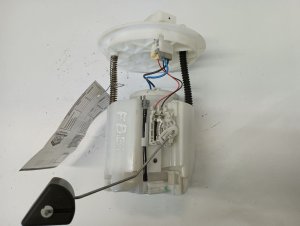
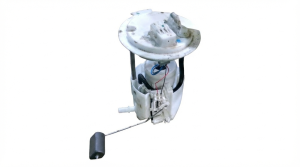
This code almost always means the fuel level sensor has failed. On the Dodge Journey, the sensor is part of the fuel pump module inside the gas tank. The fix is to replace the entire fuel pump assembly, which costs around $100-$250 for an aftermarket part and $400-$600+ for OEM. It's a DIY 4/5 difficulty job due to dropping the fuel tank, which is more complex on AWD models.
- P0463 on a Dodge Journey points to a problem in the fuel level sensor circuit, most often a failed sensor.
- The fuel level sensor is built into the fuel pump module, so you must replace the entire assembly to fix it.
- The primary symptom will be an incorrect fuel gauge, which poses a risk of running out of gas.
- Before replacing the expensive fuel pump module, always inspect the wiring and connector on top of the fuel tank for corrosion or damage.
- Part numbers for the fuel pump module are specific to the engine, drivetrain (FWD/AWD), and year, so VIN verification is crucial.
What's Unique About the 2011-2020 Dodge Journey
For the 2011-2020 Dodge Journey, the fuel level sensor is not sold as a separate component. Instead, it is integrated into the main fuel pump module located inside the fuel tank. This design choice means that a failure of the relatively simple level sensor requires the replacement of the entire, more expensive fuel pump assembly. The repair process involves dropping the fuel tank, which can be more complex on All-Wheel Drive (AWD) models that may also require removing the driveshaft to access the tank. Furthermore, some replacement fuel pump kits come with an updated harness connector that MUST be installed, as the pin locations on the new pump module are different.
Symptoms You May Notice
- Inaccurate or erratic fuel gauge, often stuck on full or empty.
- Check Engine Light is on.
- Low fuel warning light may be on, even with a full tank.
- In some cases, the engine may hesitate or stall if the inaccurate reading masks a true no-fuel condition.
- Replacing only the fuel pump motor when the issue is the integrated level sensor.
- Replacing the instrument cluster before thoroughly testing the sensor and its wiring.
- Assuming an aftermarket fuel pump assembly is good. Some owners report getting a P0463 code immediately after installing a cheap, non-OEM fuel pump module due to a faulty sending unit out of the box or one with an incompatible resistance range.
- Re-using the old fuel pump harness connector when a new one is supplied with the replacement pump. A TSB indicates some replacement pumps have different pinouts, making the new connector mandatory for proper function.
Most Likely Causes
- Faulty Fuel Level Sending Unit 🔴 High Probability → Shop Fuel Tank Sending Unit The sending unit is a wear item. The resistor strip that the float's contact arm sweeps across can wear out or corrode over time, creating an open circuit that the PCM interprets as a high voltage signal. This is the most common failure for P0463. 🎬 Watch: A mechanic explains the real fix for the P0463 code.
How to confirm: After accessing the fuel pump module, use a multimeter set to Ohms to test the resistance across the sensor's pins while manually moving the float arm up and down. The resistance should change smoothly and consistently. For an OEM Chrysler sensor of this era, the expected range is approximately 10-12 Ohms at full and 73 Ohms at empty. If you get an infinite reading (OL) or the reading is erratic, the sensor is bad.
Typical fix: Replace the entire fuel pump module assembly, as the sensor is integrated into it. Ensure the new harness connector is used if supplied with the kit.
Est. part cost: $100-$650 - Damaged Wiring or Corroded Connector 🟡 Medium Probability The main electrical connector sits on top of the fuel tank, where it is exposed to moisture, road salt, and debris, which can lead to corrosion or physical damage to the wires or pins. This can create high resistance or an open circuit.
How to confirm: Visually inspect the wiring harness and connector leading to the fuel pump module. Look for green or white corrosion, broken or frayed wires, or backed-out pins. Test for continuity and proper voltage at the connector using a multimeter. The signal wire (often Dark Blue/White) should have a 5V reference from the PCM.
Typical fix: Clean the connector terminals with a contact cleaner or repair/replace the damaged section of the wiring harness. In some cases, a connector pigtail may be required. A TSB notes that some replacement pumps require a new pigtail to be installed due to different pin locations.
Est. part cost: $10-$50 - Poor Ground Connection ⚪ Low Probability
How to confirm: Locate the ground strap or wire for the fuel tank/pump circuit and test its integrity. Use a multimeter to check for high resistance between the ground point on the connector and a clean spot on the vehicle's chassis. A voltage drop test on the ground side should show less than 0.1V (100mV). A visual inspection for rust or looseness is also necessary.
Typical fix: Clean the ground connection point on the vehicle's frame and re-secure the ground wire. Common chassis ground points are located on the strut towers (G101/G102) and kick panels (G926A).
Est. part cost: $1-$5
Rare But Worth Checking
- Faulty Instrument Cluster: → Shop Instrument Cluster While rare, a failure within the instrument cluster's circuitry can cause incorrect processing of the fuel level signal. This is usually suspected only after the sensor and wiring have been confirmed to be good. A cluster self-test can sometimes help diagnose this; it is initiated by holding the trip reset button while turning the ignition to the 'ON' position.
- Faulty Powertrain Control Module (PCM): This is a very uncommon cause. The PCM itself could be failing to read the sensor signal correctly. This would require advanced diagnostics and should be the last item to consider after all other possibilities are exhausted.
Diagnosis Steps
- Read the trouble codes with an OBD-II scanner to confirm P0463 is present. Note any other codes like U1403.
- Visually inspect the wiring harness and electrical connector on top of the fuel tank for any signs of corrosion, damage, or loose connections.
- If the wiring looks good, use a scan tool to view live data. The Fuel Level Sensor signal voltage should be between 0.5V (empty) and 4.5V (full). A reading stuck at or near 5V confirms the high circuit condition.
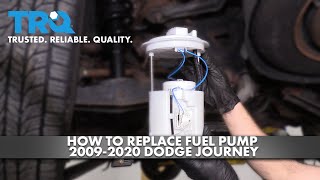
- To definitively test the sensor, you must access the top of the fuel pump module. This requires lowering the fuel tank. On AWD models, this may involve removing the driveshaft first. 🎬 Watch: This step-by-step guide shows how to replace the fuel pump.
- With the module accessible, disconnect the connector and measure the resistance (Ohms) of the sending unit's terminals.
- Manually move the float arm through its range of motion. The resistance reading should change smoothly from approximately 73 Ohms (empty) to 10-12 Ohms (full). If the reading is open (OL) or jumps erratically, the sending unit has failed.
- If the sending unit and wiring test good, the problem may lie with the instrument cluster or PCM, which requires more advanced diagnostics. An instrument cluster self-test can be initiated to check gauge functionality by holding the trip reset button and turning the key to 'ON'.
Parts You'll Likely Need
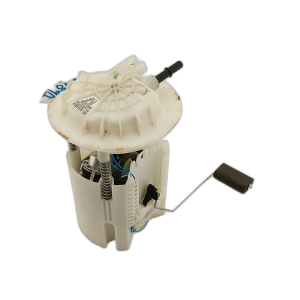
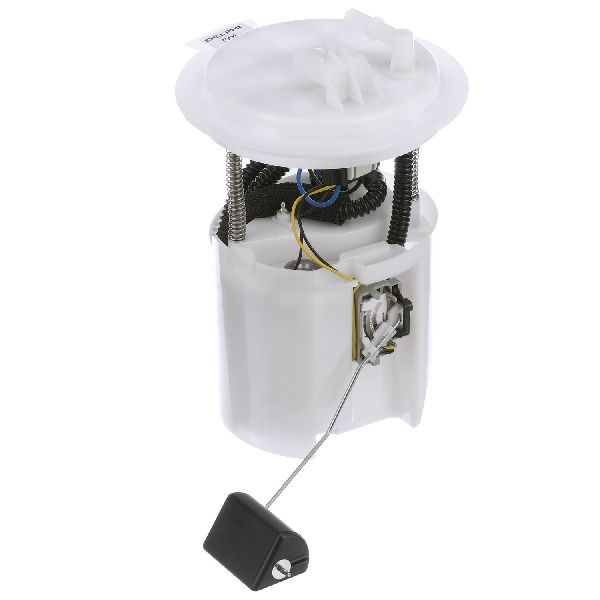
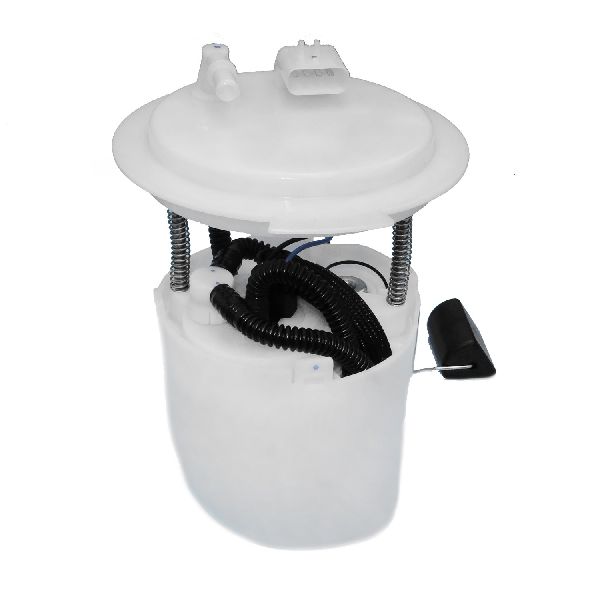
- Fuel Pump Module Assembly
(OEM #68039210AG)— This is the most common failure. The fuel level sensor is integrated into this assembly, so the entire unit must be replaced to fix the faulty sensor. Note: Part numbers vary significantly by year, engine (2.4L/3.6L), and drivetrain (FWD/AWD). Examples include 68038901AB/AA. Always verify with your VIN. A TSB also indicates that replacement modules may require the installation of a new, included wiring pigtail due to updated pin locations.
Trusted brands: Mopar, Delphi, Bosch, Denso, TRQ, US Motor Works
OEM price range: $400-$650
Aftermarket price range: $100-$250
Related Codes That Often Appear With This One
- U1403 - Implausible Fuel Level Signal Received
Technical Service Bulletins (TSBs) & Recalls
- A general Chrysler TSB indicates that when replacing a fuel pump module, if a revised fuel pump kit is supplied, the updated harness connector that comes with it MUST be replaced. The new pump has electrical pins in different locations, and reusing the old connector will lead to failure.
Platform-Specific Known Issues
- On AWD models, the rear driveshaft must often be removed to gain enough clearance to drop the fuel tank, adding complexity to the repair.
- Some owners on forums have reported receiving a P0463 code immediately after installing a low-cost aftermarket fuel pump assembly, indicating poor quality control on the integrated sending unit or an incompatible resistance range.
- A known issue documented by a TSB is that some replacement Mopar fuel pump modules have a different electrical pin configuration than the original part, making it mandatory to replace the wiring harness connector with the new one provided in the kit.
Mechanic-Grade Diagnostic Values
- Fuel Level Sensor Resistance (OEM) — expected: Approx. 10-12 Ohms (Full) to 73 Ohms (Empty). Failure: Infinite resistance (OL), erratic readings, or values significantly outside the expected range.
- Fuel Level Sensor Signal Voltage (Live Scan Data) — expected: 0.5 Volts (Empty) to 4.5 Volts (Full). Failure: A voltage signal stuck at or near 5.0 Volts.
- Ground Circuit Voltage Drop — expected: Less than 0.1 Volts (100 mV). Failure: A reading higher than 100mV indicates excessive resistance in the ground circuit for the fuel pump module.
- Fuel Pump Fuse — expected: F153 (20A) in the under-hood fuse box (TIPM).. Failure: Blown fuse indicates a short circuit, though less common for a P0463 'high/open' circuit code.
Hidden / Shadow Codes Worth Checking
- U1403: Implausible Fuel Level Signal Received. This code is often set by the Body Control Module (BCM) or Instrument Cluster when the data it receives from the PCM about the fuel level is nonsensical (e.g., higher than possible). It directly corroborates the P0463 fault detected by the PCM. (see via Standard OBD-II scanner capable of reading BCM or 'U' (network) codes.)
Scan Tool Commands That Help
- wiTECH or high-end bidirectional scanner: Instrument Cluster Self-Test / Actuator Test — After confirming the sensor and wiring are good, this command can force the fuel gauge to sweep through its range (e.g., command to 0%, 50%, 100%). If the gauge responds correctly to the command, it proves the gauge itself is functional and points the diagnosis back toward the signal it's receiving.
- wiTECH or high-end bidirectional scanner: Fuel Pump Activation / Duty Cycle Command — While primarily for testing the fuel pump motor for a pressure issue (like P0087), it can help confirm the power and ground circuits to the module are intact under load, which is useful if a ground issue is suspected for the P0463 code.
Wiring & Ground Locations
- Fuel Pump Module Connector (C315) — On top of the fuel tank, connecting the main harness to the fuel pump module assembly.. This is the primary point of failure for corrosion and damage. The fuel level sensor signal wire (often Dark Blue/White) and ground wire pass through here.
- G101 / G102 — Ground points located on the driver and passenger side strut towers in the engine bay.. These are major chassis ground points. While not the direct ground for the fuel pump, they are excellent, reliable known-good ground locations to use as a reference when performing voltage drop tests on the fuel pump's ground circuit.
- G926A — Located in the driver's side kick panel area.. This is an interior ground point. Circuits related to the instrument cluster and BCM may ground here. A fault at this location could potentially affect how the fuel level signal is interpreted, though it's a less likely cause.
Real Owner Repair Stories
- AliExpress Product Discussion / Forum User Report (2012 Dodge Journey) — Fuel gauge inaccuracy after installing a new fuel pump module (part #68038901AB).
❌ Tried (didn't work) Replacing the fuel pump module initially caused the problem due to an installation error.
✅ What actually fixed it The owner discovered the float arm on the new sending unit was bent slightly upward during installation, preventing it from reading the full range of motion. By manually adjusting the arm to be parallel with the tank floor, the resistance readings stabilized in the correct range and the fuel gauge began working properly. - Unofficial YouTube Repair Video (2017 Dodge Journey AWD) — Fuel pump failure requiring replacement.
✅ What actually fixed it The owner chose to cut access panels in the floor pan above the fuel tank to replace both the primary and auxiliary (for AWD) fuel pumps instead of dropping the entire tank, driveshaft, and exhaust. This is an un-recommended but documented shortcut taken by some owners.
OEM Part Supersession History
68039210A(A, B, C, D, E, F)→68039210AG— Part has been revised multiple times by the manufacturer.
Heads up: A TSB indicates that newer replacement kits may contain a pump with a different pinout, requiring the mandatory installation of the new harness connector provided in the kit. Failure to use the new connector will result in a non-functional or incorrectly reading sensor.68038901AA→68038901AB— Part revision.
Heads up: Different part revisions may have different resistance ranges (e.g., 0-75 ohm vs 0-90 ohm). Installing a part with the wrong resistance spec for the vehicle's calibrated expectation will cause persistent gauge inaccuracy even if the part is not 'faulty'.
Model Year Variations Within This Range
- 2011-2020 (AWD Models): All-Wheel Drive models use a saddle-style fuel tank with two fuel level sending units: a primary unit ('A') with the main pump and a secondary, auxiliary unit ('B') on the opposite side. P0463 refers to the primary 'A' sensor. A fault in the secondary sensor would typically set a P2068 (Fuel Level Sensor 'B' Circuit High).
Diagnostic Flowchart
Other Known Issues on This Vehicle
Issues unrelated to this code that are worth knowing about as an owner of this generation:
- Rocker Arm / Lifter Failure ('Pentastar Tick') 🔴 High — Common on the 3.6L V6, typically appearing after 80,000 miles. Early signs are a distinct ticking noise from the top of the engine. (Ref: Multiple TSBs exist for related components, like TSB #9100229 regarding MDS lifters.)
- Cracked Oil Filter/Cooler Housing 🔴 High — Very common on the 3.6L V6, often between 60,000-100,000 miles. The plastic housing cracks, causing significant oil and/or coolant leaks in the engine valley.
- Left Cylinder Head Defect (3.6L V6) 🔴 High — Notorious on 2011-2013 models, causing misfires in cylinders 2, 4, and 6 due to premature valve guide wear. (Ref: Originally covered by an extended warranty (X56) and addressed in TSB 09-002-14 Rev. B, both of which are now expired.)
- Transmission Issues (62TE) 🟠 Medium — The 6-speed 62TE automatic can experience shuddering, harsh shifts, or solenoid pack failures. Some codes may point to an internal torque converter failure. (Ref: TSB #9004206 advises that certain codes (like P2764) often indicate torque converter failure, not just a solenoid issue.)
- Infotainment Screen Failure (4.3" and 8.4" Uconnect) 🟡 Low — Common across all years. Symptoms include a black/blank screen, unresponsive touch controls, or 'delamination' (bubbling/peeling) of the screen surface due to heat.
- Premature Brake and Suspension Wear 🟠 Medium — Due to the vehicle's weight, front control arm bushings, stabilizer links, and brake components can wear out prematurely, leading to clunking noises and brake vibration.
Used vs. New Parts: Buying Guide for This Vehicle
When a used part is the smart pick: A used OEM fuel pump module from a junkyard is a risky choice for this repair. The fuel level sensor is a known wear item, and a used unit may have limited remaining life. Given the high labor cost of dropping the tank, saving a small amount on a used part is generally not recommended unless the donor vehicle is very low mileage and the part's history is known.
Donor-vehicle mileage cap: roughly under 50000 miles for the part to have meaningful remaining life.
What to inspect on the donor part:
- Verify the part number from the donor vehicle matches your required part number exactly.
- Inspect the electrical connector pins for any signs of corrosion, melting, or damage.
- Manually move the float arm; it should move smoothly without any binding or gritty feeling.
- Test the resistance (Ohms) of the used unit before purchase, ensuring it matches the OEM spec (~10-73 Ohms) and sweeps smoothly.
OEM-only on this vehicle (don't cheap out):
- While not strictly 'OEM-only', using a Mopar fuel pump module is highly recommended. The risk of incompatible resistance ranges and poor quality control with cheap aftermarket units is well-documented for this platform and can lead to immediate re-work.
Aftermarket brands forum-validated for this vehicle:
- Delphi
- Bosch
- Denso
Brands owners have reported issues with on this vehicle:
- Unnamed, low-cost 'white box' brands from online marketplaces are frequently reported to cause immediate P0463 codes or have incorrect resistance ranges out of the box.
Real Owner Stories
Aggregated from forums and TSBs cited above. Mileages and costs reflect what owners reported in those sources.
2016 Ram (Platform Mate) — 26000 miles
Symptoms: Experienced the 'dreaded' P0463 code at very low mileage.
What fixed it: Complete fuel pump/sensor assembly replacement (Part #68197307AA).
Cost: $700-$700
Source hint: RamForum.com - 'Dreaded P0463 code at only 26000 miles.....'
2011-2020 Dodge Journey
Symptoms: P0463 code appeared immediately after installing a new fuel pump.
What fixed it: Replacing the low-cost aftermarket fuel pump with a higher quality unit, as the cheap version had poor quality control or an incompatible resistance range.
Source hint: vehicle_specific_issues - forum reports on aftermarket pumps
Related OBD-II Codes
Frequently Asked Questions
I'm replacing the fuel pump on my Dodge Journey to fix P0463; do I need to change the wiring connector too?
Why is my fuel gauge stuck on full even though I've been driving for days?
Is it harder to fix P0463 on an All-Wheel Drive (AWD) Dodge Journey?
Can I just replace the fuel level sensor alone to save money?
How can I test if my Dodge Journey's fuel gauge itself is broken instead of the sensor?
What are the specific resistance values I should look for when testing the Journey's sending unit?
Helpful Videos


Used OEM Parts in Stock
New Aftermarket Parts Available


The information in this article is provided for general reference and educational purposes only. Vehicle specifications, procedures, and part compatibility can vary by production date, trim level, and region. Always consult your vehicle's factory service manual and verify part numbers before purchasing or performing repairs. Safety-critical components such as airbags, seat belts, and braking systems should be installed by a qualified professional.
- Dodge Journey:
- 🧭 Diagnostic Flowchart
- 🎬 Helpful Videos
- 🛍️ Shop This Part
- What's Unique About the 2011-2020 Dodge Journey
- Symptoms You May Notice
- Most Likely Causes
- Rare But Worth Checking
- Diagnosis Steps
- Parts You'll Likely Need
- Related Codes That Often Appear With This One
- Technical Service Bulletins (TSBs) & Recalls
- Platform-Specific Known Issues
- Mechanic-Grade Diagnostic Values
- Hidden / Shadow Codes Worth Checking
- Scan Tool Commands That Help
- Wiring & Ground Locations
- Real Owner Repair Stories
- OEM Part Supersession History
- Model Year Variations Within This Range
- Other Known Issues on This Vehicle
- Used vs. New Parts: Buying Guide for This Vehicle
- Real Owner Stories
- 2016 Ram (Platform Mate) — 26000 miles
- 2011-2020 Dodge Journey
- Related OBD-II Codes
- Frequently Asked Questions
- 🎟️ Get 5% Off