
P0463 on 2011-2015 Honda Civic: Fuel Level Sensor Circuit High Causes and Fixes
This code means your car's computer sees a voltage from the fuel level sensor that's too high, causing a wrong fuel gauge reading. It's almost always a faulty fuel level sending unit, which is part of the fuel pump assembly. Expect to replace the sending unit or the entire fuel pump module.
- P0463 on a 2011-2015 Civic means the fuel gauge is unreliable because of a 'circuit high' fault.
- The most likely culprit is a failed fuel level sending unit, which is part of the fuel pump module in the gas tank.
- Driving is possible, but you risk running out of gas. It's best to fix this promptly.
- Before buying parts, check the wiring connector at the top of the fuel pump assembly (under the rear seat) for corrosion and perform a simple unplug test to help isolate the fault.
What's Unique About the 2011-2015 Honda Civic
For the 9th generation Honda Civic (2011-2015), the fuel level sensor, also known as the sending unit, is integrated into the fuel pump module located inside the fuel tank. While the sensor can sometimes be replaced separately, it is most commonly sold and replaced as part of the entire fuel pump assembly. Accessing the unit is relatively straightforward for a DIYer, as it's located under the rear seat cushion, not requiring the fuel tank to be dropped.
Symptoms You May Notice
- Check Engine Light is on 🎬 Watch: Understanding the P0463 code and its common symptoms.
- Fuel gauge reads full all the time (most common symptom)
- Fuel gauge fluctuates randomly or reads inaccurately
- Fuel gauge is stuck on empty
- Low fuel warning light may be on, even with a full tank
- Replacing the entire fuel pump when only the wiring connector was corroded.
- Replacing the instrument cluster when the fault is with the sensor in the tank.
Most Likely Causes
- Faulty Fuel Level Sending Unit 🔴 High Probability → Shop Fuel Tank Sending Unit The variable resistor on the sensor's arm wears out over time from constant contact and movement, leading to an open circuit or high resistance, which the PCM interprets as a 'high' signal.
How to confirm: After confirming the wiring is intact, access the fuel pump module. Remove the sending unit and test its resistance with a multimeter while moving the float arm. 🎬 See how to diagnose and fix high circuit input issues. The resistance should change smoothly. For Honda, the approximate specs are 2-5 Ohms when full and 105-110 Ohms when empty. A reading that is open (infinite resistance) or doesn't change indicates a bad sensor.
Typical fix: Replace the fuel level sending unit. On this vehicle, it is often sold as part of the complete fuel pump module.
Est. part cost: $180-$300 for the OEM assembly - Wiring Issue (Open or Short to Power) 🟡 Medium Probability Wiring can become damaged or corroded over time, especially the connector on top of the fuel pump assembly which is exposed to some moisture and dirt under the access panel.
How to confirm: Visually inspect the wiring harness from the fuel tank to the PCM for any breaks, chafing, or corrosion, paying close attention to the connector at the fuel pump. Use a multimeter to check for continuity and for a short to power on the signal wire.
Typical fix: Repair the damaged section of the wire or replace the faulty connector.
Est. part cost: $10-$50 for wire and connectors - Stuck Float Arm ⚪ Low Probability If a vehicle sits for a long time, old fuel can cause corrosion or deposits that make the float arm physically stick in one position. A hard impact, like hitting a large speed bump, has also been anecdotally reported to dislodge or jam the float mechanism.
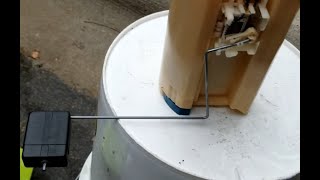
How to confirm: After accessing the fuel pump module, visually inspect the float arm. It should move freely throughout its range of motion. If it is stuck, it will cause a constant reading.
Typical fix: In some cases, the arm can be freed. More commonly, the sending unit is replaced as the mechanism may be damaged or unreliable.
Est. part cost: $0 if freed, otherwise cost of sending unit. - Poor Ground Connection ⚪ Low Probability The ground for the fuel pump assembly can become corroded or loose, causing high resistance in the circuit.
How to confirm: Locate the ground point for the fuel pump circuit (refer to a service manual) and inspect it for corrosion or looseness. Test for high resistance between the ground pin at the fuel pump connector and the chassis.
Typical fix: Clean the ground connection point and terminal, then re-secure it.
Est. part cost: $1-$5 for cleaning supplies
Rare But Worth Checking
- Faulty Powertrain Control Module (PCM): This is extremely rare. The PCM should only be considered after all other possibilities, including the wiring and sensor, have been exhaustively tested and ruled out.
- Faulty Instrument Cluster: → Shop Instrument Cluster A failure in the instrument cluster itself can cause incorrect gauge readings, but it is less likely to trigger a P0463 code, which originates from the PCM's reading of the sensor circuit. A simple test is to unplug the fuel pump connector; if the gauge then reads empty, the cluster is likely working correctly.
Diagnosis Steps
- Scan the vehicle's computer to confirm P0463 is the only code present. If other codes are stored, address them first.
- Check the fuel gauge. Note if it is stuck on full, which is the most common symptom for this code.
- Gain access to the fuel pump assembly connector by removing the rear seat cushion and the metal service cover.
- Visually inspect the connector and wiring harness for any signs of corrosion, damage, or loose pins.
- As a quick preliminary test, disconnect the fuel pump connector and turn the key to the 'ON' position. The fuel gauge should drop to empty. If it does, the gauge cluster and wiring are likely okay, pointing towards the sending unit. If it stays full, you may have a wiring short.
- With the key on and connector plugged in, use a multimeter to check the signal wire voltage. A reading of 5 volts or very close to it confirms the 'Circuit High' condition seen by the PCM.
- If wiring appears okay, the most likely cause is the sending unit itself. Depressurize the fuel system and remove the fuel pump assembly from the tank.
- Test the sending unit's resistance with a multimeter while manually sweeping the float arm up and down. The reading should be smooth, approximately 105-110 ohms at empty and 2-5 ohms at full, without any dropouts.
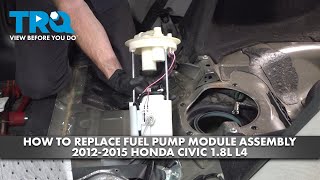
- If the sensor fails the test or the float arm is stuck, replace the fuel level sending unit or the entire fuel pump module. 🎬 Watch this step-by-step guide to replacing the fuel pump assembly.
- If the sensor tests good, a more thorough inspection of the wiring harness between the tank and the PCM is required for an open circuit or short to power.
- After the repair, clear the code, reinstall all components, and verify that the fuel gauge reads correctly.
Parts You'll Likely Need
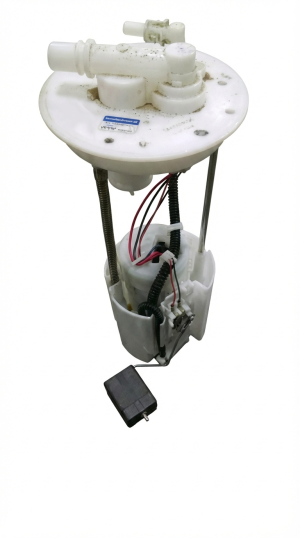
- Fuel Pump Module Assembly
(OEM #17047-TR0-A00)— This assembly contains the fuel pump, fuel pressure regulator, and the fuel level sending unit, which is the most common failure point for P0463. Replacing the entire module is often the most practical and reliable repair. The sending unit itself is sometimes referred to as a 'Meter Set'.
Trusted brands: Honda (Genuine), Denso, Delphi, TRQ
OEM price range: $190-$285
Aftermarket price range: $150-$220
Mechanic-Grade Diagnostic Values
- Fuel Level Sensor Signal Voltage — expected: 0.5 Volts (Empty) to 4.5 Volts (Full). Failure: A reading consistently above 4.5 Volts, often near 5.0 Volts, confirms the 'Circuit High' condition.
- Fuel Level Sensor Resistance — expected: Approximately 2-5 Ω at Full, and 105-110 Ω at Empty.. Failure: An open circuit (infinite resistance) or a reading that does not change smoothly as the float arm is moved.
Scan Tool Commands That Help
- Honda Diagnostic System (HDS): Body Electrical > Gauges > Functional Tests > Self-Diagnostic Function — To command the instrument cluster to perform a full self-test, including a gauge sweep, to verify the functionality of the gauge control module and the physical gauge itself.
- Manual Procedure (No Scanner): Instrument Cluster Self-Diagnostic Mode — To test the instrument cluster without a dealer-level scan tool. This procedure initiates a full sweep of all gauges (including fuel), tests indicator lights, and confirms the cluster can respond to inputs. It's useful for ruling out a faulty gauge cluster. The procedure involves a specific sequence of pressing the Trip/Reset button while turning the ignition and headlight switches.
Wiring & Ground Locations
- Fuel Pump Assembly Connector — On top of the fuel pump module, accessed by removing the rear seat cushion and a metal service panel.. This 4-pin connector is the primary interface for the fuel level sensor. Corrosion or damage to the signal wire pin, power pin, or ground pin at this connector is a common cause of the P0463 code. The signal wire (often Yellow/Green) is where the high voltage reading originates.
- Fuel Pump Circuit Ground — The ground for the fuel level sensor is typically integrated into the vehicle's main wiring harness and grounds to the chassis. While a specific ground point number for the 9th gen is not readily available, tracing the black wire from the fuel pump connector will lead to its chassis ground point, often near the fuel tank or under the rear seats.. A poor or corroded ground connection can increase resistance in the circuit, leading to incorrect voltage readings that can trigger a P0463 code.
OEM Part Supersession History
17047-TR0-A00→17047-TBA-A01— Part update or consolidation across vehicle generations.
Heads up: The superseding part number 17047-TBA-A01 is primarily listed for the 10th generation Honda Civic (2016+). While some databases suggest it replaces the -TR0- part, compatibility must be verified with the parts vendor using the vehicle's VIN before purchasing, as it may not be a direct fit for the 2011-2015 models.
Diagnostic Flowchart
Used vs. New Parts: Buying Guide for This Vehicle
When a used part is the smart pick: A complete, used OEM fuel pump assembly from a verified low-mileage donor vehicle is a reasonable choice. The failure is due to wear on the resistor, so a part with less use has significant life remaining and is more reliable than a cheap, new aftermarket unit.
Donor-vehicle mileage cap: roughly under 80000 miles for the part to have meaningful remaining life.
What to inspect on the donor part:
- Verify the mileage of the donor car.
- Inspect the electrical connector pins for any green or white corrosion.
- Ensure the plastic housing is not cracked or damaged.
- Confirm the float arm moves freely and is not bent.
Aftermarket brands forum-validated for this vehicle:
- Denso (often the original OEM supplier for Honda)
- Delphi
Brands owners have reported issues with on this vehicle:
- Spectra (some owners have reported premature failures and noise issues)
Real Owner Stories
Aggregated from forums and TSBs cited above. Mileages and costs reflect what owners reported in those sources.
2012 Honda Civic
Symptoms: The fuel gauge was stuck on full.
What fixed it: The problem was identified as the sending unit in the tank after unplugging the connector under the rear seat caused the gauge to go to empty. The fix is to replace the sending unit.
Source hint: HondaCivicForum.com thread titled 'Fuel Guage Stuck on Full - HondaCivicForum.com'
Related OBD-II Codes
Frequently Asked Questions
Where is the fuel level sending unit located on my 2011-2015 Civic?
My fuel gauge is stuck on full. What's a quick test I can do to see if it's the sending unit?
What resistance values should I expect when testing the fuel level sensor on my Civic?
Do I have to replace the entire fuel pump assembly to fix a P0463 code?
Are there any recommended aftermarket brands for the fuel pump assembly on this Civic?
I have a 2014 Acura ILX with a P0463 code. Is the repair the same as for the Civic?
Helpful Videos

Used OEM Parts in Stock

New Aftermarket Parts Available


The information in this article is provided for general reference and educational purposes only. Vehicle specifications, procedures, and part compatibility can vary by production date, trim level, and region. Always consult your vehicle's factory service manual and verify part numbers before purchasing or performing repairs. Safety-critical components such as airbags, seat belts, and braking systems should be installed by a qualified professional.
- Honda Civic:
- 🧭 Diagnostic Flowchart
- 🎬 Helpful Videos
- 🛍️ Shop This Part
- What's Unique About the 2011-2015 Honda Civic
- Symptoms You May Notice
- Most Likely Causes
- Rare But Worth Checking
- Diagnosis Steps
- Parts You'll Likely Need
- Mechanic-Grade Diagnostic Values
- Scan Tool Commands That Help
- Wiring & Ground Locations
- OEM Part Supersession History
- Used vs. New Parts: Buying Guide for This Vehicle
- Real Owner Stories
- 2012 Honda Civic
- Related OBD-II Codes
- Frequently Asked Questions
- 🎟️ Get 5% Off