
U0073 on 2009-2018 Ram 1500: Control Module Communication Bus 'A' Off Fixes
On a 2009-2018 Ram 1500, code U0073 most often indicates a wiring problem, a weak battery, or a loose fuse in the TIPM, not a major component failure. Start by testing the battery and checking all fuses before chasing complex wiring issues or replacing modules. A pending U0073 code without other symptoms may be a temporary network traffic issue that resolves itself and may not require immediate action.
- U0073 is a network failure code, not a specific part failure code. Diagnosis is required.
- Always start with the basics: test the battery, check for clean/tight grounds, and ensure all fuses in the TIPM are fully seated.
- The most common cause is a wiring or connector issue. A thorough visual inspection can often find the problem.
- Advanced diagnosis on a Ram involves measuring CAN bus resistance (should be ~60 ohms) and using the star connectors to isolate the faulty circuit branch or module.
- Do not replace expensive modules like the PCM or ABS unit without confirming they are the cause of the network failure.
What's Unique About the 2009-2018 Ram 1500
The 4th Generation Ram 1500's electrical system is complex, with the Totally Integrated Power Module (TIPM) acting as a central hub. While wiring issues are the most common cause for a U0073 code, problems can sometimes be as simple as a fuse that has vibrated loose from the TIPM. For more complex diagnostics, technicians use the truck's 'star connectors' (also known as junction blocks) to disconnect different branches of the CAN network. This helps isolate whether the fault is in the wiring or a specific module without having to test every component individually.
Generation note: The 2009-2018 year range covers the fourth generation of the Ram 1500 (DS/DJ platform). This information is specific to this generation. The 'Classic' models from 2019-2023 are also part of this generation and may be affected by the same issues.
Symptoms You May Notice
- Multiple warning lights on the dashboard (Check Engine, ABS, Traction Control, etc.)
- Engine may not crank or start
- Engine may stall unexpectedly
- Instrument cluster gauges behaving erratically or dropping to zero
- Transmission shifting harshly or getting stuck in gear
- Loss of power features like windows or door locks
- Scan tool cannot communicate with multiple modules
- Message on dash: "Service Electronic Braking System"
- Replacing the first module that a basic code reader points to. For example, if a U0100 (Lost Communication with ECM/PCM) is present alongside U0073, the problem may not be the PCM itself, but the network wiring that connects to it.
- Mistaking a wiring or power supply issue for a failed control module, leading to unnecessary and expensive parts replacement.
Most Likely Causes
- Damaged or Corroded Wiring Harness 🔴 High Probability Harnesses in the engine bay are exposed to heat, vibration, and moisture. Wires can chafe against brackets or other components over time, leading to a short or open circuit in the CAN bus wiring. Common chafing points include harnesses near the parking brake assembly, under the driver's side dash, and where they pass through the firewall.
How to confirm: Perform a detailed visual inspection of all major wiring harnesses, especially where they pass through the firewall or are secured near the engine and frame. Look for chafed insulation, green corrosion, or pinched wires. Check resistance of the CAN bus at the OBD-II port (should be ~60 ohms).
Typical fix: Repairing the damaged section of the wire harness. This involves cutting out the bad section, splicing in new wire with sealed connectors, and protecting the repair with loom or tape.
Est. part cost: $10-$50 - Weak Battery or Poor Charging System 🟡 Medium Probability → Shop Vehicle Battery Modern electronics are highly sensitive to voltage. A weak or failing battery can provide inconsistent voltage during startup or operation, causing modules to fail to initialize correctly and drop off the network.
How to confirm: Test the battery with a digital battery tester. A simple voltage check is not enough; it must be load tested. Check the alternator output when the truck is running (should be ~13.8-14.5 volts). Ensure battery terminals are clean and tight.
Typical fix: Replace the vehicle's battery.
Est. part cost: $150-$300 - Loose Fuses or Corroded Connectors at the TIPM 🟡 Medium Probability The TIPM (Totally Integrated Power Module) is the main fuse box and power distribution center. Over time, fuses can vibrate and lose solid contact, or the large connectors underneath can develop corrosion, interrupting power or communication signals to critical modules.
How to confirm: With the battery disconnected, physically press down on every fuse in the TIPM to ensure they are fully seated. Disconnect the main connectors on the underside of the TIPM and inspect for any signs of green or white corrosion on the pins.
Typical fix: Reseat all fuses. If corrosion is found, clean the connector pins carefully with an electrical contact cleaner and a small brush. In severe cases, the connector or TIPM itself may need replacement.
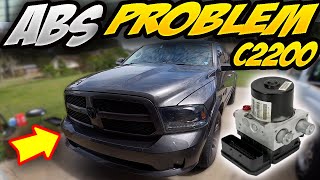
Est. part cost: $0-$1000 - Faulty ABS Module ⚪ Low Probability → Shop ABS Control Module The ABS module is a primary node on the high-speed CAN bus. An internal failure can cause it to short out the communication lines or stop responding, which takes the entire network down. This can also manifest as code U0121.
How to confirm: Using an advanced scan tool, see if the ABS module is one of the modules that is not communicating. If it is, disconnect the main electrical connector from the ABS module and re-check if other modules come back online. If they do, the ABS module is the likely culprit. 🎬 See how to handle a failed RAM ABS module
Typical fix: Replace the ABS module. This often requires programming with a dealer-level scan tool to configure it to the vehicle.
Est. part cost: $250-$800
Rare But Worth Checking
- Faulty Aftermarket Electronics: Improperly installed remote starters, alarms, stereos, or even LED lighting can interfere with or short out the CAN bus network. If you have recently installed any aftermarket electronics, try disconnecting them first to see if the problem resolves. Some owners have reported issues after installing aftermarket radios that were not properly integrated.
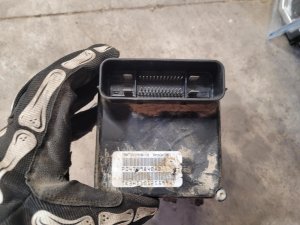
- Failed PCM or BCM: While less common than wiring or ABS module issues, the Powertrain Control Module (PCM) or Body Control Module (BCM) can fail internally and disrupt communication. This is typically a last resort after all wiring and other modules have been checked. 🎬 Watch: Troubleshooting a Ram PCM with no communication
- Faulty Radio Frequency Hub Module (RFHM): A faulty RFHM can cause communication issues leading to no-start conditions and may set other DTCs. TSB 08-100-15 addresses a software update for this module on related platforms for similar issues.
Diagnosis Steps
- Check Battery and Charging System: Ensure the battery has at least 12.4V at rest and the alternator is charging between 13.8-14.5V when running. A weak battery is a common cause of network codes. Clean any corrosion from the terminals.
- Check Fuses: Open the TIPM (fuse box) and physically press down on all fuses to ensure they are fully seated. Visually inspect fuses related to the ECM, BCM, and ABS.
- Perform a Full System Scan: Use an advanced OBD-II scanner to see which modules are reporting 'no communication'. This helps narrow down the scope of the problem.
- Check CAN Bus Resistance: With the battery disconnected, use a multimeter to measure the resistance between Pin 6 (CAN High) and Pin 14 (CAN Low) on the OBD-II port. A healthy network should read approximately 60 Ohms. A reading of 120 Ohms indicates one of the two terminating resistors is offline. A reading near 0 Ohms indicates a short circuit between the CAN high and low wires.
- Visual Inspection: Thoroughly inspect the main engine and under-dash wiring harnesses for any signs of damage, chafing, or corrosion, paying close attention to major connectors and common problem areas like near the parking brake pedal.
- Isolate the Fault: If the resistance reading is incorrect (e.g., 120 Ohms or 0 Ohms), or if multiple modules are offline, the fault must be isolated. On a Ram, this is done using the star connectors (junction blocks for the CAN bus), which are often located behind the driver's side kick panel. By disconnecting branches from the star connector one by one and re-measuring resistance, you can determine which circuit or module is causing the network to fail.
- Isolate the Module: Once a faulty branch is identified, disconnect the module on that branch. If the rest of the network comes back online (e.g., resistance returns to 60 Ohms), you have likely found the faulty module.
Parts You'll Likely Need
- Wiring Repair Supplies — The most common cause is a damaged wire or corroded connector that needs to be repaired, not a specific part that needs replacement.
Trusted brands: 3M
Aftermarket price range: $10-$50 - ABS Control Module
(OEM #68212842AC (example for 2014 Ram 1500, verify with VIN))— If a module is found to be the cause, the ABS module is a common culprit for bringing down the CAN network.
Trusted brands: Mopar
OEM price range: $300-$500
Aftermarket price range: $250-$800 - Battery — A weak or failing battery can cause unpredictable voltage drops, leading to network communication errors.
Trusted brands: Interstate, DieHard, Optima
OEM price range: $200-$350
Aftermarket price range: $150-$300
Related Codes That Often Appear With This One
- U0100 — Lost Communication With ECM/PCM
- U0121 — Lost Communication With Anti-Lock Brake System (ABS) Control Module
- U0140 — Lost Communication With Body Control Module (BCM)
Technical Service Bulletins (TSBs) & Recalls
- Addresses issues with the Radio Frequency Hub Module (RFHM) that can cause no-start conditions and communication problems on related platforms. Involves a software update.
- Involves reprogramming the Transmission Control Module (TCM) for shift quality and to correct erroneous DTCs on related platforms. Relevant as TCM communication is critical.
- Addresses radio software enhancements for issues like screen lock-up or blank screens, which can sometimes be related to network communication problems.
Mechanic-Grade Diagnostic Values
- CAN C Bus Resistance — expected: 53.5 to 67 Ohms between Pin 6 (CAN C +) and Pin 14 (CAN C -) at the DLC with battery disconnected.. Failure: A reading of ~120 Ohms indicates an open circuit or one terminating resistor is offline. A reading near 0 Ohms indicates a short between the two wires.
- CAN C Bus (+) Voltage — expected: Approximately 2.5V in the recessive state, 3.5V in the dominant state.. Failure: A steady voltage significantly different from 2.5V, or a voltage shorted to battery voltage (>6.0V), indicates a fault on the line.
- CAN C Bus (-) Voltage — expected: Approximately 2.5V in the recessive state, 1.5V in the dominant state.. Failure: A steady voltage significantly different from 2.5V, or a voltage shorted to ground or battery voltage (>6.0V), indicates a fault on the line.
- System Operating Voltage — expected: Between 10.0 and 16.0 volts for modules to operate correctly. A battery at rest should be above 12.4V.. Failure: Voltage dropping below 12V, especially during cranking, can cause modules to drop off the network.
Scan Tool Commands That Help
- wiTECH or equivalent advanced scan tool: Network Topology / Module Status — Use this function at the start of diagnosis to get a live view of all modules on the network and see which ones are not communicating. This is the fastest way to narrow down the scope of the problem before taking measurements.
- wiTECH or equivalent advanced scan tool: ECU Reset / BCM Reset — After a repair is performed (like fixing a wire or replacing a module), a full network reset may be required to force all modules to re-initialize and communicate. This can also be used after checking fuses and battery to clear any lingering 'soft' faults.
Wiring & Ground Locations
- Star Connector (CAN C Diagnostic Connector) — Typically located behind the driver's side kick panel or under the dash to the left of the steering column. On some later models (2018-2019), it may be on the passenger side, clipped to the body behind the kick panel.. This is the central junction for the CAN C bus. Disconnecting branches from this connector is the primary method for isolating which circuit or module is causing the network to go down.
- G302 — A major body ground located on the left front of the body, often near the A-pillar or behind the kick panel.. Multiple modules on the interior CAN bus share this ground point. Corrosion or a loose connection at G302 can cause several modules to lose their ground reference, leading to communication failures and a U0073 code.
- C200 Series Connectors — These are various in-line harness connectors located in the instrument panel area.. The CAN bus wiring passes through several C200-series connectors. A pin that has backed out or corroded within one of these connectors can cause an open circuit and bring down the network.
- DLC (Data Link Connector) Pins — The OBD-II port under the driver's side dashboard.. Pin 6 is CAN C High (+) and Pin 14 is CAN C Low (-). These are the primary test points for measuring bus resistance and voltage for the entire network.
Real Owner Repair Stories
- Reddit user on r/mechanic (2016 Ram 1500 V6, 115k miles) — Service ABS Module, Service Electronic Throttle Module, Parking Brake light on, Traction Control off, Park Sense cycling on/off, Service Shifter message.
❌ Tried (didn't work) Replacing the star connector itself did not fix the issue.
✅ What actually fixed it The user noted that even after replacing the star connector, the issue persisted. The problem was identified as exposed and damaged wires leading into the individual connectors that plug into the star connector block. Repairing these wire ends and ensuring the small white connector bodies were not broken was the necessary fix. - YouTube video by 'Automotive Diagnostics & Programming' (2016 Ram 1500) — Interior features not working (windows, radio), no communication with any interior CAN bus modules.
❌ Tried (didn't work) Initial scan showed a complete loss of communication on the interior bus.
✅ What actually fixed it The fault was isolated using the star connectors. By splitting the network into two halves, the technician determined the fault was on the branch containing the Driver Door Module (DDM), Passenger Door Module (PDM), and Radio Frequency Hub (RFH). Unplugging the Integrated Trailer Brake Relay Module (ITBM) restored communication to the rest of the network. The ITBM had failed internally and was shorting the bus. Replacing the ITBM resolved the U0073 code and all symptoms.
Model Year Variations Within This Range
- 2018-2019 (DS 'Classic' body style): The location of the primary star connector may be on the passenger side kick panel area, as opposed to the driver's side on earlier models. Technicians should be prepared to check both sides if it's not immediately found on the driver's side.
Diagnostic Flowchart
Other Known Issues on This Vehicle
Issues unrelated to this code that are worth knowing about as an owner of this generation:
- 5.7L Hemi Camshaft/Lifter Failure 🔴 High — Common, often cited between 70,000 and 130,000 miles, but can occur earlier. Often presents as a persistent engine tick.
- Cracked Exhaust Manifold Bolts 🟠 Medium — Very common. The steel bolts and cast iron manifold expand/contract at different rates, causing the bolts to shear off, leading to an exhaust leak tick, especially on cold starts.
- TIPM (Totally Integrated Power Module) Failure 🔴 High — A known issue across many Chrysler products of this era. Can cause a wide range of bizarre electrical problems, including no-start, fuel pump issues, or random accessory activation.
- Air Suspension System Faults 🟠 Medium — Common on trucks equipped with air suspension, especially in cold weather. Issues include compressor failure, blown fuses, and the truck being unable to adjust ride height.
- Water Pump Leakage 🟠 Medium — A known service bulletin item where the engine water pump may leak coolant, potentially leading to overheating if not addressed. (Ref: Yes (General Service Bulletin))
Used vs. New Parts: Buying Guide for This Vehicle
When a used part is the smart pick: For a complex wiring issue where a section of harness is damaged beyond simple repair, a complete used harness from a low-mileage, non-wrecked donor vehicle can be a cost-effective solution. Star connectors and their associated pigtails are also good candidates for used parts, as they are simple passive components.
Donor-vehicle mileage cap: roughly under 80000 miles for the part to have meaningful remaining life.
What to inspect on the donor part:
- Check for any signs of green or white corrosion on connector pins.
- Inspect the harness for any nicks, cuts, or previous amateur repairs (look for mismatched tape or crimp connectors).
- Ensure the donor vehicle was not in a flood or major collision that could have stressed the wiring.
- Verify the part numbers on modules if pulling from a donor, as there are many variations.
OEM-only on this vehicle (don't cheap out):
- ABS Module: While aftermarket options exist, they can have programming and compatibility issues. An OEM Mopar unit is strongly recommended for this critical safety component to ensure proper function and communication with the rest of the vehicle's systems.
- TIPM (Totally Integrated Power Module): Due to the high failure rate of some aftermarket TIPMs and the complexity of the component, a new or remanufactured OEM unit is the safest bet to avoid introducing new electrical problems.
Brands owners have reported issues with on this vehicle:
- Unbranded or 'white-box' electronic modules from online marketplaces. These often lack proper quality control and can fail prematurely or cause further network issues.
Real Owner Stories
Aggregated from forums and TSBs cited above. Mileages and costs reflect what owners reported in those sources.
2020 Ram 1500 5.7L Hemi — ~50000 miles
Symptoms: Diagnosed with lifter failure.
What fixed it: Engine replacement under warranty.
Source hint: Reddit r/ram_trucks - 1500 5.7 Hemi, are bad lifters a common problem?
Related OBD-II Codes
Frequently Asked Questions
My 2015 Ram 1500 is having shift quality issues and throwing communication codes; is there a TSB for this?
Could a software update fix the 'no-start' and communication problems on my Ram's Radio Frequency Hub?
My dash screen is locking up and I have a U0073 code; are these related?
Where should I check for wiring damage on my Ram 1500 if I suspect a CAN bus short?
How can I tell if my ABS module is the reason the whole network is down?
What should the resistance be when testing the CAN bus at the OBD-II port?
Helpful Videos


We Have This Part in Stock

The information in this article is provided for general reference and educational purposes only. Vehicle specifications, procedures, and part compatibility can vary by production date, trim level, and region. Always consult your vehicle's factory service manual and verify part numbers before purchasing or performing repairs. Safety-critical components such as airbags, seat belts, and braking systems should be installed by a qualified professional.
- Ram 1500:
- 🧭 Diagnostic Flowchart
- 🎬 Helpful Videos
- 🛍️ Shop This Part
- What's Unique About the 2009-2018 Ram 1500
- Symptoms You May Notice
- Most Likely Causes
- Rare But Worth Checking
- Diagnosis Steps
- Parts You'll Likely Need
- Related Codes That Often Appear With This One
- Technical Service Bulletins (TSBs) & Recalls
- Mechanic-Grade Diagnostic Values
- Scan Tool Commands That Help
- Wiring & Ground Locations
- Real Owner Repair Stories
- Model Year Variations Within This Range
- Other Known Issues on This Vehicle
- Used vs. New Parts: Buying Guide for This Vehicle
- Real Owner Stories
- 2020 Ram 1500 5.7L Hemi — ~50000 miles
- Related OBD-II Codes
- Frequently Asked Questions
- 🎟️ Get 5% Off