
U0140 on 2011-2015 Kia Optima: Lost Communication With Body Control Module Causes and Fixes
This code means the Body Control Module (BCM), also known as the Smart Junction Box (SJB), has stopped communicating. This causes widespread electrical problems. Before replacing the SJB (around $75-$250 used), check for a weak battery, bad grounds, and blown fuses in the dash and engine bay fuse boxes, as these are common and cheaper fixes.
- U0140 on a 2011-2015 Optima points to a communication failure with the Smart Junction Box (SJB), the car's main body computer.
- Always check the easiest things first: battery health, terminal connections, and all related fuses in both fuse boxes before assuming the main computer has failed.
- Common symptoms are widespread and electrical: lights, locks, and windows failing simultaneously.
- If you must replace the Smart Junction Box (interior fuse panel), you can often use a matching-part-number used unit without needing expensive dealer programming.
- Do not drive the vehicle if possible, as safety-critical systems like headlights and wipers can fail at any time.
What's Unique About the 2011-2015 Kia Optima
On this generation of Kia Optima (TF), the Body Control Module is part of the Smart Junction Box (SJB), which is the interior fuse box assembly. While many modern control modules require expensive dealer programming after replacement, the SJB on the 2011-2015 Optima is generally considered plug-and-play. As long as you replace it with a used or new unit that has the exact same OEM part number, it typically does not require programming to restore function. This makes a DIY replacement much more feasible than on many other vehicles. However, it is absolutely critical to match the part number exactly, as there are many variations based on trim level and features.
Symptoms You May Notice
- Flickering or completely dead headlights, taillights, or interior lights.
- Power windows, power door locks, and remote keyless entry not working.
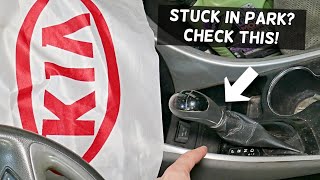
- Gear selector may become stuck in Park. There is a manual override slot near the shifter to bypass this temporarily. 🎬 Watch: How to manually shift your Kia out of Park
- Wipers behaving erratically or not working at all.
- Multiple warning lights illuminated on the instrument cluster (ABS, Traction Control, etc.).
- Parasitic battery drain leading to a dead battery, sometimes accompanied by clicking from the dashboard as internal SJB relays cycle incorrectly.
- A/C or heater blower motor may stay on even with the car turned off.
- Turn signals activating on the opposite side from what is selected (a known software issue on some related platforms).
- Replacing individual components like window switches or light bulbs when the root cause is the central SJB/BCM that controls them all.
- Misdiagnosing a faulty brake light switch as a BCM failure, 🎬 See how to diagnose a BCM with no shift signal as a bad switch can sometimes cause communication issues on this platform.
Most Likely Causes
- Weak Battery or Poor Connections 🔴 High Probability → Shop Vehicle Battery Network modules are highly sensitive to voltage. A battery below 12.4V or corroded/loose terminals can easily cause communication dropouts. This is a common issue across most modern vehicles.
How to confirm: Test the battery voltage with a multimeter. It should be at least 12.4V with the engine off and 13.7-14.7V with the engine running. Load test the battery to ensure it can hold a charge under load. Check that battery terminals are clean and tight.
Typical fix: Charge or replace the battery. Clean the battery terminals and cable ends with a wire brush.
Est. part cost: $0-$250 - Blown BCM / SJB Fuses 🟡 Medium Probability The SJB is powered by multiple fuses in both the interior and engine bay fuse boxes. An electrical surge or short can easily blow one, taking the module offline.
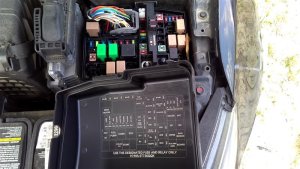
How to confirm: Visually inspect and test all fuses labeled 'Module', 'BCM', or 'B/UP' in both the driver's side interior fuse panel and the engine compartment fuse box. Pay close attention to the large multi-fuses in the engine bay.
Typical fix: Replace any blown fuses with new ones of the exact same amperage rating.
Est. part cost: $1-$10 - Faulty Smart Junction Box (SJB / BCM) 🟡 Medium Probability The SJB is a known failure point on this platform, with internal circuit board or relay failures causing a wide range of electrical issues. Water intrusion from clogged sunroof drains or a leaking windshield seal can also damage the SJB, which is located in the driver's side footwell.
How to confirm: If all power, ground, and fuses for the SJB are confirmed good, but the unit will not communicate and symptoms persist, the SJB itself is the likely cause. A professional scan tool will show the BCM as 'offline'. Visually inspect the SJB and its connectors for any signs of green/white corrosion or water marks.
Typical fix: Replace the Smart Junction Box. It is located as part of the interior fuse panel on the driver's side. The replacement MUST have the exact same OEM part number to be plug-and-play. If water damage is found, the source of the leak must be repaired to prevent repeat failure.
Est. part cost: $75-$250 (Used), $400-$600 (New) - CAN Bus Wiring or Connector Fault ⚪ Low Probability Wiring can become damaged or corroded over time, especially in harnesses that pass through the doors or firewall. The pins in the large connectors at the SJB can also lose tension.
How to confirm: Visually inspect the wiring and connectors at the SJB for any signs of corrosion, water intrusion, or physical damage. Advanced diagnosis involves checking for 60 ohms of resistance across the CAN High (Pin 6) and CAN Low (Pin 14) pins at the OBD-II port with the battery disconnected. A reading of 120 Ohms suggests a break in the circuit or a failed termination resistor. A reading near 0 Ohms indicates a short circuit.
Typical fix: Repair the damaged section of wiring or clean/replace the corroded connector.
Est. part cost: $10-$100
Diagnosis Steps
- Check Battery Health: Use a multimeter to ensure the battery has at least 12.4 volts with the engine off and 13.7-14.7V when running. A weak or dying battery is a very common cause of network codes. Clean any corrosion from the battery terminals and ensure connections are tight.
- Inspect Fuses: Carefully check all fuses related to the BCM/SJB. There are multiple fuses in both the interior fuse panel (driver's side dash) and the engine bay fuse box. Look for fuses labeled 'Module 1', 'Module 2', and 'B/UP'.
- Scan All Modules: Use an advanced OBD-II scanner capable of reading manufacturer-specific codes from all modules (not just the engine). Note which other modules are reporting a loss of communication with the BCM. Confirm the BCM/SJB is 'offline'.
- Visual Inspection of SJB: Access the Smart Junction Box (interior fuse panel) and disconnect its main electrical connectors. Look carefully for any signs of green or white corrosion, moisture, or backed-out pins, which could indicate water damage or a poor connection.
- Check for Shift Interlock Override: If the gear selector is stuck in Park, use the manual shift-lock release. It's a small slot near the shifter, usually covered by a small plastic cap.
- Test Network Resistance (Advanced): With the battery disconnected, measure the resistance between Pin 6 (CAN High) and Pin 14 (CAN Low) on the OBD-II port. A healthy network should read approximately 60 Ohms. A reading of 120 Ohms suggests a break in the circuit or a failed termination resistor. A reading near 0 Ohms indicates a short circuit.
- Confirm SJB Failure: If the battery is strong, all fuses are good, and wiring appears intact, the Smart Junction Box (BCM) is the most likely failed component.
Parts You'll Likely Need
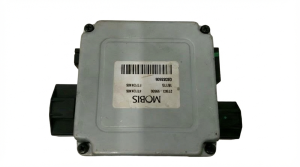
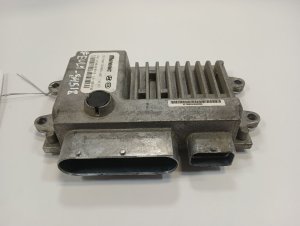
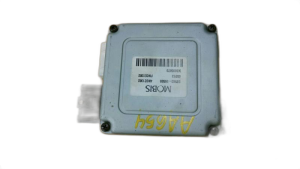
- Smart Junction Box (Body Control Module)
(OEM #91950-2T090 (Example for 2011-2013 US build, non-LED DRL). Many others exist, MUST match original.)— This module is the most common point of failure for this code after basic electrical issues are ruled out. It contains the relays and logic for most of the car's body electronics. Internal failure or water damage are common culprits.
Trusted brands: Kia (OEM)
OEM price range: $400-$600
Aftermarket price range: $75-$250 (Used/Remanufactured) - Automotive Fuses — A simple blown fuse can take the entire BCM offline, causing this code.
Trusted brands: Bussmann, Littlefuse
OEM price range: $5-$15 (kit)
Aftermarket price range: $5-$10 (kit)
Related Codes That Often Appear With This One
- U0073 — Control Module Communication Bus 'A' Off. This is a general network failure code that often appears with more specific module communication loss codes like U0140.
- U0155 — Lost Communication With Instrument Panel Cluster (IPC) Control Module. The IPC and BCM are in constant communication, and a network fault can cause both to log codes.
- B1602 — CAN Error. This is a manufacturer-specific code that often accompanies U0140, pointing directly to a CAN bus communication error related to the BCM.
Platform-Specific Known Issues
- Water Intrusion from Sunroof Drains: On models equipped with a sunroof, the drain tubes can become clogged or the grommets can fail. This can cause water to leak down the A-pillar and directly onto the Smart Junction Box in the driver's footwell, causing corrosion and failure. Owners have reported success with DIY rerouting of the drain tubes to bypass the problematic factory grommets.
Mechanic-Grade Diagnostic Values
- CAN Bus Resistance — expected: ~60 Ω. Failure: 120 Ω indicates an open circuit or missing termination resistor. ~0 Ω indicates a short between CAN High and CAN Low wires.
- B-CAN (Body CAN) High Voltage — expected: Near 0V (Key On, Engine Off). Failure: Significant voltage deviation can indicate a short to power or internal module fault.
- B-CAN (Body CAN) Low Voltage — expected: ~5V (Key On, Engine Off). Failure: Significant voltage deviation can indicate a short to ground or internal module fault.
- SJB/BCM Power Supply Voltage — expected: 12.2V - 12.8V. Failure: Low or no voltage indicates a fuse or wiring issue upstream of the module.
- SJB/BCM Ground Resistance — expected: < 0.1 Ω. Failure: High resistance indicates a poor ground connection, which can cause intermittent communication.
Scan Tool Commands That Help
- Kia GDS (Global Diagnostic System): DTC Analysis / Fault Code Searching — To scan all vehicle modules (including BCM, Smart Key, etc.) simultaneously to see which ones are reporting communication loss with the BCM. This is more comprehensive than generic OBD-II scanners.
- Kia GDS (Global Diagnostic System): Actuation Test — To command specific functions controlled by the BCM (e.g., 'turn on headlights,' 'lock doors'). If the command works, it suggests the BCM's output driver is functional, pointing the diagnosis more toward network or input signal issues.
- Kia GDS (Global Diagnostic System): Vehicle S/W Management — This function is used for variant coding or resetting configurations. While the SJB is often plug-and-play, this would be used if a new module required configuration for specific vehicle options.
Wiring & Ground Locations
- SJB / BCM — Integrated into the interior fuse panel, located in the driver's side footwell, to the left of the steering column.. This is the location of the module itself. It is critical for visual inspection for water damage and for testing power, ground, and CAN signals at its connectors.
- Main Dash Ground Bolt — A silver bolt to the right of the interior fuse panel, with multiple ground wires attached to it.. This is a primary grounding point for many interior electronics, including potentially the SJB/BCM. A loose or corroded connection here can cause widespread electrical issues and communication codes.
- Joint Connector (JM02) — Located next to the interior fuse box. It's a comb-like connector where multiple CAN bus wires join together.. This is a central node for the B-CAN network. A poor connection or corrosion within this joint connector can disrupt communication for multiple modules, including the BCM.
- OBD-II Port Pins 6 & 14 — Driver's side under-dash area. Pin 6 is CAN High, Pin 14 is CAN Low.. These pins provide the most accessible point to test the overall health of the CAN bus network with a multimeter (resistance test) or oscilloscope without having to access individual modules.
Real Owner Repair Stories
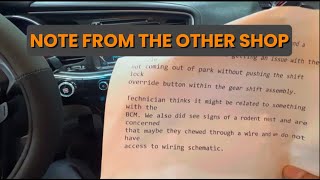
- YouTube video by 'Fix it up' (2015 Kia Optima) — Vehicle would not shift out of Park without using the manual override button.
❌ Tried (didn't work) The previous shop replaced the shift lock solenoid, alternator, and battery.
✅ What actually fixed it Diagnosis revealed the BCM was receiving the brake pedal signal but was not providing the necessary ground signal to the shift lock solenoid. The BCM itself was faulty and needed replacement.
OEM Part Supersession History
91950-2T090→N/A— Part specific to model years and trim.
Heads up: This specific part number is listed for 2011-2013 US-built Optimas without LED running lights. Using a part from a car with different options (e.g., push-button start, different lighting) will cause features to not work. The part number MUST be an exact match to the original unit.
Model Year Variations Within This Range
- 2014-2015: The Kia Optima received a significant facelift for the 2014 model year. This included revised interior controls, a new optional 4.3-inch TFT display in the gauge cluster, and new safety features like Blind Spot Detection. These changes introduced different SJB/BCM part numbers to support the new features. While the fundamental cause of a U0140 code remains the same, the specific part number for a replacement SJB will be different from the 2011-2013 models.
Diagnostic Flowchart
Other Known Issues on This Vehicle
Issues unrelated to this code that are worth knowing about as an owner of this generation:
- Theta II Engine Failure 🔴 High — Widespread across 2.0L Turbo and 2.4L GDI engines. Failures can occur at various mileages, often starting with rod knock. (Ref: Multiple recalls (e.g., 17V-224) and a class-action lawsuit settlement extended warranty coverage. The issue stems from metallic debris left during manufacturing, leading to connecting rod bearing failure and potential engine seizure or fire.)
- Hydraulic Electronic Control Unit (HECU) Fire Risk 🔴 High — Affects a broad range of model years, including 2013-2015 Optimas. (Ref: Multiple recalls issued (e.g., NHTSA #20V519, SC197, SC212). Brake fluid can leak inside the HECU, causing an electrical short that can lead to an engine compartment fire, even when the car is parked.)
- Excessive Oil Consumption 🟠 Medium — Common on Theta II engines, often related to carbon buildup on piston rings. (Ref: A 2020 TSB addressed this issue. Insufficient oil levels can exacerbate the risk of bearing wear and engine failure.)
- Carbon Buildup on Intake Valves 🟡 Low — An inherent issue with Gasoline Direct Injection (GDI) engines like the Theta II, as fuel does not wash over the intake valves. Becomes more noticeable at higher mileage.
- High-Pressure Fuel Pipe Leak 🔴 High — Primarily affects vehicles that had engines replaced under warranty or recall. (Ref: Recall SC172. The high-pressure fuel pipe may have been damaged or improperly torqued during engine replacement, leading to a fuel leak and fire risk.)
Used vs. New Parts: Buying Guide for This Vehicle
When a used part is the smart pick: A used Smart Junction Box (SJB) is a very smart choice for this repair. Because the SJB on the 2011-2015 Optima is typically plug-and-play and does not require dealer programming, a used part from a reputable salvage yard can save hundreds of dollars compared to a new OEM unit.
Donor-vehicle mileage cap: roughly under 120000 miles for the part to have meaningful remaining life.
What to inspect on the donor part:
- CRITICAL: The part number on the used SJB must EXACTLY match the part number on your original unit. There are many variations based on trim and options.
- Inspect all connector ports for any signs of green or white corrosion, which indicates water damage. Do not buy if corrosion is present.
- Check the plastic casing for any signs of heat damage, melting, or cracking.
- Ask for the VIN of the donor vehicle to verify its year and trim level if possible.
- Buy from a seller that offers a warranty or return policy in case the unit is dead on arrival.
Aftermarket brands forum-validated for this vehicle:
- Used OEM (Kia/Hyundai)
Brands owners have reported issues with on this vehicle:
- Unknown third-party sellers on platforms like AliExpress or eBay offering 'new' units at extremely low prices, as these may be non-functional or used parts misrepresented as new.
Real Owner Stories
Aggregated from forums and TSBs cited above. Mileages and costs reflect what owners reported in those sources.
2013 Kia Optima
Symptoms: Flickering headlights, power windows and door locks not functioning, and the gear stick was stuck in Park.
What fixed it: Diagnosis pointed to the Smart Junction Box (BCM) losing communication.
Source hint: Reddit r/KiaK5
2011-2015 Kia Optima
Symptoms: The BCM got wet due to water intrusion, leading to electrical failure and communication codes.
What fixed it: Replacement of the Smart Junction Box and repairing the source of the water leak.
Source hint: Reddit r/MechanicAdvice - 'Had an issue where my bcm got wet...'
Related OBD-II Codes
Frequently Asked Questions
My 2013 Kia Optima's gear shifter is stuck in Park and the headlights are flickering. Is this related to code U0140?
Can a bad battery cause U0140 on my 2011-2015 Optima?
I found water in my driver's side footwell and now have electrical issues. What should I check?
Is there a recall for the engine issues mentioned in my Optima's history?
My 2014 Optima has a risk of fire even when parked; is this related to the SJB?
Does the 2011-2014 Hyundai Sonata share this U0140 issue?
Helpful Videos
We Have This Part in Stock


The information in this article is provided for general reference and educational purposes only. Vehicle specifications, procedures, and part compatibility can vary by production date, trim level, and region. Always consult your vehicle's factory service manual and verify part numbers before purchasing or performing repairs. Safety-critical components such as airbags, seat belts, and braking systems should be installed by a qualified professional.
- Kia Optima:
- 🧭 Diagnostic Flowchart
- 🎬 Helpful Videos
- 🛍️ Shop This Part
- What's Unique About the 2011-2015 Kia Optima
- Symptoms You May Notice
- Most Likely Causes
- Diagnosis Steps
- Parts You'll Likely Need
- Related Codes That Often Appear With This One
- Platform-Specific Known Issues
- Mechanic-Grade Diagnostic Values
- Scan Tool Commands That Help
- Wiring & Ground Locations
- Real Owner Repair Stories
- OEM Part Supersession History
- Model Year Variations Within This Range
- Other Known Issues on This Vehicle
- Used vs. New Parts: Buying Guide for This Vehicle
- Real Owner Stories
- 2013 Kia Optima
- 2011-2015 Kia Optima
- Related OBD-II Codes
- Frequently Asked Questions
- 🎟️ Get 5% Off