
U1000 on 2005-2013 Chevrolet Corvette: Class 2 Communication Fault Causes and Fixes
On a C6 Corvette, code U1000 is almost always caused by a weak battery or a corroded ground connection, especially the main grounds located under the battery tray and in the passenger footwell (Splice Pack SP208). Cleaning these grounds and ensuring the battery is healthy resolves the issue in a majority of cases and should be the first step before suspecting more expensive module failures. Door-related symptoms often point to the Driver Door Module (DDM) or its wiring.
- Before any other diagnosis, fully charge and load-test your battery.
- The most likely fix is cleaning the ground connections under the battery tray. This is a common and well-documented issue for the C6 Corvette.
- If door functions (windows, locks, mirrors) are failing, the door module in that specific door is the next most likely cause.
- U1000 is a generic communication code. A proper diagnosis requires a scan tool that can identify which specific module has gone offline.
- Do not replace modules randomly. The problem is often the power or ground supplying the module, not the module itself.
What's Unique About the 2005-2013 Chevrolet Corvette
The C6 Corvette, like many GM vehicles of its era, relies on the older Class 2 communication protocol instead of the more modern CAN bus for many body and convenience functions. This single-wire network is particularly sensitive to voltage fluctuations and poor ground connections. Corvette owners frequently report that electrical 'gremlins' caused by corroded grounds are a common source of this code, making ground point inspection a critical first step. Key problem areas are the splice packs (especially SP208 in the passenger footwell) and grounds under the battery.
Generation note: The 2005-2013 model years cover the entire C6 generation of the Chevrolet Corvette. The causes and fixes are generally consistent across this generation, though some part numbers for modules may vary by year.
Symptoms You May Notice
- Multiple warning lights on the instrument cluster (e.g., 'Service Vehicle', Security, ABS).
- Loss of function in the driver or passenger door, such as power windows, mirrors, and door locks not working.
- Radio or navigation system inoperative or behaving erratically.
- Intermittent no-start or no-crank condition.
- Check Engine Light is on.
- The security light stays illuminated.
- HUD display randomly turning on and off, often associated with ground G201.
- Loss of engine power, bucking, and erratic behavior of the odometer, RPM gauge, and temperature gauge, as noted in similar GM vehicle reports like NHTSA ODI #11244385.
- Replacing random modules without diagnosis. The U1000 code indicates a communication loss, not necessarily a failure of the module that stored the code. The actual fault lies with the module that is *not* communicating, or the wiring/grounds connected to it. A proper scan tool is needed to see which module is offline.
Most Likely Causes
- Weak Battery or Poor Battery Connections 🔴 High Probability → Shop Vehicle Battery The C6 Corvette's numerous electronic modules are sensitive to low voltage. A voltage drop during startup is a very common trigger for communication codes as modules fail to initialize properly.
How to confirm: Test the battery voltage with a multimeter. A healthy, resting battery should be at or above 12.6 volts. You can also check this on the DIC by putting the car in accessory mode (press and hold ACC for 10 seconds) and cycling the 'Gauges' button. Have the battery load-tested at an auto parts store, as a battery can show good voltage but fail under load. Check for clean, tight terminal connections.
Typical fix: Recharge or replace the battery. Clean the battery terminals and cable ends with a wire brush.
Est. part cost: $150-$300 - Corroded or Loose Ground Connections 🔴 High Probability Several key ground points and splice packs on the C6 are known to corrode or loosen. Forum members consistently cite this as the top cause for U1000. The main ground block under the battery tray is a frequent culprit. Additionally, splice packs SP205 (driver side) and SP208 (passenger footwell, near the BCM) are common failure points for the Class 2 data bus.
How to confirm: Visually inspect ground points for corrosion. Key locations: G101/G102 under the battery tray, G201 (driver A-pillar/threshold), G202 (passenger A-pillar), and engine block grounds G105/G106/G107. Inspect splice packs SP205 and SP208 for corrosion or water intrusion, which is common if the HVAC drain is clogged. A voltage drop test can confirm a bad connection.
Typical fix: Disconnect the battery. Remove the ground wires/splice packs, clean the terminals and the chassis mounting point to bare metal using a wire brush or sandpaper, and re-secure them tightly. Applying dielectric grease can prevent future corrosion.
Est. part cost: $0-$20 - Failing Driver Door Module (DDM) or Passenger Door Module (PDM) 🟡 Medium Probability → Shop Body Control Module If symptoms are isolated to one door (windows, locks, mirrors), the module inside that door is a common point of failure. It can lose communication and trigger a U1000 code in other modules. The DDM is particularly common.
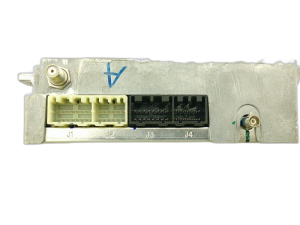
How to confirm: Use a high-end scan tool to see if the DDM or PDM is offline or not communicating. Check for 12V power on the red/white wire (pin 20) and ground on the black wire (pin 10) at the module's connector. Check for a toggling voltage on the brown Class 2 data wire (pin 19).
Typical fix: Replace the faulty door module. The module is located inside the door panel. In some cases, the module is sold as part of the window regulator assembly.
Est. part cost: $150-$400 - Damaged Wiring or Connectors ⚪ Low Probability The wiring harness that passes between the door and the car body (in the accordion boot) can fatigue and break over time from repeated opening and closing of the door. This can sever the power, ground, or data wire to the door module. Manufacturer service bulletins for other GM models, such as Bulletin #PIT5369A and Bulletin #GCUS-3-423, also highlight that harness issues (specifically the engine EGI harness) can lead to a U1000 and crank/no-start events.
How to confirm: Visually inspect the wiring harness in the door jamb for broken or chafed wires. This often requires peeling back the rubber accordion boot. Check for backed-out pins or corrosion in the main door harness connector.
Typical fix: Repair the broken wire(s) with butt connectors and heat shrink, or replace the damaged section of the harness. Ensure the repair is flexible enough to withstand door movement.
Est. part cost: $10-$100
Rare But Worth Checking
- Faulty Body Control Module (BCM): → Shop Body Control Module The BCM acts as a central hub for communication. While less common than grounds or door modules, a BCM failure can take down the entire network. Water intrusion from a clogged HVAC drain is a known cause of BCM failure on the C6. This is usually suspected after all other causes are ruled out.
- Improperly Installed Aftermarket Electronics: Aftermarket radios, alarms, or remote starters that are incorrectly tapped into the Class 2 data wire (often a brown or light-green wire) can disrupt communication and cause a U1000 code. Tapping into Splice Pack SP208 for a ground connection is a common mistake that can cause these issues.
- Faulty Transmission Control Module (TCM) Connector: → Shop Transmission Assembly TSB 08-07-30-021H points to backed-out terminals or corrosion in the 16-way electrical connector at the automatic transmission, which can cause a loss of GMLAN communication and set various U-codes. While this TSB focuses on GMLAN (a different network), the underlying issue of connector integrity is relevant.
Diagnosis Steps
- Read All Codes: Use a scan tool capable of reading manufacturer-specific codes (B, C, U-codes) from all modules. Note which modules are reporting U1000 and, more importantly, which modules are not responding at all (e.g., 'No Comm').
- Check Battery Health: Test the battery voltage (should be >12.6V resting) and perform a load test. Ensure terminals are clean and tight. A weak battery is the most common and easiest fix.
- Inspect and Clean Key Grounds: Disconnect the battery. Locate, disassemble, clean to bare metal, and reassemble the primary ground connection points. Prioritize the grounds under the battery tray (G101/G102) and the splice packs in the passenger footwell (SP208) and driver's side (SP205).
- Isolate Symptoms: If symptoms are specific to one area (e.g., driver's door), suspect the module in that area (Driver Door Module).
- Check Module Power/Ground: If a specific module is suspected (like the DDM), access its connector. Use a multimeter to verify it is receiving battery power (Pin 20, Red/Wht) and has a solid ground (Pin 10, Blk).
- Check Data Line: With the module still connected, probe the Class 2 data wire (Pin 19, Brown wire for DDM). You should see a fluctuating voltage (typically between 0-7V) indicating data transfer. If the voltage is stuck high or low, there is a wiring short or an internal module fault.
- Inspect Wiring Harnesses: Check for physical damage, especially in flexible areas like the door jamb accordion boot. Look for broken or chafed wires. Note that Bulletin #PIT5369 suggests that a U1000 may be found in multiple high-speed modules alongside BCM codes like B2190 or B2193.
- Disconnect Modules Sequentially: If the data line appears shorted, you can unplug modules from the Class 2 network one by one (starting with common culprits like the DDM, PDM, and Radio). When the shorted module is disconnected, communication between the other modules may be restored. This is an advanced step that requires a wiring diagram.
Parts You'll Likely Need
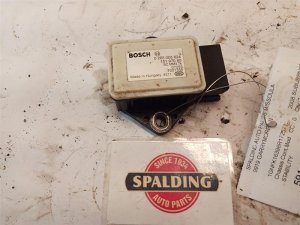
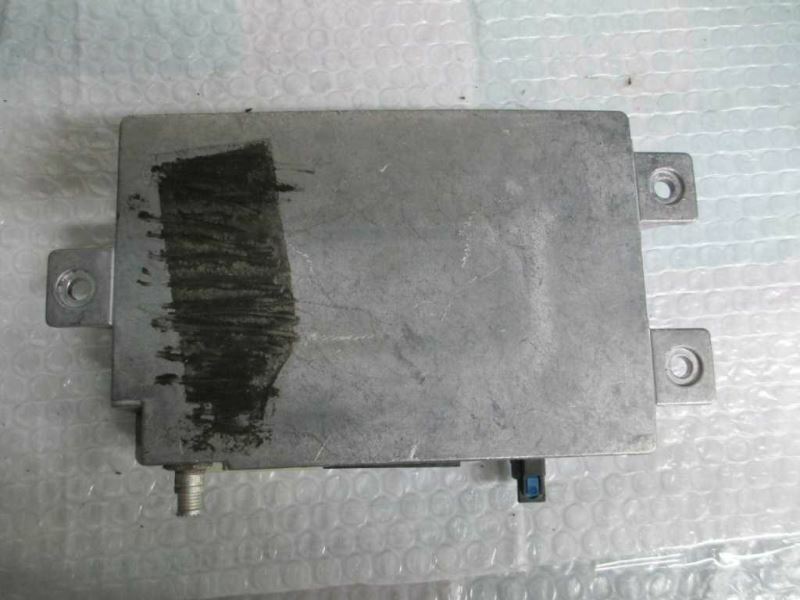
- Driver Door Module (DDM)
(OEM #22895755 (Sold with regulator))— This module controls the window, lock, and mirror functions and is a frequent point of failure that can disrupt the Class 2 network, causing U1000 codes in other modules. It is often sold as a complete assembly with the window regulator.
Related Codes That Often Appear With This One
- U1017 — Loss of communication with the Engine Control Module (ECM).
- U1040 — Loss of communication with the Electronic Brake Control Module (EBCM).
- U1064 — Loss of communication with the Body Control Module (BCM).
- B2282 — Battery Power Circuit Fault, often seen with DDM/PDM issues.
- B2284 — Battery Power Circuit Fault, often seen with DDM/PDM issues.
- P0700 / U0073 — Often seen together with U1000 during power loss events, as noted in NHTSA ODI #11244385.
Technical Service Bulletins (TSBs) & Recalls
- 08-07-30-021H: While primarily for GMLAN (High-Speed CAN) issues on 2007+ models, this TSB is relevant as it addresses widespread communication loss (U0100, U0121, etc.) caused by poor connections, particularly the 16-way connector at the transmission. It highlights the importance of checking major harness connectors for backed-out pins or corrosion.
- Bulletin #PIC3557: This bulletin advises technicians that a Class 2 communications DTC U1000 may not lead to a final repair and suggests that in some diagnostic scenarios, technicians should be advised to disregard the U1000 code if it is set as current or intermittent while focusing on other primary codes.
- Bulletin #PIT5369 / #PIT5369A: These bulletins describe a crank no-start issue, particularly after sitting overnight below freezing, where a U1000 may be present. The recommended action involves gaining access to the engine harness above the fuel rail and unsecuring it from its retainers.
- Bulletin #GCUS-3-423: Notes that during a crank/no-start event, a Malfunction Indicator Lamp will illuminate and the vehicle will store U0100, U1000, and B2193, requiring a revision of the engine EGI harness.
Platform-Specific Known Issues
- The ground splice pack located under the battery tray is notoriously prone to corrosion from battery fumes or leaks, making it the number one suspect for this code on the C6 platform.
- The wiring harness for the driver's seat module can become stressed and break from the seat moving back and forth, causing a U1000 code in the seat module.
Mechanic-Grade Diagnostic Values
- Class 2 Data Line (J1850 VPW) Voltage — expected: Fluctuating voltage, typically between 0V and +7V. A high signal is > 3.5V (dominant), and a low signal is < 3.5V (recessive).. Failure: Voltage stuck at 0V (short to ground), stuck at a constant high voltage (short to power), or no fluctuation (open circuit or dead module).
- GMLAN Bus Resistance (at DLC) — expected: Approximately 60 Ohms between Pin 6 and Pin 14 of the DLC with the battery disconnected.. Failure: 120 Ohms indicates a break in the circuit or a missing terminating resistor (one at the BCM, one at the ECM). 0 Ohms indicates a short between the two CAN wires.
- Resting Battery Voltage (at terminals or DIC) — expected: 12.6V or higher.. Failure: Below 12.4V indicates a discharged state. Readings below 11.5V can cause modules to behave erratically and set communication codes.
Scan Tool Commands That Help
- Tech 2: Diagnostic Circuit Check / Class 2 Message Monitor — This function is critical for diagnosing U1000. It allows a technician to see a list of all modules on the network and their status. The module that is *not* on the list is the one that is offline and causing the fault.
- Tech 2: Clear All DTCs — After performing a repair (like cleaning a ground), clear all codes from all modules. Then, cycle the ignition off for at least 5 seconds and then back on to see if the U1000 code returns as current. This verifies if the fix was successful.
Wiring & Ground Locations
- G201 — Interior, at the bottom of the driver's side A-pillar, behind the plastic kick panel/threshold area.. This is a shared ground for several interior modules, including the HUD and instrument panel lights. A loose or corroded G201 is a known cause of random electrical issues and communication faults.
- G202 — Interior, at the bottom of the passenger's side A-pillar, behind the plastic kick panel near the BCM.. This ground is critical for the BCM and other passenger-side electronics. Its location makes it susceptible to water damage if the AC evaporator drain clogs.
- SP205 — Interior, behind the lower left of the instrument panel, to the left of the steering column.. This is a 'star' connector or splice pack that joins the Class 2 data wires for several modules on the driver's side of the car. Corrosion here can isolate multiple modules.
- SP208 — Interior, in the passenger footwell, behind the right side of the instrument panel, often located to the left of the audio amplifier/BCM area.. This is a major splice pack for the Class 2 data bus. It is a very common failure point due to its location, which is prone to water intrusion from a clogged AC drain. It should NOT be used as a ground point for aftermarket accessories.
- AC Evaporator Drain — A 90-degree black rubber hose on the lower passenger side of the firewall, best accessed from underneath the car.. If this drain clogs with debris, condensation from the AC system will back up and overflow into the passenger footwell, soaking the BCM, SP208, and G202, causing widespread communication failures.
Real Owner Repair Stories
- CorvetteForum user story (2007 C6 Z06 with 4,000 miles) — Sound of water sloshing from passenger dash, multiple random DIC messages, doors would not unlock or open.
❌ Tried (didn't work) The car had previously had two BCMs replaced by the dealer without fixing the root cause.
✅ What actually fixed it A technician found the AC evaporator drain tube was pinched, causing nearly a gallon of water to collect in the evaporator case. This water leaked onto a BCM connector, shorting the module. The final fix was to unclog the drain line, dry the connector, and replace the BCM for a third time. - CorvetteForum user story (2008 Corvette) — Security light on, no function from driver's side window/mirror/lock switches, U1000 code in RCDLR, radio, and driver position module.
❌ Tried (didn't work) Initial diagnosis was unclear due to multiple modules reporting the code.
✅ What actually fixed it The problem was traced to the Class 2 data bus wiring. The user was advised to check splice packs SP205 (driver's side) and SP208 (passenger's side) as the likely source of the communication breakdown affecting those specific modules. - CorvetteForum user story (2005 C6 after an engine swap) — No-start condition, fob not unlocking doors, multiple communication codes including U1000, U1017 (loss of ECM comm), and U1040 (loss of EBCM comm).
❌ Tried (didn't work) Replacing the battery.
✅ What actually fixed it The issue was traced to an improperly placed ground wire after the engine swap. A ground wire was incorrectly attached to a header bolt instead of its proper location on the engine block (G106). Correcting the ground location is the prescribed fix. - NHTSA ODI #11244385 — An owner of a similar GM vehicle reported that the car would throw codes P0700, U0073, and U1000, resulting in a loss of engine power, the Stabilitrak light illuminating, and the car bucking while gauges behaved erratically.
OEM Part Supersession History
15803798, Delphi 28043635→15850986— Standard part revision and update by GM.
Heads up: BCMs are year-specific and require programming to the vehicle's VIN and options. A used BCM from another car will not be plug-and-play and may cause more communication issues if not properly programmed by a dealer or specialist with a Tech 2.10372535, 15294296, 15853335→25940664— Part revision for the Remote Control Door Lock Receiver (RCDLR).
Heads up: This module is critical for key fob and security functions. Using an incorrect or improperly programmed module can lead to no-start conditions and security system faults.
Model Year Variations Within This Range
- 2005-2013: While the C6 generation uses both the older Class 2 (J1850 VPW) single-wire network and the newer GMLAN (CAN bus) two-wire network, the distribution of modules between these networks can vary slightly by year and option package. Body control modules (DDM, PDM, Radio, HVAC, etc.) typically use Class 2, while powertrain and safety modules (ECM, EBCM, TCM) use the high-speed GMLAN. The BCM acts as the gateway between the two networks. This distinction is important for diagnosis, as a U1000 code specifically points to a fault on the Class 2 network.
Diagnostic Flowchart
Other Known Issues on This Vehicle
Issues unrelated to this code that are worth knowing about as an owner of this generation:
- Harmonic Balancer Wobble/Failure 🔴 High — Common across all C6 years, especially LS2 and LS3 engines. The rubber bonding deteriorates, causing the outer ring to wobble, which can throw the serpentine belt and damage other components. Onset can be as early as 20k-30k miles. (Ref: TSB #05-06-01-001A (for early 2005 models with a loose bolt), but the delamination issue affects all years.)
- Fuel Level Sending Unit Failure 🟠 Medium — Very common. The contacts on the sending units inside the dual fuel tanks wear out, causing an inaccurate or empty fuel gauge reading and codes like P2068. Often requires additives like Techron or replacement, which is labor-intensive. (Ref: GM issued guidance and part updates, but no major recall. The issue is widely documented in forums.)
- Steering Column Lock Failure (2005 Models) 🔴 High — Primarily affects 2005 models (especially manual transmission), leading to a 'Service Column Lock' message and a no-start condition. A recall was issued for a related 'Service Active Handling' issue. (Ref: Recall #10118 for Active Handling issue. TSB #18-NA-346 was later issued to allow dealers to permanently disable the lock system.)
- Roof Panel Delamination / Flying Roof 🔴 High — Common on early C6 models (2005-2007). The adhesive bonding the roof panel to its frame fails, causing noise and, in the worst case, the roof panel separating from the car at speed. (Ref: NHTSA Recalls #06V313000 and #09V432000.)
- Passenger Presence System (PPS) Fault 🟡 Low — Commonly causes an 'Airbag' light and 'Service Airbag' message. The sensor mat in the passenger seat fails, or the connector under the seat becomes loose. (Ref: Multiple TSBs exist for diagnosing PPS faults. The sensor itself is a fluid-filled pad.)
Used vs. New Parts: Buying Guide for This Vehicle
When a used part is the smart pick: Used mechanical parts like window regulators (without the motor/module) are often a cost-effective choice. Some electronic modules like the Driver/Passenger Door Module (DDM/PDM) can sometimes be sourced used, but there is a risk of them being faulty or incompatible.
Donor-vehicle mileage cap: roughly under 80000 miles for the part to have meaningful remaining life.
What to inspect on the donor part:
- For electronic modules, verify the part number exactly matches your original.
- Ask the seller if the donor vehicle had any electrical issues or water damage.
- Inspect connectors for any signs of corrosion, bent pins, or cut wires.
- For window regulators, check that cables are not frayed and plastic guides are not cracked.
OEM-only on this vehicle (don't cheap out):
- Body Control Module (BCM)
- Engine Control Module (ECM)
Aftermarket brands forum-validated for this vehicle:
- Dorman (for window regulators): Generally considered a decent-quality replacement, though some users report they can be noisier than the OEM unit.
Brands owners have reported issues with on this vehicle:
- Unbranded, cheap window regulators from online marketplaces: While some users have success, many report premature failure or poor fitment.
Real Owner Stories
Aggregated from forums and TSBs cited above. Mileages and costs reflect what owners reported in those sources.
2008 Chevrolet Corvette
Symptoms: Driver door issues including power windows, mirrors, and door locks not working, accompanied by a U1000 Class 2 data link code.
What fixed it: Diagnosis focused on the Driver Door Module (DDM) and checking splice packs SP205 and SP208 for communication integrity.
Source hint: CorvetteForum - 'U1000 Class 2 data link' (https://www.corvetteforum.com/forums/c6-corvette-general-discussion/4387071-u1000-class-2-data-link.html)
2008 Chevrolet Corvette
Symptoms: Security light stays illuminated and a U1000 code is present in the system.
What fixed it: Inspected BCM connectors for corrosion and checked for water intrusion caused by a clogged HVAC drain; verified ground splice blocks.
Source hint: CorvetteForum - 'Security light , U1000 code' (https://www.corvetteforum.com/forums/c6-corvette-general-discussion/4679786-security-light-u1000-code.html)
Related OBD-II Codes
Frequently Asked Questions
I have a 2008 Corvette with a U1000 code and my driver's door functions are dead. Is there a specific place I should look for wiring damage?
My C6 Corvette is showing 'Service Vehicle' and 'Security' lights with a U1000 code. Could a clogged HVAC drain be the cause?
Does TSB 08-07-30-021H apply to my 2007+ Corvette if I have communication codes?
Where is the most common ground failure point for a U1000 code on a C6 Corvette?
Can I check my battery health using the Corvette's Driver Information Center (DIC)?
Why would moving my driver's seat trigger a U1000 code?
We Have This Part in Stock

The information in this article is provided for general reference and educational purposes only. Vehicle specifications, procedures, and part compatibility can vary by production date, trim level, and region. Always consult your vehicle's factory service manual and verify part numbers before purchasing or performing repairs. Safety-critical components such as airbags, seat belts, and braking systems should be installed by a qualified professional.
- Chevrolet Corvette:
- 🧭 Diagnostic Flowchart
- 🛍️ Shop This Part
- What's Unique About the 2005-2013 Chevrolet Corvette
- Symptoms You May Notice
- Most Likely Causes
- Rare But Worth Checking
- Diagnosis Steps
- Parts You'll Likely Need
- Related Codes That Often Appear With This One
- Technical Service Bulletins (TSBs) & Recalls
- Platform-Specific Known Issues
- Mechanic-Grade Diagnostic Values
- Scan Tool Commands That Help
- Wiring & Ground Locations
- Real Owner Repair Stories
- OEM Part Supersession History
- Model Year Variations Within This Range
- Other Known Issues on This Vehicle
- Used vs. New Parts: Buying Guide for This Vehicle
- Real Owner Stories
- 2008 Chevrolet Corvette
- 2008 Chevrolet Corvette
- Related OBD-II Codes
- Frequently Asked Questions
- 🎟️ Get 5% Off