
U1000 on 2005-2010 Chrysler 300: CAN Bus Communication Failure Causes and Fixes
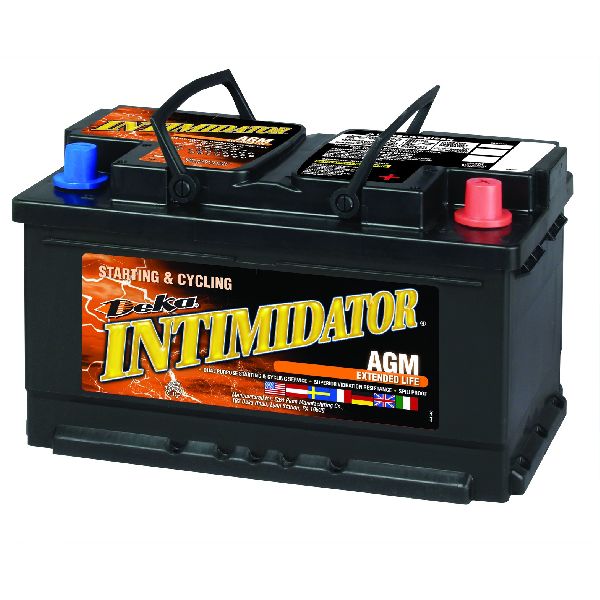
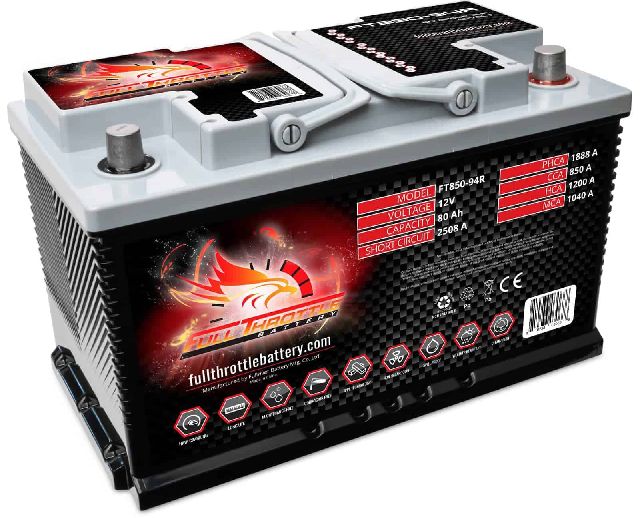
Code U1000 on a 2005-2010 Chrysler 300 means there's a network communication failure. Before suspecting expensive computers, check for the most common causes: a weak battery, corroded battery terminals (in the trunk), or poor ground connections. These simple electrical issues are responsible for the majority of these codes. The Totally Integrated Power Module (TIPM) is also a very common culprit on this platform.
- U1000 is a network error. Start your diagnosis with the simplest electrical components first.
- Fully charge and load-test your battery before any other diagnostics. A weak battery is the #1 cause.
- Thoroughly clean the battery terminals in the trunk and check all major ground connections.
- Do not assume the PCM is bad. The problem is more likely the TIPM (fuse box) or the wiring providing power and ground to the PCM.
- Due to the complexity, professional diagnosis is recommended if simple battery and ground checks don't solve the problem.
What's Unique About the 2005-2010 Chrysler 300
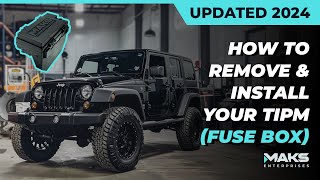
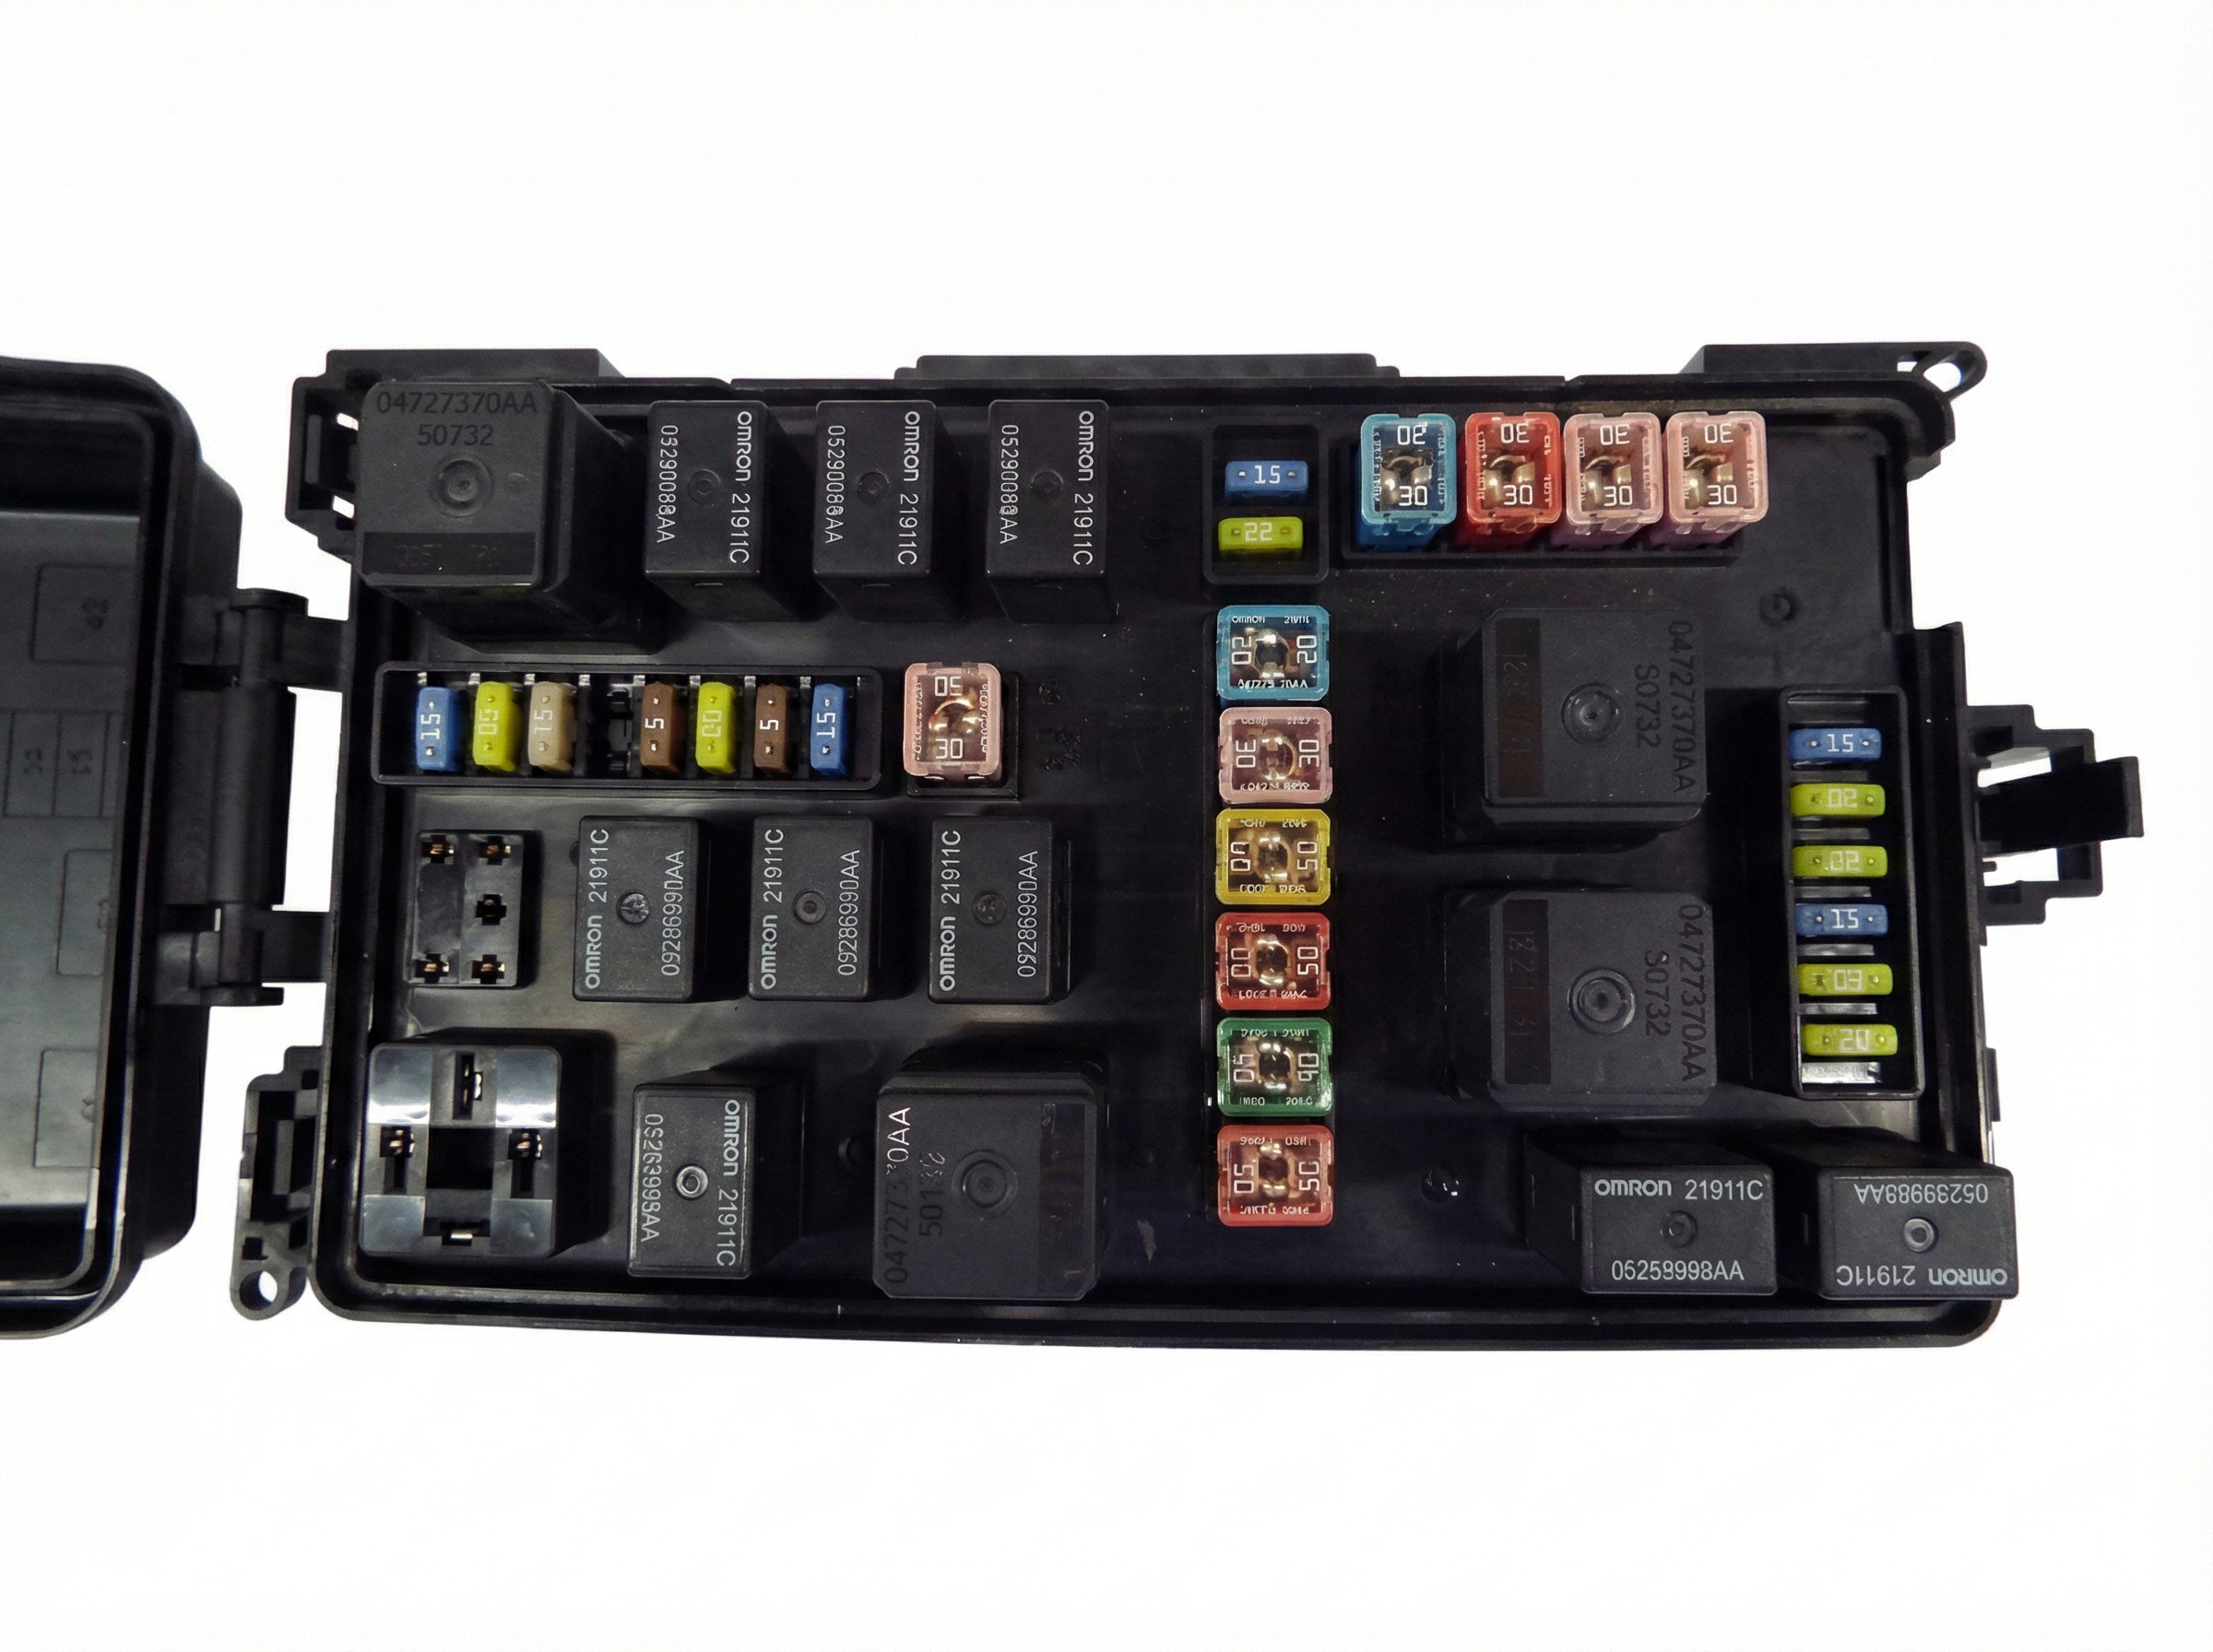
The first-generation Chrysler 300 (and its LX platform siblings like the Dodge Charger and Magnum) has a known weak point in its electrical architecture: the Totally Integrated Power Module (TIPM). The TIPM serves as both the main fuse box and a central communications gateway. Internal failures within the TIPM are common and can cut power or communication to other critical modules, like the Powertrain Control Module (PCM), triggering a U1000 or U0100 code. Therefore, any network communication issue on this platform should put the TIPM high on the list of potential suspects after basic battery and ground checks. The network is also segmented; the main diagnostic port (DLC) connects to a 'Diagnostic CAN-C' bus that goes only to the TIPM, which then acts as a gateway to the main 'CAN-C' (powertrain) and 'CAN-IHS' (body) buses. This means you cannot test the main bus resistance directly from the DLC.
Symptoms You May Notice
- Check Engine Light is on
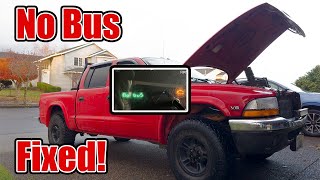
- "no bus" message displayed on the odometer 🎬 Watch: How to diagnose and fix a "no bus" TIPM issue area
- Engine stalls randomly while driving or fails to start
- Transmission may be stuck in one gear (limp mode)
- Multiple warning lights on the dashboard (ABS, Traction Control, etc.)
- Erratic or non-functional gauges
- Electrical accessories fail to work (e.g., power windows, radio, wipers)
- Horn or alarm may go off randomly
- Replacing the Powertrain Control Module (PCM) without first verifying it has proper power and ground. The root cause is often the TIPM failing to supply power to the PCM.
Most Likely Causes
- Weak or Failing Battery 🔴 High Probability → Shop Vehicle Battery The battery is located in the trunk, and its condition is critical. Low voltage during startup can prevent modules from initializing correctly, causing communication faults.
How to confirm: Test the battery voltage with a multimeter; it should be above 12.4V with the engine off. Have the battery load-tested at an auto parts store. A simple voltage test may not be enough; a load test is crucial.
Typical fix: Recharge or replace the battery. Ensure both the trunk terminals and under-hood remote posts are clean and tight.
Est. part cost: $150-$250 - Corroded or Loose Battery Terminals/Grounds 🔴 High Probability → Shop Vehicle Battery
How to confirm: Visually inspect the battery terminals in the trunk for corrosion (white or greenish powder). Inspect the main chassis ground straps for tightness and corrosion. Key ground points are G100 (left front of engine bay) and G101 (right front of engine bay). Also check the ground strap on the passenger side fender well.
Typical fix: Disconnect the battery (negative first). Clean the terminals and posts with a wire brush and a baking soda/water solution. Reconnect securely. Clean chassis ground points with a wire brush and ensure they are tight.
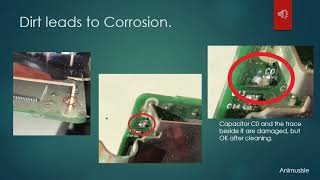
Est. part cost: $5-$20 - Faulty Totally Integrated Power Module (TIPM) 🟡 Medium Probability → Shop Fuse Box The TIPM on this platform is a known high-failure item that can cause a wide range of difficult-to-diagnose electrical problems, including network communication failures. Internal relay failures are common, cutting power to modules like the PCM or fuel pump.
How to confirm: Diagnosis is complex. A professional may need to check for power output from the TIPM to the affected modules. Swapping with a known-good TIPM is a common diagnostic step. A tell-tale sign can be multiple, unrelated electrical issues occurring simultaneously.
Typical fix: Replacement or repair of the TIPM. Companies like MAKS TIPM Rebuilders or UpFix offer repair services. Replacement often requires programming to the vehicle's VIN.
Est. part cost: $300-$800 - Damaged CAN Bus Wiring ⚪ Low Probability Wiring can become chafed from vibration or damaged by rodents, especially since some harnesses are routed through areas where critters might nest. Wires pinched between the engine and transmission are also a possibility.
How to confirm: Visually inspect the wiring harnesses, particularly around the PCM, TIPM, and under the dashboard. Look for any signs of chewing, rubbing, or corrosion. Advanced diagnosis involves checking for 60 ohms of resistance across the CAN High and CAN Low pins at a module connector, not the OBD-II port.
Typical fix: Repair the damaged section of the wiring harness.
Est. part cost: $10-$100
Rare But Worth Checking
- Faulty Powertrain Control Module (PCM): → Shop Engine Control Module (ECM) While possible, the PCM is often replaced mistakenly. Always rule out power, ground, and TIPM issues before condemning the PCM. A common failure mode is corrosion in the connector pins due to its location on the passenger-side firewall.
- Faulty Instrument Cluster: → Shop Instrument Cluster The instrument cluster is a gateway module on the CAN bus. A failure within the cluster, such as a bad solder joint on the main connector, can sometimes cause a 🎬 Watch: How to repair a "no bus" instrument cluster fault "no bus" error and take down the network.
- Faulty Aftermarket or Replacement Radio: An improperly installed or failing aftermarket component (especially a radio) can introduce noise onto the CAN bus and disrupt communication. Even a used OEM radio that is not configured for the vehicle's VIN can cause a "no bus" error.
- Faulty Wireless Control Module (WCM): The WCM, also known as the Sentry Key Immobilizer Module, is another node on the network. TSB 08-007-08 Rev. A discusses situations where a WCM going 'off bus' can cause a no-start condition. Resetting the IOD fuse can sometimes temporarily restore its function.
Diagnosis Steps
- Check and Charge Battery: Ensure the battery is fully charged (12.4V+) and load-tested. A weak battery is the most common cause.
- Inspect and Clean Terminals: Thoroughly clean the battery terminals in the trunk and the remote posts under the hood. Remove all corrosion.
- Perform 'Key Dance' for Codes: Without a scanner, you can perform a 'key dance' by turning the ignition key from OFF to ON (not START) three times, ending in the ON position. Any stored P-codes will display on the odometer. This may not show U-codes.
- Check All Fuses: Inspect all fuses in the TIPM (front fuse box) and the rear power distribution center, paying close attention to the IOD (Ignition Off Draw) fuse.
- Scan for Codes: Use a high-quality OBD-II scanner that can access all modules. Identify which module(s) are not communicating.
- Inspect Grounds: Locate and inspect the main engine and chassis ground connections. Key locations include G100 and G101 in the engine bay, and G300/G302 in the driver's side kick panel/B-pillar area. Ensure they are clean, tight, and free of corrosion.
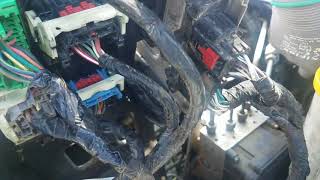
- Inspect Wiring: Visually inspect the main wiring harnesses for obvious signs of damage, chafing, or rodent activity, especially near the PCM and TIPM.
- Check Network Resistance: With the battery disconnected, access a CAN-C module connector (like the ABS or PCM connector) and measure the resistance between the CAN High and CAN Low pins (often a twisted pair of White/Black and White/Light Blue wires). A healthy network should read approximately 60 Ohms. A reading of 120 Ohms suggests a missing terminating resistor, and a reading near 0 Ohms indicates a short.
- Isolate Modules: If the resistance is incorrect, you can disconnect modules one by one (starting with the PCM, TIPM, and ABS module) to see if the resistance returns to 60 Ohms, which would indicate a faulty module is disrupting the bus. Unplugging junction connectors like C105 can isolate entire branches of the network.
- Seek Professional Diagnosis: If the steps above do not identify the issue, a professional with a lab scope and advanced diagnostic tools (like wiTECH) may be needed to isolate the faulty module or wiring.
Parts You'll Likely Need
- Battery — A weak or failing battery is the most frequent cause of network communication codes on this vehicle.
Trusted brands: Interstate, DieHard, Duralast
OEM price range: $200-$300
Aftermarket price range: $150-$250 - Totally Integrated Power Module (TIPM)
(OEM #e.g., 04692137AF, 04692137AG (Part numbers are highly specific to year/options, must verify with VIN))— This is a known failure point on the LX platform and is a common cause of communication codes when battery/ground issues are ruled out.
Trusted brands: Mopar (OEM), Dorman (remanufactured), MAKS TIPM Rebuilders (Repair Service)
OEM price range: $500-$1000
Aftermarket price range: $250-$800 (Remanufactured/Repaired)
Related Codes That Often Appear With This One
- U0100 — This is a more specific version of a U-code, indicating 'Lost Communication With ECM/PCM'. If the PCM is the module that has gone offline, U0100 will often accompany the more generic U1000.
- U0199 / U0200 — These codes indicate a loss of communication with the driver and passenger door modules, respectively. TSB #08-061-12 was issued for this issue, pointing to wiring problems in the driver's door harness.
Technical Service Bulletins (TSBs) & Recalls
- TSB #08-061-12: Addresses inoperative front power door locks and windows due to lost communication with door modules (U0199, U0200), advising inspection of the driver's door module and wiring.
- TSB #08-007-09 REV. A: While not for U1000 directly, it addresses failures of the Wireless Control Module (WCM) which can cause communication issues and no-start problems on the CAN bus.
- TSB #08-007-15 REV. A: Discusses a radio software update to fix an issue where the radio may keep the CAN bus network awake, causing a battery drain, which could lead to low voltage and communication faults.
Platform-Specific Known Issues
- The Totally Integrated Power Module (TIPM) is a notoriously unreliable component on this platform and is a primary suspect for any U-code.
- The battery's location in the trunk can lead to overlooked corrosion on the terminals.
- Corrosion on the PCM connector pins is common due to its location on the passenger-side firewall, exposed to moisture.
Documented NHTSA Reports
- NHTSA ODI #10169405 describes a situation where malfunction indicator lights remained on and the vehicle could not be driven; the dealership reported a U1000 code and identified an electrical and ground wire problem.
- NHTSA ODI #10171770 reports that when a vehicle stalled, it lost ignition input, with a scan revealing codes U1000, U1016, U1152, B1372, and U1088, eventually requiring an ignition switch replacement.
- NHTSA ODI #11461728 notes that U1000 can indicate lost communication with the TCM, sometimes caused by the module overheating due to its physical location.
- NHTSA ODI #10970695 describes a CAN system diagnostic failure where the instrument cluster had no communication despite power and ground being present, resulting in a U1000 code.
- NHTSA ODI #10929763 highlights a case where a vehicle would not restart and showed codes U1000, P1807, and P0717 after a radiator leak ruined the transmission.
Mechanic-Grade Diagnostic Values
- CAN C Bus Resistance — expected: ~60 Ω. Failure: 120 Ω (open circuit/missing terminator), ~0 Ω (short circuit), or ~40 Ω (possible third terminator/module fault).
- CAN Bus Voltage (Lab Scope) — expected: CAN High toggles 2.5V to 3.5V; CAN Low toggles 2.5V to 1.5V. Both should be a clean mirror image of each other.. Failure: Bus resting at 0V or 2.5V on both lines, or a noisy/distorted waveform indicates a short, open, or module interference.
- Ground Circuit Voltage Drop — expected: < 0.2 Volts. Failure: A reading higher than 0.2V indicates excessive resistance in the ground path, which can cause modules to malfunction.
Scan Tool Commands That Help
- wiTECH or equivalent (Autel): Network Topology / Bus Diagnostics View — This is the first step after reading codes. It provides a visual map of all modules on the network and shows which ones are active (communicating) and which are inactive (red/offline), immediately pinpointing the area of the fault.
- wiTECH or equivalent (Autel): Restore Vehicle Configuration — After replacing a major module like the TIPM or BCM, this function is used to write the vehicle's original configuration (VIN, installed options like sunroof, premium audio, etc.) to the new module so it functions correctly.
- wiTECH: Reprogram/Flash Module — Used to update the software on a module (like the PCM) to the latest version, which can fix known software bugs that may cause communication DTCs.
Wiring & Ground Locations
- CAN Bus Star Connector (Junction) — Located under the dashboard, near the steering column shaft. There are separate hubs for the CAN-C and CAN-IHS bus.. These are the central nervous system points where multiple CAN bus wires meet. Corrosion or a loose connection here can take down multiple modules at once. They are a key diagnostic location.
- G300 — Below the driver's side (left) 'B' pillar trim.. This is a major body ground point. Modules in the cabin, such as the door modules or seat modules, rely on this ground. A poor connection can cause intermittent communication faults.
- G302 — Behind the driver's side (left) kick panel.. Another critical interior ground point for various modules and controls located in the driver's side of the instrument panel.
- Connector C105 — An inline harness connector in the engine compartment.. This connector bundles the CAN bus wiring for the Steering, Wireless Control Module (WCM), and Airbag modules. Unplugging it can quickly isolate this entire branch of the network to see if a fault lies within one of those components.
- CAN Bus Wiring Colors — Throughout the vehicle's wiring harnesses.. The CAN-C bus wires are typically a twisted pair of White/Black (CAN High) and White/Light Blue (CAN Low). Knowing these colors helps a technician quickly identify the correct wires to test at any module or connector.
Real Owner Repair Stories
- iATN (International Automotive Technicians Network) Forum Post (Chrysler LX Platform Vehicle (similar to 300)) — No crank, no start. All dashboard warning lights illuminated. Key FOBs not working. Scan tool could only communicate with modules on the interior (CAN-IHS) bus; all powertrain (CAN-C) modules were offline.
❌ Tried (didn't work) Initial scan showed a massive network failure. Unplugging individual modules like the ABS and PCM did not restore the network.
✅ What actually fixed it The technician diagnosed a CAN-C bus failure. Resistance was over 100 ohms (should be 60). A lab scope showed the bus voltage was being pulled low. By consulting a wiring diagram, they located connector C105, which served the steering, wireless, and airbag modules. Unplugging C105 restored communication to the other modules. This isolated the fault to that branch, leading to the discovery of a faulty module on that circuit which was bringing the whole network down. - EricTheCarGuy / YouTube (Chrysler Minivan (similar cluster design and failure mode)) — Intermittent no-start, instrument cluster 'freaking out'.
❌ Tried (didn't work) Initial diagnosis was inconclusive as the problem was intermittent.
✅ What actually fixed it The problem was traced to cracked/cold solder joints on the main electrical connector pins on the back of the instrument cluster's circuit board. The cluster is a gateway module, and the poor connection caused network instability. The fix was to remove the cluster, disassemble it, and re-flow the solder on the connector pins with a soldering iron.
"I Checked Everything" — The Actual Cause
- The electrical equivalent is when the CAN bus resistance measures a perfect 60 ohms, but communication issues persist. This was seen in a case on a 2012 Chrysler 300 where numerous communication codes were present. A lab scope revealed that while the bus had signal, it was very noisy. The noise was traced to a faulty Electro-Hydraulic Power Steering (EHPS) pump module that was corrupting data on the bus. The module itself was the source of the problem, not a wiring short or open that a multimeter would find.
OEM Part Supersession History
e.g., 04692026→Multiple revisions exist (e.g., ending in AA, AB, AC, etc.).— Revisions often address hardware or internal logic flaws from the original design.
Heads up: TIPMs are highly specific to the vehicle's year, engine, and options (AWD, sunroof, etc.). Using a TIPM with the wrong part number, even from another 300, will cause features to not work or can prevent the car from starting. Always match the part number exactly or use a VIN-programmed remanufactured unit.
Model Year Variations Within This Range
- 2005-2010: While the core electrical architecture (based on Mercedes designs) and its weaknesses (TIPM, grounds) are consistent, there were minor changes. A 2008 refresh brought updated lighting and interior materials. A new infotainment system arrived in 2009. These changes mean that TIPM and other module part numbers are often year-specific and not interchangeable without programming.
Diagnostic Flowchart
Other Known Issues on This Vehicle
Issues unrelated to this code that are worth knowing about as an owner of this generation:
- Front Suspension Clunk/Rattle 🟠 Medium — Very common, especially over 75,000 miles. Caused by worn tension strut bushings, sway bar bushings/links, and upper control arm ball joints. (Ref: Multiple TSBs exist for suspension noises, such as #02-008-17 for lower control arm bushings.)
- Shifter Stuck in Park ('Pink Thingy' Failure) 🟠 Medium — Common on 2005-2007 models with the NAG1 5-speed transmission. A small plastic lever in the shifter assembly breaks, preventing the shifter from moving. (Ref: No recall, but it is a widely documented failure. Aftermarket metal replacement parts (e.g., Dorman 924-706) are available.)
- 5.7L HEMI MDS Lifter/Camshaft Failure 🔴 High — A known potential issue, though frequency is debated. A failed MDS (Multi-Displacement System) lifter can seize, causing a misfire and potentially destroying the camshaft lobe. Often presents as a 'Hemi tick'.
- NAG1 (W5A580) Transmission Conductor Plate/Valve Body Issues 🟠 Medium → Shop Transmission Assembly — Can occur at higher mileage. Issues include TCC shudder, harsh shifting, or going into limp mode. Often caused by failing solenoids or sensors on the conductor plate within the transmission.
Used vs. New Parts: Buying Guide for This Vehicle
When a used part is the smart pick: A used part is generally not recommended for the TIPM due to its high failure rate and the difficulty in finding an exact match. However, for other modules like the instrument cluster or radio, a used part can be a cost-effective option if the part number is an exact match.
Donor-vehicle mileage cap: roughly under 80000 miles for the part to have meaningful remaining life.
What to inspect on the donor part:
- For a TIPM, inspect the exterior for any signs of heat damage, melting, or cracking.
- Check all connector pins for corrosion (green/white powder) or signs of water intrusion.
- Verify the part number on the sticker EXACTLY matches the original part.
- Ask the seller if the donor vehicle had any electrical issues or was in a flood; avoid if so.
OEM-only on this vehicle (don't cheap out):
- Powertrain Control Module (PCM): Due to the complexity of software and VIN security, using anything other than an OEM or a reputable, VIN-programmed remanufactured unit is highly risky.
Aftermarket brands forum-validated for this vehicle:
- For TIPM repair/replacement: MAKS TIPM Rebuilders, Circuit Board Medics, GoECM, and UpFix are frequently cited as reliable sources for remanufactured, VIN-programmed units.
- Dorman offers remanufactured TIPMs that are widely available.
Brands owners have reported issues with on this vehicle:
- Avoid unbranded, 'no-name' electronic modules from online marketplaces, as they often lack quality control and proper programming.
Real Owner Stories
Aggregated from forums and TSBs cited above. Mileages and costs reflect what owners reported in those sources.
2006 Chrysler 300
Symptoms: The owner experienced a 'no bus' error and replaced the PCM, but the vehicle still had issues.
What fixed it: The real issue was discovered to be a bad ground or a faulty TIPM that was failing to supply power to the PCM.
Source hint: 300cforums.com thread regarding 'no bus' error
2008 Chrysler 300
Symptoms: U1000 and U0100 codes present; owner sought alternatives to expensive dealer TIPM replacement.
What fixed it: Used a TIPM repair service (MAKS or UpFix) to resolve internal relay failures.
Source hint: lxforums.com discussion on TIPM failures
2007 Chrysler 300
Symptoms: The CAN bus was being brought down, causing communication errors across the network.
What fixed it: The owner diagnosed the issue by unplugging sensors like the Crank Sensor, Cam Sensor, TPS, and MAP sensor one-by-one to find a shorted 5v sensor.
Source hint: DodgeForum.com user report
Related OBD-II Codes
Frequently Asked Questions
My 2005-2010 Chrysler 300 odometer is displaying a 'no bus' message; what does this mean?
Can I use the 'key dance' method to find the U1000 code on my Chrysler 300?
Does TSB #08-061-12 apply to my communication issues?
Why is the trunk-mounted battery a concern for U1000 codes on this vehicle?
Are there cheaper alternatives to replacing the TIPM at a Chrysler dealership?
Could a software update fix my Chrysler 300's communication and battery drain issues?
Helpful Videos

Used OEM Parts in Stock

New Aftermarket Parts Available


The information in this article is provided for general reference and educational purposes only. Vehicle specifications, procedures, and part compatibility can vary by production date, trim level, and region. Always consult your vehicle's factory service manual and verify part numbers before purchasing or performing repairs. Safety-critical components such as airbags, seat belts, and braking systems should be installed by a qualified professional.
- Chrysler 300:
- 🧭 Diagnostic Flowchart
- 🎬 Helpful Videos
- 🛍️ Shop This Part
- What's Unique About the 2005-2010 Chrysler 300
- Symptoms You May Notice
- Most Likely Causes
- Rare But Worth Checking
- Diagnosis Steps
- Parts You'll Likely Need
- Related Codes That Often Appear With This One
- Technical Service Bulletins (TSBs) & Recalls
- Platform-Specific Known Issues
- Documented NHTSA Reports
- Mechanic-Grade Diagnostic Values
- Scan Tool Commands That Help
- Wiring & Ground Locations
- Real Owner Repair Stories
- "I Checked Everything" — The Actual Cause
- OEM Part Supersession History
- Model Year Variations Within This Range
- Other Known Issues on This Vehicle
- Used vs. New Parts: Buying Guide for This Vehicle
- Real Owner Stories
- 2006 Chrysler 300
- 2008 Chrysler 300
- 2007 Chrysler 300
- Related OBD-II Codes
- Frequently Asked Questions
- 🎟️ Get 5% Off