
U1000 on 2002-2009 GMC Envoy: Class 2 Communication Failure Causes and Fixes
On a 2002-2009 GMC Envoy, code U1000 indicates a network communication failure. The most common causes are bad grounds (especially G201 under the dash), broken wires in the liftgate harness, or a faulty module like the BCM, instrument cluster, or TCCM. Diagnosis is complex and often requires professional tools to isolate the fault by disconnecting modules one by one.
- U1000 is a network failure code, not a single part failure code. Do not replace parts without a proper diagnosis.
- Always start by checking the battery and all major ground connections. Corroded grounds are the most common and cheapest fix for this issue on an Envoy.
- Thoroughly inspect the wires inside the rubber boot between the body and the rear liftgate for breaks. This is a very common failure point.
- Diagnosing this code correctly often requires professional tools to isolate which module or wire is bringing the network down.
- The vehicle is not safe or reliable to drive with an active U1000 code, as it can stall or fail to start at any time.
What's Unique About the 2002-2009 GMC Envoy
The GMC Envoy and its GMT360 platform siblings (like the Chevy Trailblazer) are known for specific electrical vulnerabilities that trigger the U1000 code. The most notorious issues are corrosion at key grounding points (like G201 under the driver's side dash and G103 on the engine block), and wire fatigue/breakage in the flexible harness leading to the rear liftgate. These common failure points can cause a single module or wire to bring down the entire vehicle network, leading to a wide array of baffling symptoms that appear unrelated.
Symptoms You May Notice
- Intermittent no-crank or no-start condition.
- Engine may stall unexpectedly while driving.
- Instrument cluster gauges drop to zero, then sweep back to normal.
- Multiple warning lights illuminating, such as ABS, Airbag, and Security.
- Scan tool cannot communicate with some or all modules.
- Loss of function for power windows, power locks, radio, or HVAC controls.
- Security light stays on solid.
- Message center displays warnings about various system faults.
- 4WD indicator lights are off and system is inoperative.
- Replacing the PCM (Powertrain Control Module) without confirming it is the source of the network failure. The PCM is often just one of many victims of the network being down.
- Replacing multiple modules one after another without performing a proper network diagnosis to find the single root cause.
- Mistaking a faulty ignition switch for a bad BCM, as both can cause a no-start and loss of communication. 🎬 Watch: Step-by-step no-crank, no-start diagnostic walkthrough
Most Likely Causes
- Corroded or Loose Ground Connections 🔴 High Probability The GMT360 platform has several critical ground points that are known to corrode or loosen, causing high resistance and disrupting module communication. Key locations include G103 on the driver's side of the engine block and G201 under the driver's side of the dashboard near the A-pillar.
How to confirm: Visually inspect and test the integrity of major ground points. A voltage drop test from the module's ground wire to the negative battery terminal should show less than 0.1V. A common failure point is the ground splice pack, which can be unbolted, cleaned, and re-secured.
Typical fix: Remove the ground bolt/nut, clean all contact surfaces (eyelet and frame/body) down to bare metal with a wire brush or sandpaper, then re-secure tightly. Applying dielectric grease can help prevent future corrosion.
Est. part cost: $0-$15 - Broken Wires in Liftgate Harness 🔴 High Probability The wires that pass from the body to the rear liftgate are inside a flexible rubber boot. Years of opening and closing the liftgate cause these wires to fatigue and break. The Class 2 data wire (often a dark purple wire) is one of them, and a break or short in this wire can take down the entire network.
How to confirm: Open the liftgate and peel back the rubber boot between the body and the gate. Carefully inspect the wires for obvious breaks, chafing, or previous poor repairs. Owners on forums like GMTNation report finding multiple broken wires inside this boot.
Typical fix: Repair the broken wire(s) using solder and heat shrink tubing. It is often better to splice in a new, flexible section of wire (preferably silicone-insulated) rather than just butt-connecting the broken ends to prevent a repeat failure.
Est. part cost: $5-$25 - Faulty Control Module 🟡 Medium Probability Any module on the Class 2 network can fail internally and either stop communicating or short the data line to power or ground. Common culprits on the Envoy include the Body Control Module (BCM), Instrument Panel Cluster (IPC), Liftgate Module (LGM), and Transfer Case Control Module (TCCM).
How to confirm: This requires advanced diagnostics. A technician will use a scan tool to see which modules are offline. They will then disconnect modules one by one from the network (often at a splice pack like SP205 under the dash) until communication is restored to the rest of the network. 🎬 See how to isolate a faulty module using splice packs The last module disconnected is the faulty one.
Typical fix: Replace the faulty module. Note that some modules, particularly the BCM and IPC, require programming with a GM-specific tool after installation.
Est. part cost: $100-$600 - Weak or Failing Battery/Alternator ⚪ Low Probability → Shop Alternator
How to confirm: Test the battery voltage with the engine off (should be ~12.6V) and the alternator output with the engine running (should be ~13.7-14.7V). Low voltage during cranking can cause modules to drop off the network temporarily. A load test is the most definitive way to check battery health.
Typical fix: Replace the battery and/or alternator.
Est. part cost: $150-$500
Rare But Worth Checking
- Faulty Ignition Switch: → Shop Ignition Switch The electrical portion of the ignition switch can wear out, causing intermittent power loss to various modules and triggering communication faults. If electrical problems seem to happen when turning or wiggling the key, the switch is a primary suspect.
- Chafed Wiring Under Fuse Block: The underhood fuse block can sometimes have wiring harnesses underneath it that rub against sharp edges over time, eventually causing a short on the data line. This requires removing the fuse block to inspect.
- Improperly Installed Aftermarket Electronics: Aftermarket stereos, remote starters, or alarms that are incorrectly wired into the Class 2 data line (the purple wire at the radio harness, for example) can disrupt the entire network. This is a common cause if the problems started after a new accessory was installed.
Diagnosis Steps
- Check Battery and Charging System: Ensure the battery has a full charge (12.6V+) and the alternator is charging correctly (13.7-14.7V). Low or unstable voltage is a common cause of U-codes.
- Perform a Full Module Scan: Use a professional scan tool capable of communicating with all vehicle modules (BCM, IPC, ABS, etc.). Note which modules are reporting 'No Communication'.
- Inspect Grounds: Thoroughly inspect, clean, and tighten all major ground connections. Pay special attention to G103 (driver's side of engine block), G201 (under dash near driver's A-pillar), and the grounds on the frame rail under the driver's door.
- Check the Liftgate Harness: Peel back the rubber boot between the liftgate and the body and inspect all wires for breaks or chafing. This is a very common failure point. Look for a broken dark purple wire.
- Analyze the Data Line: Using an oscilloscope on Pin 2 of the DLC (Data Link Connector), check the Class 2 data line (purple wire). A healthy network will show a square wave signal fluctuating between approximately 0V and 7V. If the voltage is stuck high (near 12V) or low (near 0V), there is a short. A multimeter is not fast enough to read this signal correctly.
- Isolate the Fault: If a short is present, the best way to find the source is to disconnect modules one by one until the signal returns to normal. A key diagnostic point is the splice pack (SP205 is a common one located under the driver's side dash). By disconnecting legs of the splice pack, you can isolate sections of the network to narrow down the search for the shorted module or wire.
- Inspect the Culprit Circuit: Once the faulty module or circuit branch is identified, inspect its wiring for shorts to power or ground, and check the module's power and ground connections before condemning the module itself.
Parts You'll Likely Need
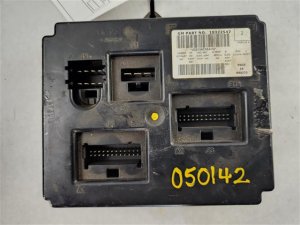
- Body Control Module (BCM)
(OEM #15191621 (2002-2005), 15135466 (2005-2009, w/o factory security))— The BCM is a central hub for the Class 2 network and controls many body functions. Its failure can cause a total communication breakdown. Symptoms often include loss of interior lights, power locks, and a no-start condition.
Trusted brands: ACDelco (GM Genuine), Dorman
OEM price range: $250-$400
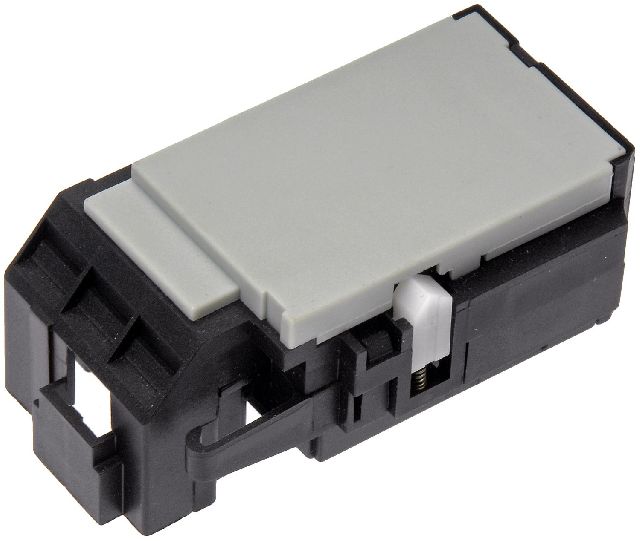
Aftermarket price range: $150-$300 (often requires programming) - Ignition Switch (Electrical Portion)
(OEM #ACDelco D1462G)— The electrical contacts inside the switch wear out, causing intermittent power loss to key modules on the network, which can mimic a communication fault. If wiggling the key affects the symptoms, this part is suspect.
Trusted brands: ACDelco, Standard Motor Products
OEM price range: $60-$90
Aftermarket price range: $30-$50
Related Codes That Often Appear With This One
- U1001-U1255 — These are all Class 2 communication codes. Seeing multiple U-codes pointing to different modules (e.g., U1041 Lost Communication with EBCM, U1064 Lost Communication with BCM) confirms a network-wide issue rather than a single module failure.
Technical Service Bulletins (TSBs) & Recalls
- TSB #040525002B: Addresses ABS light on with codes C0265, C0201, and U1041, indicating loss of communication with the brake module, a potential contributor to U1000 network issues.
Platform-Specific Known Issues
- The wiring harness passing through the rubber boot to the rear liftgate is a well-documented weak point. The constant flexing from opening and closing the gate causes wires to break, with the Class 2 data line being a common casualty.
- Ground pack G201, located under the center console on some model years, is known to have poor connections, leading to a host of seemingly unrelated electrical failures.
- Cross-manufacturer records such as NHTSA ODI #10681194 highlight that U1000 is frequently identified as a ground harness problem, reinforcing the need to inspect all chassis grounds.
Mechanic-Grade Diagnostic Values
- Class 2 Serial Data Line Voltage (at DLC Pin 2) — expected: A fluctuating square wave signal between ~0V and ~7V when viewed on an oscilloscope.. Failure: Voltage stuck near 0V (short to ground), stuck near battery voltage (short to power), or a flat line indicates a dead bus or faulty module. A multimeter is too slow to read this signal accurately.
- Class 2 Network Resistance — expected: There is no standard resistance test for the single-wire Class 2 network.. Failure: Unlike CAN bus systems which should read ~60 Ohms between CAN High and CAN Low, this test is not applicable to the J1850 VPW protocol used in the Envoy.
Scan Tool Commands That Help
- GM Tech 2: Class 2 Message Monitor — This is the primary function for diagnosing a U1000. It displays a list of all modules on the Class 2 network and shows their status as 'Active' or 'Inactive'. When the network is down, you can use this screen to see which modules are not communicating, helping to pinpoint the source of the failure without physical disconnection.
- GM Tech 2: Diagnostic Circuit Check — This is the menu path to access the 'Class 2 Message Monitor'. It's the starting point for any network-level diagnosis on this platform.
Wiring & Ground Locations
- G201 / SP201 — Located behind the carpeted trim panel on the passenger side of the center console/transmission tunnel area. Some sources state driver's side, but many technicians access it from the passenger footwell.. This is a critical ground splice pack for numerous interior modules, including the Instrument Panel Cluster (IPC), HVAC controls, radio, Transfer Case Control Module (TCCM), and the Data Link Connector (DLC) itself. A bad connection here can cause dozens of seemingly unrelated symptoms and is a top cause of U1000.
- G103 — Located on the driver's side of the engine block, sometimes near the front, or on the cowl above the brake booster.. This is a primary ground point for the Body Control Module (BCM), Instrument Panel Cluster (IPC), and Data Link Connector (DLC). Corrosion here directly impacts the main communication hubs.
- SP205 — A 'Star' splice pack connector, typically located under the driver's side dash, often taped to a harness near the steering column.. This is a junction point where the Class 2 data wire from multiple modules meets. A technician can remove the shorting bar (comb) from the splice pack to disconnect different 'legs' of the network, allowing for systematic isolation of the faulty module or wiring branch that is shorting the data line.
- Liftgate Harness Boot — The flexible rubber boot between the top of the liftgate and the main body of the vehicle.. This is a high-flex area where wires, including the Class 2 data line (often dark purple) for the Liftgate Module and Rear Wiper Module, frequently break from metal fatigue. A broken or shorted wire here will bring down the entire network.
Real Owner Repair Stories
- YouTube diagnostic video (GMC Envoy / Chevrolet Trailblazer) — No crank, no start, no communication with scan tool, multiple U-codes when communication is briefly possible.
❌ Tried (didn't work) Replacing the battery., Checking fuses.
✅ What actually fixed it A loose ground connection on the engine block (G103) was found and cleaned. Tightening the ground bolt restored all communication and allowed the vehicle to start. - Forum discussions on GMTNation / Trailvoy (2002-2009 GMC Envoy/Trailblazer) — Intermittent stalling, gauges sweeping to zero, multiple warning lights, no communication with 4WD system.
❌ Tried (didn't work) Replacing the BCM., Replacing the instrument cluster., Cleaning battery terminals.
✅ What actually fixed it The electrical portion of the ignition switch was worn out. Replacing the ignition switch resolved the intermittent power loss to the modules on the Class 2 network, which had been mimicking a communication failure. - Professional technician diagnostic video (GM vehicle with Class 2 network) — Instrument cluster dead, no communication, U1000 code. Data line voltage measured high (10V instead of 0-7V).
❌ Tried (didn't work) Attempting to communicate with individual modules.
✅ What actually fixed it The technician isolated the network at the splice pack (SP205) and found one leg was outputting 10V. Tracing that wire led to a faulty Electronic Brake Control Module (EBCM / ABS module) which was internally shorted and sending excessive voltage onto the data line. Unplugging the EBCM restored communication to all other modules.
OEM Part Supersession History
15191621, 15116085, 15180220→Contact dealer with VIN— Hardware and software revisions.
Heads up: BCMs for 2002-2005 models are generally different from 2006-2009 models. They are not interchangeable. A replacement BCM must be programmed with a GM Tech 2 to match the vehicle's VIN and options (Passlock security, etc.) or the vehicle will not start.
Model Year Variations Within This Range
- 2004-2005: The GMC Envoy XUV model has a unique and complex power-sliding rear roof and a 'Midgate' with a power glass. These systems have their own control modules that are on the Class 2 data network, adding more potential points of failure for a U1000 code compared to a standard Envoy.
- 2002-2005 vs 2006-2009: The Body Control Module (BCM) part numbers and internal hardware changed around the 2005/2006 model year. The correct BCM must be used for the specific year range, and it always requires programming.
Diagnostic Flowchart
Other Known Issues on This Vehicle
Issues unrelated to this code that are worth knowing about as an owner of this generation:
- Cracked Exhaust Manifold 🟠 Medium — Very common, especially on the 4.2L I6 engine. Often occurs between 80,000-150,000 miles. Presents as a ticking noise when cold that may disappear as the engine warms up. (Ref: A special coverage adjustment was issued for some 2008-2009 models, but the problem is widespread across all years.)
- Failing Fan Clutch 🔴 High — Extremely common. The electronically controlled fan clutch can fail, causing it to be stuck on (sounding like a jet engine) or off (causing overheating in traffic). Failure can occur at any mileage.
- Instrument Cluster Gauge Stepper Motor Failure 🟡 Low → Shop Instrument Cluster — Widespread issue where individual gauges (speedometer, tachometer, fuel, etc.) become erratic, get stuck, or stop working entirely. This is due to faulty stepper motors on the cluster's circuit board.
- Cracked Fuel Tank Filler Neck / Inlet Check Valve 🔴 High — Affects earlier models (approx. 2002-2004), causing fuel spills during refueling and a strong gasoline odor. (Ref: Special Coverage Adjustment #15729 covering the fuel tank inlet check valve fracture for 15 years/150,000 miles.)
- Failed 4WD Transfer Case Encoder Motor / Actuator 🟠 Medium → Shop Transfer Case Motor — Common issue where the 'Service 4WD' light illuminates and the system fails to switch between 2WD, 4-HI, and 4-LO. Often caused by a faulty encoder motor position sensor or the actuator motor itself. (Ref: Multiple TSBs exist related to diagnosing 4WD system faults, such as TSB #020421002A for DTC B2725.)
Used vs. New Parts: Buying Guide for This Vehicle
When a used part is the smart pick: A used part is a smart choice for modules that are NOT tied to the vehicle's security system and do not require VIN programming. This includes the Transfer Case Control Module (TCCM), door modules, seat modules, and the rear wiper/liftgate module. These are often plug-and-play, but it's best to match part numbers exactly.
Donor-vehicle mileage cap: roughly under 150000 miles for the part to have meaningful remaining life.
What to inspect on the donor part:
- Verify the part number on the used module matches the original exactly.
- Inspect connectors for any signs of corrosion, bent pins, or water damage.
- If possible, choose a part from a vehicle that was not in a major collision, especially a flood-damaged vehicle.
- For wiring harnesses, ensure the insulation is still flexible and not brittle or cracked.
OEM-only on this vehicle (don't cheap out):
- Body Control Module (BCM)
- Instrument Panel Cluster (IPC)
- Powertrain Control Module (PCM)
- Ignition Switch (Electrical Portion)
Aftermarket brands forum-validated for this vehicle:
- ACDelco (GM Genuine) - Universally recommended for critical electronics like the BCM and ignition switch to ensure compatibility and longevity.
Brands owners have reported issues with on this vehicle:
- Generic/No-Name BCMs - While brands like Dorman offer replacements, forum consensus indicates a higher rate of initial failure or programming issues compared to OEM. For a critical component like the BCM that requires programming, using a non-OEM part can introduce new variables that complicate diagnosis.
Real Owner Stories
Aggregated from forums and TSBs cited above. Mileages and costs reflect what owners reported in those sources.
2005 Chevrolet Trailblazer (GMT360)
Symptoms: No-start condition, multiple U1000 codes, and Class 2 Serial Communication problems. Owner had to investigate fuses, the ignition switch, and PCM connections.
What fixed it: Step-by-step diagnosis of the communication network using splice packs to isolate the fault.
Source hint: GMTNation: No Start, Multiple U1000 codes, Class 2 Serial Communication Problem
2002 GMC Envoy
Symptoms: Widespread electrical failure and communication issues related to the rear of the vehicle.
What fixed it: Repairing the Class 2 data wire (described as a blue wire) within the liftgate harness boot.
Source hint: GMTNation: 2002 Envoy Electrical Issues Related to Liftgate
2002-2009 GMC Envoy
Symptoms: No-crank, no-start U1000 condition with a communication fault to the PCM.
What fixed it: Cleaning and tightening a loose ground connection at a specific chassis location.
Source hint: YouTube: GMC/Chevrolet fault communication fault U1000/ fault communication with PCM
2002 Chevrolet Trailblazer (GMT360)
Symptoms: U1000 code presented with a non-functional 4WD system and no indicator lights.
What fixed it: Replacement of the faulty Transfer Case Control Module (TCCM) which was shorting the data line.
Source hint: YouTube: 02 Trailblazer U1000 code no 4 wheel drive
Documented NHTSA Reports
NHTSA ODI #10171770
Symptoms: An owner reported that when the vehicle stalled, it lost ignition input. Diagnostic scan revealed codes U1000, U1016, U1152, B1372, and U1088.
What fixed it: The ignition switch was replaced with a new unit (Part #12450251).
NHTSA ODI #10259771
Symptoms: The instrument panel cluster stopped working intermittently. A dealership check confirmed code U1000 (Class 2 Data Link Malfunction).
What fixed it: While the dealership initially refused replacement, this record highlights the direct link between U1000 and cluster failure.
NHTSA ODI #10186630
Symptoms: Multiple warning lights illuminated, accompanied by a no-crank/no-start condition and an intermittent instrument panel cluster. Codes U1000, U1016, B1422, B2957, and B2958 were set, and the shifter was locked in park.
NHTSA ODI #11461728
Symptoms: A report describes electrical TCM computer issues, delayed shifting, and the check engine and ATF lights illuminating. Code U1000 was recorded as "Lost Communication with TCM."
What fixed it: The report suggests the TCM may overheat due to its location directly on the transmission under the battery box.
Related OBD-II Codes
Frequently Asked Questions
My 2002 Envoy has an ABS light on and a U1000 code; is there a specific bulletin for this?
Why did my Envoy's 4WD lights turn off when the U1000 code appeared?
I'm having electrical issues with my 2002 Envoy's liftgate; could this be related to the U1000 code?
Where are the most common ground points I should check on my GMC Envoy to fix a U1000?
Which modules are most likely to fail and cause a U1000 on the Envoy?
Can a weak battery cause my Envoy's gauges to drop to zero and show a U1000?
Helpful Videos
Used OEM Parts in Stock
New Aftermarket Parts Available


The information in this article is provided for general reference and educational purposes only. Vehicle specifications, procedures, and part compatibility can vary by production date, trim level, and region. Always consult your vehicle's factory service manual and verify part numbers before purchasing or performing repairs. Safety-critical components such as airbags, seat belts, and braking systems should be installed by a qualified professional.
- GMC Envoy:
- 🧭 Diagnostic Flowchart
- 🎬 Helpful Videos
- 🛍️ Shop This Part
- What's Unique About the 2002-2009 GMC Envoy
- Symptoms You May Notice
- Most Likely Causes
- Rare But Worth Checking
- Diagnosis Steps
- Parts You'll Likely Need
- Related Codes That Often Appear With This One
- Technical Service Bulletins (TSBs) & Recalls
- Platform-Specific Known Issues
- Mechanic-Grade Diagnostic Values
- Scan Tool Commands That Help
- Wiring & Ground Locations
- Real Owner Repair Stories
- OEM Part Supersession History
- Model Year Variations Within This Range
- Other Known Issues on This Vehicle
- Used vs. New Parts: Buying Guide for This Vehicle
- Real Owner Stories
- 2005 Chevrolet Trailblazer (GMT360)
- 2002 GMC Envoy
- 2002-2009 GMC Envoy
- 2002 Chevrolet Trailblazer (GMT360)
- Documented NHTSA Reports
- NHTSA ODI #10171770
- NHTSA ODI #10259771
- NHTSA ODI #10186630
- NHTSA ODI #11461728
- Related OBD-II Codes
- Frequently Asked Questions
- 🎟️ Get 5% Off