


Buy Honda Civic Bumper Covers
-
ID: 1✓ In Stock

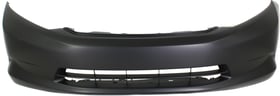
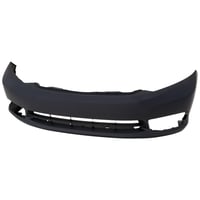
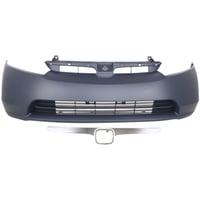
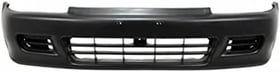
Front Bumper Cover for Honda Civic 1992-1995, Primed (Ready to Paint), Coupe/Hatchback Model, Replacement
CIVIC 92-95 FRONT BUMPER COVER, Primed, Coupe/Hatchback
OEM #: 71101-SR0-A00ZZ$124.95 -
ID: 2✓ In Stock
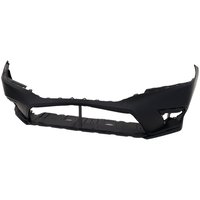
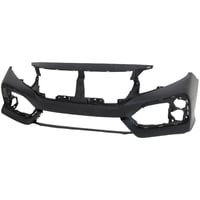
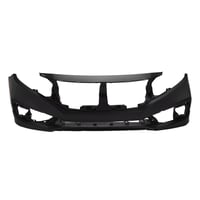
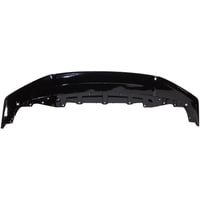
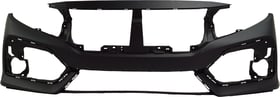
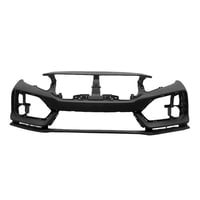
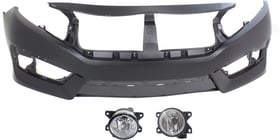
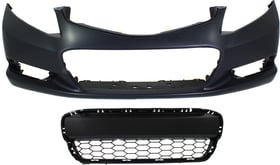
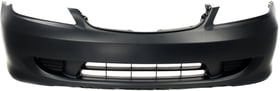
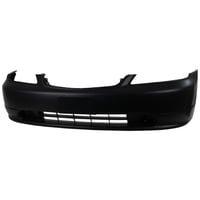
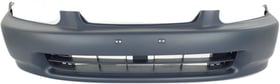
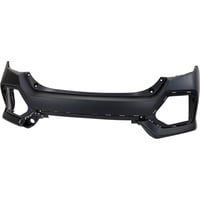
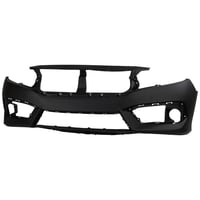
Primed (Ready to Paint) Front Bumper Cover for Honda CIVIC 2022-2023, Suitable for EX Model (Canada/Japan Built Vehicle), LX Model, Sport Touring Models, Sedan and Hatchback, Replacement
2022-2022 HONDA CIVIC: Sedan, prime , , ,OEM # 04711-T20-A00ZZ
2022-2022 HONDA CIVIC: H/B, prime , , ,OEM # 04711-T20-A00ZZ
$228.95 -
ID: 3✓ In Stock
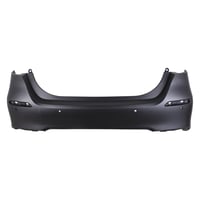
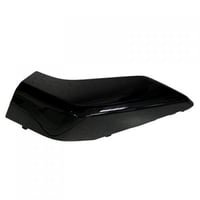
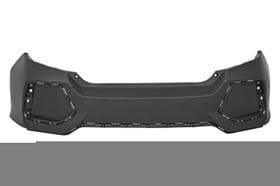
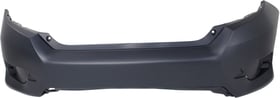
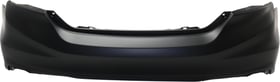
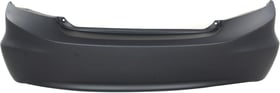
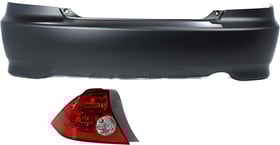
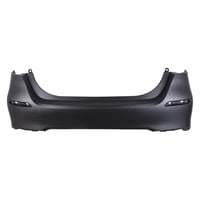
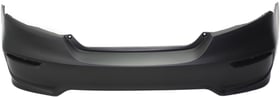
2016 - 2020 Honda Civic Rear Bumper Cover
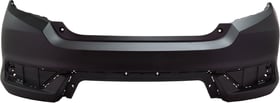
Rear Bumper Cover for Honda Civic Si Coupe, Primed (Ready to Paint), Suitable for 2017-2020 Models, Replacement
2016-2020 HONDA CIVIC: SI, Coupe, prime OEM # 04715-TBJ-A00ZZ
$826.95 -
ID: 4✓ In Stock

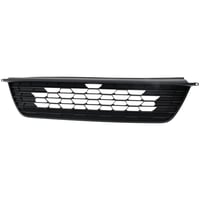
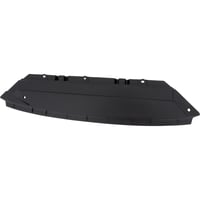
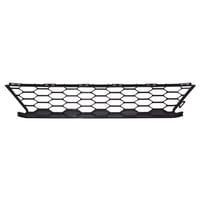
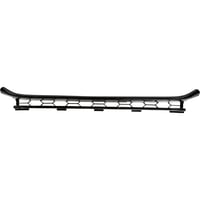
2016 - 2018 Honda Civic Front Bumper Air Shield Lower
Front Bumper Cover Air Duct for Honda Civic 2016-2018, Lower Air Shield, 1.5L Engine, Coupe/Sedan, Excludes Si Model, Replacement
LOWER GRILLE AIR DEFLECTOR, 1.5 TURBO, PLASTIC
OEM #: 71203-TBC-A00$45.95 -
ID: 5✓ In Stock
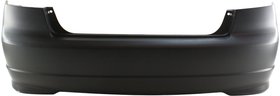
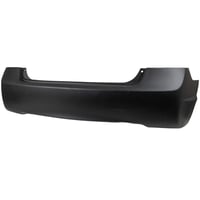
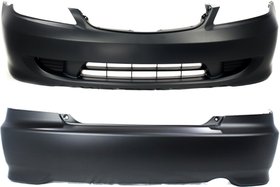
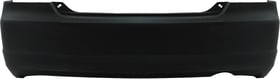
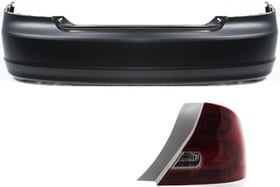
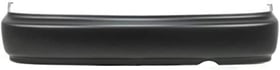
Rear Bumper Cover for Honda Civic 2004-2005 4-Door Sedan, Primed (Ready to Paint), Japan/USA Built, Replacement
CIVIC 04-05 REAR BUMPER COVER, Primed, 4-Door, Sedan, Japan or USA Built
OEM #: 04715-S5A-A91ZZ$168.95 -
ID: 6✓ In Stock
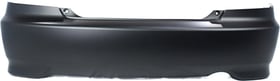
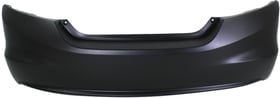
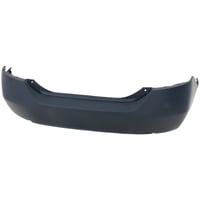
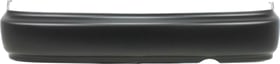
Rear Bumper Cover for Honda Civic 2004-2005, Primed (Ready to Paint), Coupe, Replacement
CIVIC 04-05 REAR BUMPER COVER; Primed; Coupe
OEM #: 04715-S5P-A91ZZ$139.95 -
ID: 7✓ In Stock

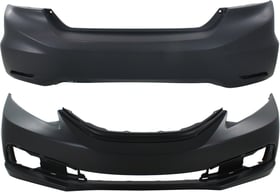
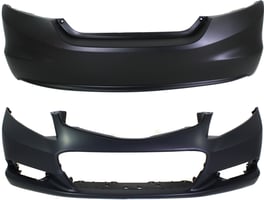
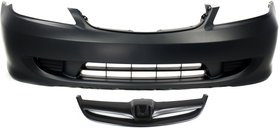
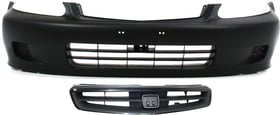
Front and Rear Bumper Cover for Honda Civic 1999-2000, Set of 2, Primed (Ready to Paint), Replacement Set
CIVIC 99-00 FRONT AND REAR BUMPER COVER, Set of 2, Primed
OEM #s: 04711S01A01ZZ, 04715S01A01ZZ
Partslink #s: HO1000184,HO1100190$249.95 -
ID: 8✓ In Stock
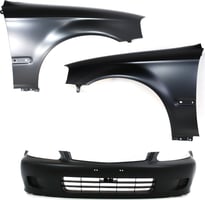
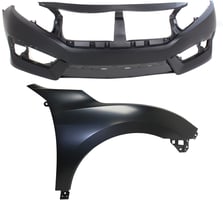
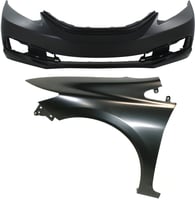
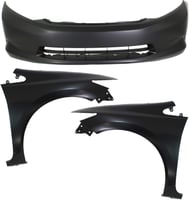
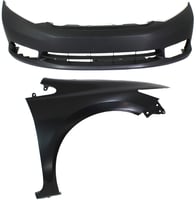
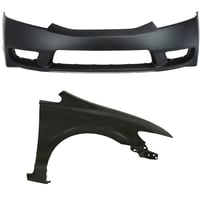
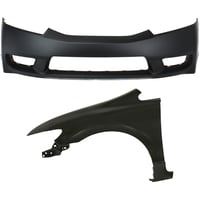
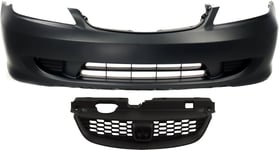
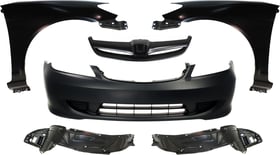
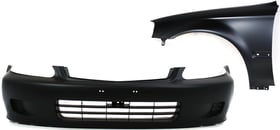
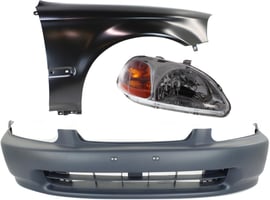
Front Bumper Cover for 1999-2000 Honda Civic, 3-Piece Kit with Fenders, Replacement
CIVIC 99-00 FRONT BUMPER COVER, 3-pc kit, with Fenders
OEM #s: 04711S01A01ZZ, 60261S01A10ZZ, 60211S01A10ZZ
Partslink #s: HO1000184,HO1240151,HO1241151$286.95 -
ID: 9✓ In Stock
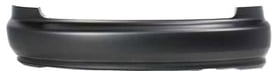
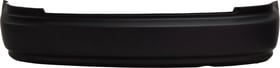
Rear Bumper Cover for 1992-1995 Honda Civic, Primed (Ready to Paint), Suitable for Hatchback Model, Replacement
CIVIC 92-95 REAR BUMPER COVER; Primed; Hatchback
OEM #: 71501-SR0-A00ZZ$148.95 -
ID: 10✓ In Stock

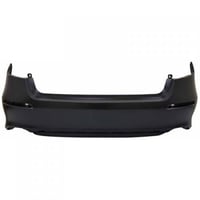
2023 - 2025 Honda Civic Rear Bumper Cover
2023-2025 HONDA CIVIC: TYPE R, prime OEM # 04715-T60-J00ZZ
$803.95 -
ID: 11✓ In Stock
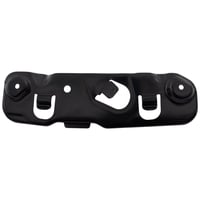
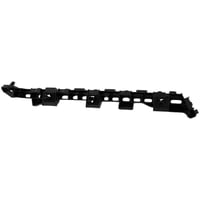
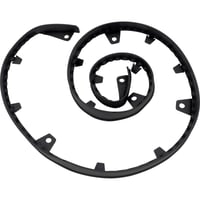
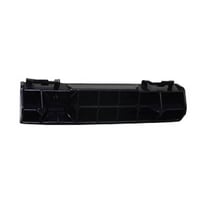
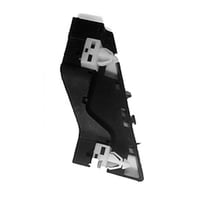
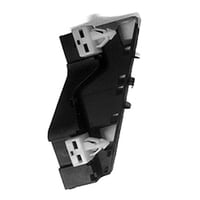
2022 - 2025 Honda Civic Rear Bumper Cover Support (Left / Driver Side)
2022-2023 HONDA CIVIC: Sedan, Side Bracket OEM # 71691-T20-A00
$28.95 -
ID: 12✓ In Stock
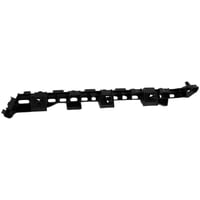
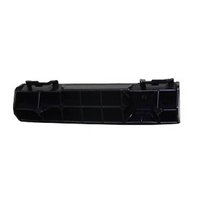
2022 - 2025 Honda Civic Rear Bumper Cover Support (Right / Passenger Side)
2022-2023 HONDA CIVIC: Sedan, Side Bracket OEM # 71641-T20-A00
$16.95 -
ID: 13✓ In Stock
2022 - 2025 Honda Civic Rear Bumper Cover Support (Right / Passenger Side)
Rear Bumper Support Cover Spacer for Honda Civic Sedan, Right (Passenger), 2022-2023, Replacement
2022-2022 HONDA CIVIC: EX|LX|SPORT, Canada Built , , ,OEM # 71630-T20-A11
$42.95 -
ID: 14✓ In Stock
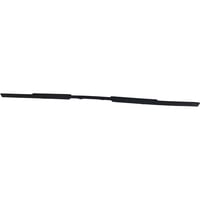
Front Lower Valance Spoiler for 2022-2023 Honda Civic, Textured Black, Suitable for Sedan/Hatchback, Replacement
2022-2022 HONDA CIVIC: , , ,OEM # 71105-T20-A00
$43.95 -
ID: 15✓ In Stock
Rear Bumper Support Cover Spacer for Honda Civic Sedan, Left (Driver), 2022-2023, Replacement
2022-2022 HONDA CIVIC: EX|LX|SPORT, Canada Built , , ,OEM # 71680-T20-A11
$42.95 -
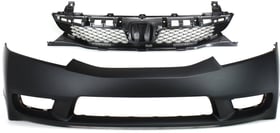
ID: 16✓ In Stock
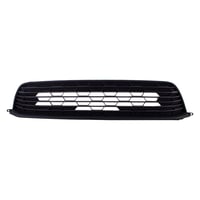
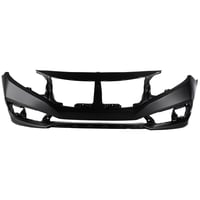
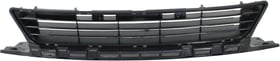
2022 - 2024 Honda Civic Front Bumper Grille
2022-2023 HONDA CIVIC: LX|SPORT, 2.0L, Sedan , , ,OEM # 71151-T21-A00
2022-2023 HONDA CIVIC: LX|SPORT, 2.0L, H/B , , ,OEM # 71151-T21-A00
$82.95 -
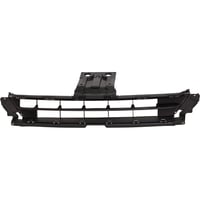
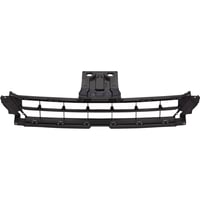
ID: 17✓ In Stock
2022 - 2024 Honda Civic Front Bumper Grille
Front Bumper Grille for Honda Civic 2022-2023, Textured Dark Gray, Applicable for EX, EX-L, Sport, Sport Touring, and Touring Models with 1.5L Engine, Hatchback and Sedan, Replacement
2022-2023 HONDA CIVIC: EX|EX-L||TOURING, 1.5L, H/B , , ,OEM # 71151-T20-A00
2022-2023 HONDA CIVIC: EX|EX-L||TOURING, 1.5L, Sedan , , ,OEM # 71151-T20-A00
$119.95 -
ID: 18✓ In Stock
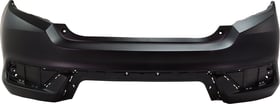
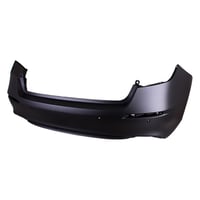
2022 - 2024 Honda Civic Rear Bumper Cover
2022-2023 HONDA CIVIC: SPORT TOURING, H/B, w/Parking Sensors, prime OEM # 04715-T47-A50ZZ
$348.95 -
ID: 19✓ In Stock
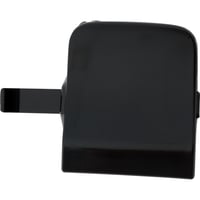
2022 - 2024 Honda Civic Rear Bumper Tow Hook Cover
2022-2022 HONDA CIVIC: EX, Japan Built, PTM OEM # 71506-T39-A00ZD
$30.95 -
ID: 20✓ In Stock
2020 - 2021 Honda Civic Front Bumper Grille
2020-2021 HONDA CIVIC: SPORT|SPORT TOURING, H/B, Grille Mesh OEM # 71107-TGG-A70
$113.95 -
ID: 21✓ In Stock
Front Bumper Cover for 2020-2021 Honda Civic EX/EX-L/LX/Sport/Sport Touring Hatchback, Primed (Ready to Paint), Replacement
2020-2021 HONDA CIVIC: H/B, prime OEM # 04711-TGG-A50ZZ
$381.95 -
ID: 22✓ In Stock
Front Bumper Cover for Honda Civic 2019-2021, DX/Deluxe, EX/EXtreme, EX-L/EXtreme Luxury, LX/Luxury, Sport, Touring Models, Coupe, Sedan (North America Built Vehicle), Primed (Ready to Paint), Replacement
2019-2021 HONDA CIVIC: DX|EX|EX-L|LX|SPORT|TOURING, Sedan, North America Built, prime OEM # 04711-TBA-A50ZZ
2019-2020 HONDA CIVIC: EX|LX|SPORT|TOURING, Coupe, North America Built, prime OEM # 04711-TBA-A50ZZ
$449.95 -
ID: 23✓ In Stock
Front Bumper Grille for Honda Civic 2019-2021, Textured Black, 2.0L Engine, Fits Coupe/Sedan Models, Excludes Si Model, Replacement
2019-2021 HONDA CIVIC: 2.0L, DX|EX|EX-L|LX|SPORT, Sedan , , ,OEM # 71115-TBA-A60
2019-2020 HONDA CIVIC: 2.0L, EX|LX|SPORT, Coupe , , ,OEM # 71115-TBA-A60
$27.95 -
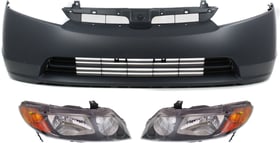
ID: 24✓ In Stock
Textured Black Front Bumper Grille for Honda Civic 2019-2021, 1.5L Engine, Coupe/Sedan (Excludes Si Model), Replacement
2019-2021 HONDA CIVIC: 1.5L TURBO, EX|EX-L|LX|SPORT|TOURING, Sedan , , ,OEM # 71115-TBC-A60
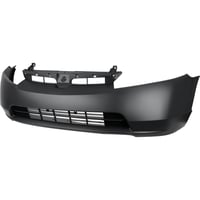
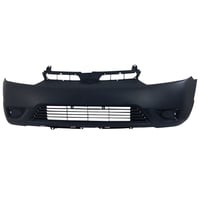
2019-2020 HONDA CIVIC: 1.5L TURBO, EX|EX-L|LX|SPORT|TOURING, Coupe , , ,OEM # 71115-TBC-A60
$62.95 -
ID: 25✓ In Stock
Front Bumper Cover for Honda Civic 2019-2020, Primed (Ready to Paint), 1.5L Engine, Japan Built, Sedan, Excludes Si Model, Replacement
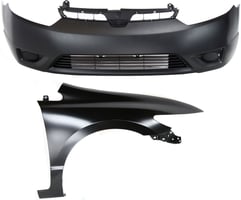
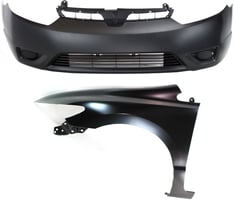
2019-2020 HONDA CIVIC: 1.5L TURBO, EX|EX-L|LX|SPORT|TOURING, Sedan, Japan Built, prime OEM # 04711-TEG-A50ZZ
$264.95 -
ID: 26✓ In Stock

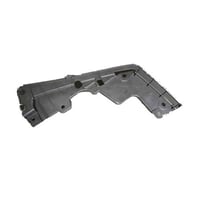
2017 - 2021 Honda Civic Front Bumper Air Shield Lower
2017-2021 HONDA CIVIC: H/B, Lower Air Guide Plate , , ,OEM # 71202-TGG-A00
$146.95 -
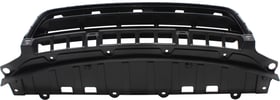
ID: 27✓ In Stock
2017 - 2021 Honda Civic Front Bumper Air Shield Lower
Radiator Support Lower Air Guide for Honda Civic 2017-2021, Excluding Type R Model, for Si, Coupe, Sedan and Hatchback Models, Replacement
2017-2021 HONDA CIVIC: H/B, Lower Air Guide Plate , , ,OEM # 71203-TGG-A00
2016-2021 HONDA CIVIC: SI, Sedan, Lower Air Guide Plate , , ,OEM # 71203-TGG-A00
2016-2020 HONDA CIVIC: SI, Coupe, Lower Air Guide Plate , , ,OEM # 71203-TGG-A00
$134.95 -
ID: 28✓ In Stock

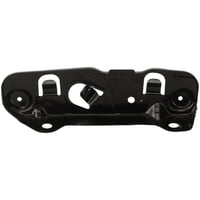
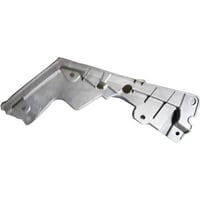
2017 - 2021 Honda Civic Front Bumper Cover Support
Front Bumper Support for Honda Civic 2017-2021, Bumper Beam for Type R (2017-2020), Hatchback, Replacement
FRONT UPPER BUMPER COVER SUPPORT, FOR HATCHBACK, MADE OF STEEL
OEM #: 71150-TGG-A00$117.95 -
ID: 29✓ In Stock
2017 - 2021 Honda Civic Rear Bumper Tow Hook Cover
2017-2021 HONDA CIVIC: Exc TYPE R, H/B, PTM , , ,OEM # 71506-TGG-A00ZH
$167.95 -
ID: 30✓ In Stock
Front Bumper Grille for Honda Civic 2017-2021, Sport/Sport Touring Model, EX/EX-L/LX Hatchback Models 2020-2021, Textured Black - Replacement
2017-2021 HONDA CIVIC: SPORT|SPORT TOURING, H/B , , ,OEM # 71102-TGG-A50
$381.95 -
ID: 31✓ In Stock
Front Valance for Honda Civic 2017-2021, Fits All Body Types, Replacement
2017-2021 HONDA CIVIC: EX|EX-L|LX|SPORT|SPORT TOURING, H/B , , ,OEM # 71110-TGG-A00
2016-2020 HONDA CIVIC: SI, Coupe , , ,OEM # 71110-TGG-A00
2016-2021 HONDA CIVIC: SI, Sedan , , ,OEM # 71110-TGG-A00
$372.95 -
ID: 32✓ In Stock
2016 - 2020 Honda Civic Rear Bumper Cover
RECONDITIONED REAR BUMPER COVER, FOR SI SEDAN MODELS, WITHOUT PARK ASSIST SENSOR HOLES, PRIME/PAINT TO MATCH FINISH, MADE OF PLASTIC
OEM #: 04715-TBF-A00ZZ$747.95 -
ID: 33✓ In Stock
2017 - 2020 Honda Civic Front Bumper Cover
Front Bumper Cover for Honda Civic 2017-2019, Primed (Ready to Paint), Excluding Type R Model, Hatchback, Replacement
2017-2020 HONDA CIVIC: Exc TYPE R, H/B, prime OEM # 04711-TGG-A00ZZ
$211.95 -
ID: 34✓ In Stock
2017 - 2019 Honda Civic Front Bumper Grille
Front Bumper Grille for Honda Civic 2017-2019, Mesh Design, Textured Black, Designed for Sport/Sport Touring Models, Hatchback, Replacement
2017-2019 HONDA CIVIC: SPORT|SPORT TOURING, H/B, Grille Mesh , , ,OEM # 71107-TGG-A50
$84.95 -
ID: 35✓ In Stock

2017 - 2019 Honda Civic Front Bumper Grille
Front Bumper Grille for Honda Civic Hatchback, Textured Black, Compatible with 2017-2019 EX, EX-L, LX models, Replacement
2017-2019 HONDA CIVIC: EX|EX-L|LX, H/B OEM # 71102-TGG-A00
$170.95 -
ID: 36✓ In Stock
2017 - 2019 Honda Civic Rear Bumper Cover
Rear Bumper Cover for Honda Civic 2017-2019, Primed (Ready to Paint), Excludes Type R Model, Hatchback, Replacement
RECONDITIONED REAR BUMPER COVER, FOR HATCHBACK MODELS, PRIME/PAINT TO MATCH FINISH
OEM #: 04715-TGG-A00ZZ$311.95 -
ID: 37✓ In Stock
2017 - 2017 Honda Civic Front Bumper Cover
RECONDITIONED FRONT BUMPER COVER, FOR HATCHBACK TYPE R MODELS, PRIME/PAINT TO MATCH FINISH, MADE OF PLASTIC
OEM #: 04711-TGH-A01ZZ$717.95 -
ID: 38✓ In Stock
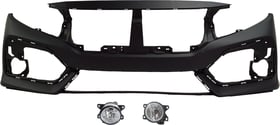
Front Bumper Cover for Honda Civic 2017-2019, Primed (Ready to Paint), 3-Piece Kit, with Fog Lights, Replacement
CIVIC 17-19 FRONT BUMPER COVER, Primed, 3-pc kit, with Fog Lights
OEM #s: 04711TGGA00ZZ, 33950T5RA01, 33900T5RA01
Partslink #s: HO1000307,HO2592143,HO2593143$309.95 -
ID: 39✓ In Stock
2016 - 2021 Honda Civic Front Bumper Molding
2016-2021 HONDA CIVIC: SI, Sedan, Upper Pad , , ,OEM # 71106-TBA-A00
2016-2020 HONDA CIVIC: SI, Coupe, Upper Pad , , ,OEM # 71106-TBA-A00
2016-2018 HONDA CIVIC: EX-L|EX-T|LX|LX-P|TOURING, Coupe, Upper Pad , , ,OEM # 71106-TBA-A00
2016-2021 HONDA CIVIC: DX|EX|EX-L|EX-T|LX|SE|TOURING, Sedan, Upper Pad , , ,OEM # 71106-TBA-A00
$36.95 -
ID: 40✓ In Stock
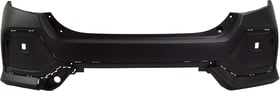
2016 - 2021 Honda Civic Rear Bumper Cover
Rear Bumper Cover for Honda Civic 2016-2021, Primed (Ready to Paint), Compatible with North America Built, Sedan Model (Excludes Si Model), Replacement
CIVIC 16-18 REAR BUMPER COVER, Primed, (Exc. Si Model), Sedan
OEM #: 04715-TBA-A00ZZ$128.95 -
ID: 41✓ In Stock
2016 - 2021 Honda Civic Rear Bumper Cover Support (Left / Driver Side)
REAR DRIVER SIDE BUMPER COVER RETAINER, FOR SEDAN MODELS
OEM #: 71555-TBA-A00$18.95 -
ID: 42✓ In Stock
2016 - 2021 Honda Civic Rear Bumper Cover Support (Right / Passenger Side)
REAR PASSENGER SIDE BUMPER COVER RETAINER, FOR SEDAN MODELS
OEM #: 71505-TBA-A00$18.95 -
ID: 43✓ In Stock
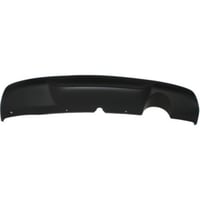
2016 - 2020 Honda Civic Rear Bumper Cover
Rear Bumper Cover for 2016-2020 Honda Civic, Primed (Ready to Paint), Suitable for EX-L/EX-Turbo/LX/LX-Premium/Sport/Touring Coupe Models, Replacement
2016-2020 HONDA CIVIC: Coupe, prime OEM # 04715-TBG-A00ZZ
$603.95 -
ID: 44✓ In Stock

2016 - 2019 Honda Civic Front Bumper Grille
Front Bumper Grille for Honda Civic 2016-2018, Textured Black, 1.5-Liter Engine, Coupe/Sedan, Excludes Si Model, Replacement
FRONT BUMPER COVER GRILLE, FOR COUPE AND SEDAN WITH 1.5 TURBO ENGINE, TEXTURED BLACK FINISH, MADE OF PP PLASTIC
OEM #: 71102-TBA-A00$58.95 -
ID: 45✓ In Stock

2016 - 2019 Honda Civic Front Bumper Grille
Front Bumper Grille for Honda Civic 2016-2018, Textured Black, 2.0L Engine, Suitable for Coupe/Sedan, Replacement
FRONT BUMPER COVER GRILLE, FOR 2.0 LITER MODELS, TEXTURED BLACK, MADE OF PP PLASTIC
OEM #: 71102-TBA-A10$44.95 -
ID: 46✓ In Stock

Front and Rear Bumper Cover Set for 2016-2018 Honda Civic Sedan, Primed (Ready to Paint), Replacement
CIVIC 16-18 FRONT AND REAR BUMPER COVER, Primed, Sedan
OEM #s: 04711TBAA00ZZ, 04715TBAA00ZZ
Partslink #s: HO1000306,HO1100296$275.95 -
ID: 47✓ In Stock

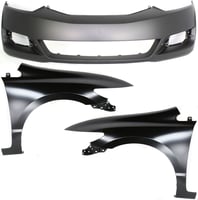
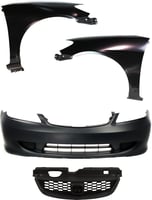
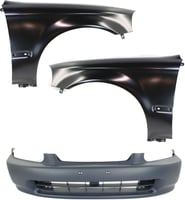
Front Bumper Cover Assembly 3-Piece Kit with Fenders for 2016-2018 Honda Civic, Replacement
CIVIC 16-18 FRONT BUMPER COVER, 3-pc kit, with Fenders
OEM #s: 04711TBAA00ZZ, 60261TBAA00ZZ, 60211TBAA00ZZ
Partslink #s: HO1000306,HO1241192,HO1240192$290.95 -
ID: 48✓ In Stock
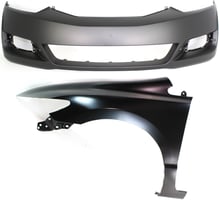
Front Bumper Cover Assembly Kit for 2016-2018 Honda Civic, Primed (Ready to Paint), 2-Piece with Fender, Replacement
CIVIC 16-18 FRONT BUMPER COVER, Primed, 2-pc kit, with Fender
OEM #s: 04711TBAA00ZZ, 60211TBAA00ZZ
Partslink #s: HO1000306,HO1241192$272.95 -
ID: 49✓ In Stock

Front Bumper Cover for Honda Civic 2016-2018, 2-Piece Kit with Fender Assembly, Replacement
CIVIC 16-18 FRONT BUMPER COVER, 2-pc kit, with Fender
OEM #s: 04711TBAA00ZZ, 60261TBAA00ZZ
Partslink #s: HO1000306,HO1240192$272.95 -
ID: 50✓ In Stock
Front Bumper Cover for HONDA CIVIC 2016-2018, Primed (Ready to Paint), 3-Piece Kit, with Fog Lights, Replacement
CIVIC 16-18 FRONT BUMPER COVER, Primed, 3-pc kit, with Fog Lights
OEM #s: 04711TBAA00ZZ, 33950T5RA01, 33900T5RA01
Partslink #s: HO1000306,HO2592143,HO2593143$259.95 -
ID: 51✓ In Stock

Front Bumper Cover Kit for 2016-2018 Honda Civic, 4-Piece Set with Bumper Filler, Bumper Grille and Grille Assembly Replacement
CIVIC 16-18 FRONT BUMPER COVER, 4-pc kit, with Bumper Filler, Bumper Grille and Grille Assembly
OEM #s: 04711TBAA00ZZ, 71102TBAA10, 71104TBAA00, 71121TBAA01
Partslink #s: HO1000306,HO1038128,HO1036124,HO1200231$409.95 -
ID: 52✓ In Stock

Front Bumper Cover Kit for 2016-2018 Honda Civic, 4-Piece Set with Bumper Filler, Bumper Grille and Grille Assembly Replacement
CIVIC 16-18 FRONT BUMPER COVER, 4-pc kit, with Bumper Filler, Bumper Grille and Grille Assembly
OEM #s: 04711TBAA00ZZ, 71102TBAA00, 71104TBAA00, 71121TBAA01
Partslink #s: HO1000306,HO1038128,HO1036123,HO1200231$386.95 -
ID: 53✓ In Stock

Front Bumper Cover for Honda Civic 2014-2015, Coupe, Primed (Ready to Paint), Excludes SI Model, Replacement
CIVIC 14-14 FRONT BUMPER COVER, Primed, 1.8L Eng., Coupe
OEM #: 71101-TS8-A50ZZ$126.95 -
ID: 54✓ In Stock

Rear Bumper Cover for 2014-2015 Honda Civic, Lower Garnish, Textured, Coupe, Fits EX, EX-L, LX Models, Replacement
CIVIC 14-15 REAR BUMPER COVER; Lower; Garnish; Textured; Coupe; EX/EX-L/LX Model
OEM #: 71502-TS8-A51$78.95 -
ID: 55✓ In Stock
2013 - 2015 Honda Civic Front Bumper Molding
Front Bumper Molding for Honda Civic Sedan 2013-2015, 2.4L Engine, Painted Black, Replacement
FRONT LOWER BUMPER COVER MOLDING, FOR SEDAN, FOR SI MODEL, MADE OF ABS PLASTIC
OEM #: 71108-TR7-A51$216.95 -
ID: 56✓ In Stock

Front Bumper Cover for Honda Civic Sedan 2013-2015, Primed (Ready to Paint), Replacement
CIVIC 13-14 FRONT BUMPER COVER, Primed, Sedan
OEM #: 04711-TR3-A70ZZ$154.95 -
ID: 57✓ In Stock

Rear Bumper Cover for Honda Civic 2013-2015 Sedan, Lower Section, Primed (Ready to Paint), Suitable for 2.4L Engine, Replacement
CIVIC 13-14 REAR BUMPER COVER, Lower, Primed, 2.4L Eng., Sedan
OEM #: 04716-TR7-A80$152.95 -
ID: 58✓ In Stock
Rear Bumper Cover for Honda Civic 2013-2015, Upper Section, Primed (Ready to Paint), Suitable for 2.4L Engine, Sedan Model, Replacement
CIVIC 13-14 REAR BUMPER COVER, Upper, Primed, 2.4L Eng., Sedan
OEM #: 04715-TR7-A80ZZ$888.95 -
ID: 59✓ In Stock

Upper Rear Bumper Cover for Honda Civic 2013-2015 Sedan, 1.8L/1.5L Engine, Primed (Ready to Paint), Replacement
CIVIC 13-15 REAR BUMPER COVER; Upper; Primed; 1.8L/1.5L Eng.; Sedan
OEM #: 04715-TR3-A80ZZ$177.95 -
ID: 60✓ In Stock
Front and Rear Bumper Cover Set for 2013-2015 Honda Civic Sedan, 1.8L/1.5L Engine, Primed (Ready to Paint) Replacement
CIVIC 13-15 FRONT AND REAR BUMPER COVER, Primed, 1.8L/1.5L Eng, Sedan
OEM #s: 04711TR3A50ZZ, 04715TR3A50ZZ
Partslink #s: HO1000290,HO1100278$304.95 -
ID: 61✓ In Stock

Front and Rear Bumper Cover Set for 2013-2015 Honda Civic Sedan, Lower, Primed (Ready to Paint), 2.4L Eng, Replacement
CIVIC 13-15 FRONT AND REAR BUMPER COVER, Lower, Primed, 2.4L Eng, Sedan
OEM #s: 04711TR3A50ZZ, 04716TR7A80
Partslink #s: HO1000290,HO1115103$291.95 -
ID: 62✓ In Stock
Front Bumper Cover Assembly for 2013-2015 Honda Civic, Primed (Ready to Paint), with Fog Light Holes, 2-Piece kit, Includes Fender, Ideal Replacement
CIVIC 13-15 FRONT BUMPER COVER, Primed, with Fog Light Holes, 2-pc kit, with Fender
OEM #s: 04711TR3A50ZZ, 60261TR6305ZZ
Partslink #s: HO1000290,HO1240181$260.95 -
ID: 63✓ In Stock

Front Bumper Cover Assembly for 2013-2015 Honda Civic, Primed (Ready to Paint), with Fog Light Holes, 2-Piece Kit, includes Fender Replacement
CIVIC 13-15 FRONT BUMPER COVER, Primed, with Fog Light Holes, 2-pc kit, with Fender
OEM #s: 04711TR3A50ZZ, 60211TR6305ZZ
Partslink #s: HO1000290,HO1241181$259.95 -
ID: 64✓ In Stock

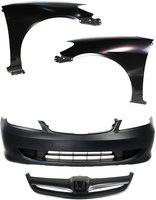
Front Bumper Cover Assembly for 2013-2015 Honda Civic, Primed (Ready to Paint), with Fog Light Holes, 3-Piece kit including Fenders, Replacement
CIVIC 13-15 FRONT BUMPER COVER, Primed, with Fog Light Holes, 3-pc kit, with Fenders
OEM #s: 04711TR3A50ZZ, 60261TR6305ZZ, 60211TR6305ZZ
Partslink #s: HO1000290,HO1241181,HO1240181$346.95 -
ID: 65✓ In Stock

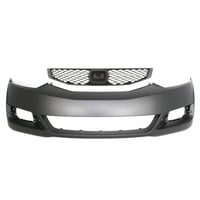
Front Bumper Cover for 2013-2015 Honda Civic, Primed (Ready to Paint), with Fog Light Holes, 2-Piece kit, includes Grille - Replacement
CIVIC 13-15 FRONT BUMPER COVER, Primed, with Fog Light Holes, 2-pc kit, with Grille
OEM #s: 04711TR3A50ZZ, 71121TR3A11
Partslink #s: HO1000290,HO1200218$222.95 -
ID: 66✓ In Stock

Front Bumper Cover for 2013-2015 Honda Civic, Primed (Ready to Paint) with Fog Light Holes, 2-Piece Kit, includes Grille, Replacement
CIVIC 13-15 FRONT BUMPER COVER, Primed, with Fog Light Holes, 2-pc kit, with Grille
OEM #s: 04711TR3A50ZZ, 71121TR3A01
Partslink #s: HO1000290,HO1200216$201.95 -
ID: 67✓ In Stock

Front Bumper Cover for Honda Civic 2013-2015, 3-Piece Kit, Primed (Ready to Paint), with Fog Light Holes, Without Parking Aid Sensor Holes, Includes Bumper Grille and Grille, Replacement
CIVIC 13-15 FRONT BUMPER COVER, 3-pc kit, Primed, with Fog Light Holes, without parking aid sensor holes, with Bumper Grille and Grille
OEM #s: 04711TR3A50ZZ, 71105TR7A51, 71121TR3A11
Partslink #s: HO1000290,HO1036116,HO1200218$299.95 -
ID: 68✓ In Stock

Front Bumper Cover for Honda Civic 2013-2015, 3-Piece Kit with Bumper Grille and Grille, Replacement
CIVIC 13-15 FRONT BUMPER COVER, 3-pc kit, with Bumper Grille and Grille
OEM #s: 04711TR3A50ZZ, 71105TR3A51, 71121TR3A01
Partslink #s: HO1000290,HO1036113,HO1200216$235.95 -
ID: 69✓ In Stock

2012 - 2015 Honda Civic Front Bumper Spoiler
Front Lower Valance Center Spoiler for Honda Civic 2012-2015, Textured Finish, Compatible with Sedan Models, Replacement Part
FRONT SPOILER, FOR SEDAN SI MODELS, ALSO FITS 2013 HYBRID, MADE OF RUBBER
OEM #: 71110-TR7-A00$35.95 -
ID: 70✓ In Stock
2012 - 2013 Honda Civic Rear Bumper Cover Replacement
Rear Bumper Cover for Honda Civic 2012-2013, 1.8L Engine, Coupe, Primed (Ready to Paint), Replacement
CIVIC 12-13 REAR BUMPER COVER, Primed, 1.8L Eng., Coupe
OEM #: 04715-TS8-A90ZZ$643.95 -
ID: 71✓ In Stock

Front Bumper Cover for Honda Civic Coupe 2012-2013, Primed (Ready to Paint), Replacement
CIVIC 12-13 FRONT BUMPER COVER; Primed; Coupe
OEM #: 04711-TS8-A90ZZ$203.95 -
ID: 72✓ In Stock
Front and Rear Bumper Cover Set for 2012-2013 Honda Civic Coupe, 1.8L Engine, Primed (Ready to Paint), Replacement
CIVIC 12-13 FRONT AND REAR BUMPER COVER, Primed, 1.8L Eng., Coupe
OEM #s: 04711TS8A90ZZ, 04715TS8A90ZZ
Partslink #s: HO1000282,HO1100273$620.95 -
ID: 73✓ In Stock

Front and Rear Bumper Cover Set for Honda Civic Sedan 2012-2012, Primed (Ready to Paint), Compatible with EX, EX-L, Si Models Replacement
CIVIC 12-12 FRONT AND REAR BUMPER COVER, Primed, EX/EX-L/Si Models, Sedan
OEM #s: 04711TR3A80ZZ, 04715TR3A90ZZ
Partslink #s: HO1000281,HO1100272$292.95 -
ID: 74✓ In Stock

Front Bumper Cover Assembly 2-Piece Kit with Fender for 2012-2013 Honda Civic, Direct Replacement
CIVIC 12-13 FRONT BUMPER COVER, 2-pc kit, with Fender
OEM #s: 04711TS8A90ZZ, 60211TR6305ZZ
Partslink #s: HO1000282,HO1241181$322.95 -
ID: 75✓ In Stock

Front Bumper Cover Assembly for 2012-2012 Honda Civic Sedan, 2-Piece Kit with Fender, Replacement
CIVIC 12-12 FRONT BUMPER COVER, 2-pc kit, with Fender, Sedan
OEM #s: 04711TR3A90ZZ, 60211TR6305ZZ
Partslink #s: HO1000280,HO1241181$243.95 -
ID: 76✓ In Stock

Front Bumper Cover Assembly for 2012-2012 Honda Civic Sedan, 2-Piece Kit with Fender Replacement
CIVIC 12-12 FRONT BUMPER COVER, 2-pc kit, with Fender, Sedan
OEM #s: 04711TR3A80ZZ, 60261TR6305ZZ
Partslink #s: HO1000281,HO1240181$237.95 -
ID: 77✓ In Stock
Front Bumper Cover Assembly for 2012-2012 Honda Civic Sedan, 3-Piece Kit with Fenders, Replacement
CIVIC 12-12 FRONT BUMPER COVER, 3-pc kit, with Fenders, Sedan
OEM #s: 04711TR3A90ZZ, 60261TR6305ZZ, 60211TR6305ZZ
Partslink #s: HO1000280,HO1241181,HO1240181$353.95 -
ID: 78✓ In Stock

Front Bumper Cover Assembly for 2012-2013 Honda Civic, Primed (Ready to Paint), with Fog Light Holes, 2-Piece Kit, Includes Fender, Replacement
CIVIC 12-13 FRONT BUMPER COVER, Primed, with Fog Light Holes, 2-pc kit, with Fender
OEM #s: 04711TS8A90ZZ, 60261TR6305ZZ
Partslink #s: HO1000282,HO1240181$322.95 -
ID: 79✓ In Stock

Front Bumper Cover Assembly for 2012-2013 Honda Civic, Primed (Ready to Paint), with Fog Light Holes and Fenders, 3-Piece kit, Replacement
CIVIC 12-13 FRONT BUMPER COVER, Primed, with Fog Light Holes, 3-pc kit, with Fenders
OEM #s: 04711TS8A90ZZ, 60261TR6305ZZ, 60211TR6305ZZ
Partslink #s: HO1000282,HO1241181,HO1240181$443.95 -
ID: 80✓ In Stock
Front Bumper Cover Assembly for 2012 Honda Civic Sedan, 2-Piece Kit with Fender, Replacement
CIVIC 12-12 FRONT BUMPER COVER, 2-pc kit, with Fender, Sedan
OEM #s: 04711TR3A80ZZ, 60211TR6305ZZ
Partslink #s: HO1000281,HO1241181$239.95 -
ID: 81✓ In Stock

Front Bumper Cover Assembly for 2012 Honda Civic Sedan, 3-Piece Kit with Fenders, Replacement
CIVIC 12-12 FRONT BUMPER COVER, 3-pc kit, with Fenders, Sedan
OEM #s: 04711TR3A80ZZ, 60261TR6305ZZ, 60211TR6305ZZ
Partslink #s: HO1000281,HO1241181,HO1240181$353.95 -
ID: 82✓ In Stock
Front Bumper Cover for 2012-2012 Honda Civic DX/HF/LX Sedan Models, Primed (Ready to Paint), without Fog Light Holes, Replacement
CIVIC 12-12 FRONT BUMPER COVER, Primed, without Fog Lamps Hole, Sedan, DX/HF/LX Models
OEM #: 04711-TR3-A90ZZ$134.95 -
ID: 83✓ In Stock
Front Bumper Cover for 2012-2012 Honda Civic, Primed (Ready to Paint), with Fog Light Holes, 2-Piece Kit, Includes Grille, Replacement
CIVIC 12-12 FRONT BUMPER COVER, Primed, with Fog Light Holes, 2-pc kit, with Grille
OEM #s: 04711TR3A80ZZ, 71121TR0A01
Partslink #s: HO1000281,HO1200206$173.95 -
ID: 84✓ In Stock
Front Bumper Cover for 2012-2012 Honda Civic, Primed (Ready to Paint), without Fog Light Holes, 2-Piece kit with Grille, Replacement
CIVIC 12-12 FRONT BUMPER COVER, Primed, without Fog Light Holes, 2-pc kit, with Grille
OEM #s: 04711TR3A90ZZ, 71121TR0A01
Partslink #s: HO1000280,HO1200206$185.95 -
ID: 85✓ In Stock
Front Bumper Cover for 2012-2012 Honda Civic Sedan, Primed (Ready to Paint), with Fog Light Holes, Suitable for EX/EX-L/Si Models, Replacement
CIVIC 12-12 FRONT BUMPER COVER, Primed, with Fog Lamp Hole, Sedan, EX/EX-L/Si Models
OEM #: 04711-TR3-A80ZZ$132.95 -
ID: 86✓ In Stock
Front Bumper Cover for 2012-2013 Honda Civic, Primed (Ready to Paint), with Fog Light Holes, 2-Piece kit, includes Bumper Grille Replacement
CIVIC 12-13 FRONT BUMPER COVER, Primed, with Fog Light Holes, 2-pc kit, with Bumper Grille
OEM #s: 04711TS8A90ZZ, 71105TS8A01
Partslink #s: HO1000282,HO1036111$286.95 -
ID: 87✓ In Stock
Front Bumper Cover for 2012-2013 Honda Civic with Grille, Primed (Ready to Paint), Featuring Fog Light Holes, 2-Piece Kit, Replacement
CIVIC 12-13 FRONT BUMPER COVER, Primed, with Fog Light Holes, 2-pc kit, with Grille
OEM #s: 04711TS8A90ZZ, 71121TS8A01
Partslink #s: HO1000282,HO1200209$260.95 -
ID: 88✓ In Stock
Rear Bumper Cover for 2012-2012 Honda Civic Sedan, Primed (Ready to Paint), Without Parking Assist Sensor Holes, Replacement
CIVIC 12-12 REAR BUMPER COVER, Primed, without Park Assist, Sedan
OEM #: 04715-TR3-A90ZZ$182.95 -
ID: 89✓ In Stock
2009 - 2011 Honda Civic Front Bumper Spoiler
FRONT DRIVER SIDE LOWER SPOILER, FOR SEDAN AND HYBRID MODELS
OEM #: 71118-SNE-A50$48.95 -
ID: 90✓ In Stock
2009 - 2011 Honda Civic Front Bumper Spoiler
FRONT PASSENGER SIDE LOWER SPOILER, FOR SEDAN AND HYBRID MODELS
OEM #: 71116-SNE-A50$48.95 -
ID: 91✓ In Stock

Front Bumper Cover for Honda Civic 2009-2011 Coupe, 1.8L Engine, Primed (Ready to Paint), Replacement
CIVIC 09-11 FRONT BUMPER COVER; Primed; 1.8L; Coupe
OEM #: 04711-SVA-A80ZZ$135.95 -
ID: 92✓ In Stock

Front Bumper Cover for Honda Civic Sedan 2009-2011, Primed (Ready to Paint), Replacement
CIVIC 09-11 FRONT BUMPER COVER, Primed, Sedan
OEM #: 04711-SNA-A90ZZ$154.95 -
ID: 93✓ In Stock
Front Bumper Grille Spoiler Assembly for Honda Civic 2009-2011, Textured Black, Sedan, Canada/USA Built, Excludes Hybrid Model, Replacement
FRONT LOWER BUMPER COVER GRILLE, FOR SEDAN MODEL, USA/CANADA BUILT, BLACK, MADE OF PP PLASTIC
OEM #: 71107-SNE-A50$68.95 -
ID: 94✓ In Stock
Front Bumper Cover Assembly for 2009-2011 Honda Civic, 2-Piece Kit Includes Fender, Replacement
CIVIC 09-11 FRONT BUMPER COVER, 2-pc Kit, Includes Fender
OEM #s: 04711SNAA90ZZ, 60211SNAA90ZZ
Partslink #s: HO1000266,HO1241168$253.95 -
ID: 95✓ In Stock
Front Bumper Cover Assembly for 2009-2011 Honda Civic, 2-Piece Kit Includes Fender, Replacement
CIVIC 09-11 FRONT BUMPER COVER, 2-pc Kit, Includes Fender
OEM #s: 04711SNAA90ZZ, 60261SNAA90ZZ
Partslink #s: HO1000266,HO1240168$261.95 -
ID: 96✓ In Stock

Front Bumper Cover Assembly for 2009-2011 Honda Civic, 3-Piece Kit Includes Fender, Replacement
CIVIC 09-11 FRONT BUMPER COVER, 3-pc Kit, Includes Fender
OEM #s: 04711SNAA90ZZ, 60261SNAA90ZZ, 60211SNAA90ZZ
Partslink #s: HO1000266,HO1241168,HO1240168$368.95 -
ID: 97✓ In Stock

Front Bumper Cover Assembly for 2009-2011 Honda Civic Coupe, 2-Piece Kit with Fender, Replacement
CIVIC 09-11 FRONT BUMPER COVER, 2-pc kit, with Fender, Coupe
OEM #s: 04711SVAA80ZZ, 60211SVAA90ZZ
Partslink #s: HO1000262,HO1241169$313.95 -
ID: 98✓ In Stock
Front Bumper Cover Assembly for 2009-2011 Honda Civic Coupe, 3-Piece Kit with Fenders, Replacement
CIVIC 09-11 FRONT BUMPER COVER, 3-pc kit, with Fenders, Coupe
OEM #s: 04711SVAA80ZZ, 60261SVAA90ZZ, 60211SVAA90ZZ
Partslink #s: HO1000262,HO1240169,HO1241169$487.95 -
ID: 99✓ In Stock
Front Bumper Cover Assembly Kit for 2009-2011 Honda Civic Coupe, 2-Piece with Fender, Premium Replacement
CIVIC 09-11 FRONT BUMPER COVER, 2-pc kit, with Fender, Coupe
OEM #s: 04711SVAA80ZZ, 60261SVAA90ZZ
Partslink #s: HO1000262,HO1240169$288.95 -
ID: 100✓ In Stock
Front Bumper Cover for 2009-2011 Honda Civic, Primed (Ready to Paint), with Fog Light Holes and Grille, 2-Piece Kit, Replacement
CIVIC 09-11 FRONT BUMPER COVER, Primed, with Fog Light Holes, 2-pc kit, with Grille
OEM #s: 04711SVAA80ZZ, 71121SVAA50
Partslink #s: HO1000262,HO1200199$185.95 -
ID: 101✓ In Stock
Front Bumper Cover for 2009-2011 Honda Civic Sedan, Primed (Ready to Paint), 2-Piece Kit with Grille, Replacement
CIVIC 09-11 FRONT BUMPER COVER, Primed, 2-pc kit, with Grille, Sedan
OEM #s: 04711SNAA90ZZ, 71121SNAA50
Partslink #s: HO1000266,HO1200198$192.95 -
ID: 102✓ In Stock

Front Bumper Cover for Honda Civic Sedan 2007-2008, Primed (Ready to Paint), 2.0L Engine, Excludes MUGEN Si, Replacement
CIVIC 07-08 FRONT BUMPER COVER; Primed; 2.0L Eng.; Sedan; Except MUGEN Si
OEM #: 04711-SNX-A90ZZ$221.95 -
ID: 103✓ In Stock

Front Bumper Cover Assembly for 2007-2008 Honda Civic Sedan, 2-Piece Kit with Fender, Replacement
CIVIC 07-08 FRONT BUMPER COVER, 2-pc kit, with Fender, Sedan
OEM #s: 04711SNXA90ZZ, 60211SNAA90ZZ
Partslink #s: HO1000259,HO1241168$368.95 -
ID: 104✓ In Stock

Front Bumper Cover Assembly for 2007-2008 Honda Civic Sedan, 3-Piece Kit with Fenders, Replacement
CIVIC 07-08 FRONT BUMPER COVER, 3-pc kit, with Fenders, Sedan
OEM #s: 04711SNXA90ZZ, 60261SNAA90ZZ, 60211SNAA90ZZ
Partslink #s: HO1000259,HO1241168,HO1240168$558.95 -
ID: 105✓ In Stock
Front Bumper Cover Kit for 2007-2008 Honda Civic Sedan, 3-Piece with Headlights, Excluding Mugen Models, Replacement
CIVIC 07-08 FRONT BUMPER COVER, 3-pc kit, with Headlights, Sedan, except Mugen Models
OEM #s: 04711SNXA90ZZ
Partslink #s: HO1000259$341.95 -
ID: 106✓ In Stock
Rear Bumper Cover for Honda Civic 2006-2011, Primed (Ready to Paint), Suitable for 1.3L/1.8L Engine, Sedan, Replacement
CIVIC 06-11 REAR BUMPER COVER, Primed, 1.3L/1.8L Eng., Sedan
OEM #: 04715-SNA-A90ZZ$140.95 -
ID: 107✓ In Stock
Rear Bumper Cover for Honda Civic Coupe, 2006-2011, Primed (Ready to Paint), Replacement
CIVIC 06-11 REAR BUMPER COVER, Primed, Coupe
OEM #: 04715-SVA-A90ZZ$138.95 -
ID: 108✓ In Stock
Front Bumper Cover for Honda Civic 2006-2008 Sedan, 1.3L/1.8L Engine, Primed (Ready to Paint), Replacement
CIVIC 06-08 FRONT BUMPER COVER; Primed; 1.3L/1.8L Eng.; Sedan
OEM #: 04711-SNE-A90ZZ$219.95 -
ID: 109✓ In Stock
Front Bumper Cover for Honda Civic Coupe, 2006-2008, Primed (Ready to Paint), Replacement
CIVIC 06-08 FRONT BUMPER COVER, Primed, Coupe
OEM #: 04711-SVA-A90ZZ$192.95 -
ID: 110✓ In Stock

Front Bumper Cover Assembly for 2006-2008 Honda Civic, 3-Piece Kit with Fenders, Suitable for Coupe, Replacement
CIVIC 06-08 FRONT BUMPER COVER, 3-pc kit, with Fenders, Coupe
OEM #s: 04711SVAA90ZZ, 60261SVAA90ZZ, 60211SVAA90ZZ
Partslink #s: HO1000237,HO1241169,HO1240169$438.95 -
ID: 111✓ In Stock
Front Bumper Cover Assembly for 2006-2008 Honda Civic Coupe, 2-Piece Kit with Fender, Replacement
CIVIC 06-08 FRONT BUMPER COVER, 2-pc kit, with Fender, Coupe
OEM #s: 04711SVAA90ZZ, 60211SVAA90ZZ
Partslink #s: HO1000237,HO1241169$332.95 -
ID: 112✓ In Stock

Front Bumper Cover Assembly for 2006-2008 Honda Civic Sedan, 2-Piece Kit with Fender, Replacement
CIVIC 06-08 FRONT BUMPER COVER, 2-pc kit, with Fender, Sedan
OEM #s: 04711SNEA90ZZ, 60211SNAA90ZZ
Partslink #s: HO1000239,HO1241168$337.95 -
ID: 113✓ In Stock

Front Bumper Cover Assembly for 2006-2008 Honda Civic Sedan, 2-Piece Kit with Fender, Replacement
CIVIC 06-08 FRONT BUMPER COVER, 2-pc kit, with Fender, Sedan
OEM #s: 04711SNEA90ZZ, 60261SNAA90ZZ
Partslink #s: HO1000239,HO1240168$344.95 -
ID: 114✓ In Stock

Front Bumper Cover Assembly for 2006-2008 Honda Civic Sedan: 3-Piece Kit with Fenders, Replacement
CIVIC 06-08 FRONT BUMPER COVER, 3-pc kit, with Fenders, Sedan
OEM #s: 04711SNEA90ZZ, 60261SNAA90ZZ, 60211SNAA90ZZ
Partslink #s: HO1000239,HO1241168,HO1240168$552.95 -
ID: 115✓ In Stock
Front Bumper Cover Assembly for Honda Civic 2006-2008, 2-Piece Kit with Fender, Coupe – Replacement
CIVIC 06-08 FRONT BUMPER COVER, 2-pc kit, with Fender, Coupe
OEM #s: 04711SVAA90ZZ, 60261SVAA90ZZ
Partslink #s: HO1000237,HO1240169$350.95 -
ID: 116✓ In Stock

Front Bumper Cover for Honda Civic 2006-2008 Coupe, Primed (Ready to Paint), 2-Piece Kit with Grille Assembly, Replacement
CIVIC 06-08 FRONT BUMPER COVER, Primed, 2-pc kit, with Grille Assembly, Coupe
OEM #s: 04711SVAA90ZZ, 75100SVAA01ZA
Partslink #s: HO1000237,HO1200174$241.95 -
ID: 117✓ In Stock
Front Bumper Cover Kit for 2006-2008 Honda Civic Sedan, Primed (Ready to Paint), 2-Piece with Grille Assembly, Replacement
CIVIC 06-08 FRONT BUMPER COVER, Primed, 2-pc kit, with Grille Assembly, Sedan
OEM #s: 04711SNEA90ZZ, 71122SNAA00
Partslink #s: HO1000239,HO1200172$223.95 -
ID: 118✓ In Stock

2004 - 2005 Honda Civic Front Bumper Cover
2004-2005 HONDA CIVIC: HYBRID, matte-black OEM # Performance
2004-2005 HONDA CIVIC: 2dr coupe/4dr sedan, matte-black OEM # Performance
$260.95 -
ID: 119✓ In Stock
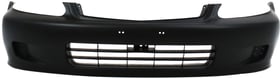
Front Bumper Cover for Honda Civic 2004-2005, Primed (Ready to Paint), Suitable for Both Coupe and Sedan, Replacement
CIVIC 04-05 FRONT BUMPER COVER, Primed, Coupe/Sedan
OEM #: 04711-S5A-A91ZZ$205.95 -
ID: 120✓ In Stock
Front and Rear Bumper Cover for 2004-2005 Honda Civic, 2-Piece Set, Primed (Ready to Paint), Coupe - Replacement
CIVIC 04-05 FRONT AND REAR BUMPER COVER, 2-pc kit, Primed, Coupe
OEM #s: 04711S5AA91ZZ, 04715S5PA91ZZ
Partslink #s: HO1000216,HO1100216$284.95 -
ID: 121✓ In Stock

Front Bumper Cover Assembly for 2004-2005 Honda Civic, 2-Piece Kit with Fender, Replacement
CIVIC 04-05 FRONT BUMPER COVER, 2-pc kit, with Fender
OEM #s: 04711S5AA91ZZ, 60211S5AA80ZZ
Partslink #s: HO1000216,HO1241162$285.95 -
ID: 122✓ In Stock

Front Bumper Cover Assembly for 2004-2005 Honda Civic, 2-Piece Kit with Fender, Replacement
CIVIC 04-05 FRONT BUMPER COVER, 2-pc kit, with Fender
OEM #s: 04711S5AA91ZZ, 60261S5AA80ZZ
Partslink #s: HO1000216,HO1240162$285.95 -
ID: 123✓ In Stock

Front Bumper Cover Assembly for 2004-2005 Honda Civic, 3-Piece Kit with Fenders, Replacement
CIVIC 04-05 FRONT BUMPER COVER, 3-pc kit, with Fenders
OEM #s: 04711S5AA91ZZ, 60261S5AA80ZZ, 60211S5AA80ZZ
Partslink #s: HO1000216,HO1241162,HO1240162$322.95 -
ID: 124✓ In Stock
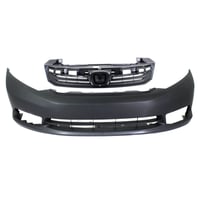
Front Bumper Cover for 2004-2005 Honda Civic Sedan, 2-Piece Kit, Primed (Ready to Paint), with Grille, Replacement
CIVIC 04-05 FRONT BUMPER COVER, Primed, 2-pc kit, with Grille, Sedan
OEM #s: 04711S5AA91ZZ, 71122S5AA00ZB
Partslink #s: HO1000216,HO1200164$226.95 -
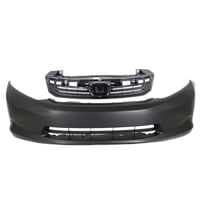
ID: 125✓ In Stock
Front Bumper Cover for Honda Civic 2004-2005, Primed (Ready to Paint), 2-Piece Kit with Grille, Replacement
CIVIC 04-05 FRONT BUMPER COVER, Primed, 2-pc kit, with Grille
OEM #s: 04711S5AA91ZZ, 71121S5PA02
Partslink #s: HO1000216,HO1200165$232.95 -
ID: 126✓ In Stock
Front Bumper Cover Kit for 2004-2005 Honda Civic, 4-Piece with Fenders and Grille Assembly, Coupe, Replacement
CIVIC 04-05 FRONT BUMPER COVER, 4-pc kit, with Fenders and Grille Assembly, Coupe
OEM #s: 04711S5AA91ZZ, 71121S5PA02, 60261S5AA80ZZ, 60211S5AA80ZZ
Partslink #s: HO1000216,HO1240162,HO1241162,HO1200165$415.95 -
ID: 127✓ In Stock
Front Bumper Cover Kit for 2004-2005 Honda Civic, 6-Piece with Grille, Fender Liners and Fenders Replacement
CIVIC 04-05 FRONT BUMPER COVER, 6-pc kit, with Grille, Fender Liners and Fenders
OEM #s: 04711S5AA91ZZ, 71122S5AA00ZB, 60261S5AA80ZZ, 60211S5AA80ZZ, 74151S5AJ00, 74101S5AJ01
Partslink #s: HO1000216,HO1240162,HO1241162,HO1248121,HO1249121,HO1200164$447.95 -
ID: 128✓ In Stock
Front Bumper Cover Kit for 2004-2005 Honda Civic Sedan, Includes 4-Piece Fenders and Grille Assembly Replacement
CIVIC 04-05 FRONT BUMPER COVER, 4-pc kit, with Fenders and Grille Assembly, Sedan
OEM #s: 04711S5AA91ZZ, 71122S5AA00ZB, 60261S5AA80ZZ, 60211S5AA80ZZ
Partslink #s: HO1000216,HO1240162,HO1241162,HO1200164$433.95 -
ID: 129✓ In Stock
Rear Bumper Cover for 2004-2005 Honda Civic, 2-Piece Kit with Tail Lights, Coupe - Replacement
CIVIC 04-05 REAR BUMPER COVER, 2-pc kit, with Tail Lights, Coupe
OEM #s: 04715S5PA91ZZ, 33551S5PA11
Partslink #s: HO1100216,HO2800155$190.95 -
ID: 130✓ In Stock

2001 - 2003 Honda Civic Front Bumper Cover
2001-2003 HONDA CIVIC: 2dr coupe/4dr sedan, matte-black OEM # Performance
$263.95 -
ID: 131✓ In Stock
Front Bumper Cover for Honda Civic 2001-2003, Primed (Ready to Paint), Suitable for Coupe/Sedan, Replacement
CIVIC 01-03 FRONT BUMPER COVER, Primed, Sedan/Coupe
OEM #: 04711-S5P-A90ZZ$418.95 -
ID: 132✓ In Stock
Rear Bumper Cover for 2001-2003 Honda Civic Coupe, Primed (Ready to Paint), Replacement
CIVIC 01-03 REAR BUMPER COVER, Primed, Coupe
OEM #: 04715-S5P-A90ZZ$214.95 -
ID: 133✓ In Stock

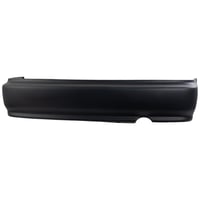
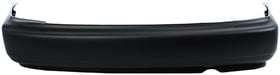
Rear Bumper Cover for Honda Civic Sedan 2001-2003, Primed (Ready to Paint), Replacement
CIVIC 01-03 REAR BUMPER COVER, Primed, Sedan
OEM #: 04715-S5A-A90ZZ$170.95 -
ID: 134✓ In Stock
2001 - 2003 Honda Civic Rear Bumper Cover Support (Left / Driver Side)
DRIVER SIDE REAR BUMPER COVER UPPER SIDE SUPPORT BRACKET, FOR COUPE
OEM #: 71599-S5A-000$23.95 -
ID: 135✓ In Stock
2001 - 2003 Honda Civic Rear Bumper Cover Support (Right / Passenger Side)
PASSENGER SIDE REAR BUMPER COVER UPPER SIDE SUPPORT BRACKET, FOR COUPE
OEM #: 71594-S5A-000$19.95 -
ID: 136✓ In Stock
Rear Bumper Cover for 2001-2003 Honda Civic, 2-Piece Kit with Tail Lights, Coupe, Replacement
CIVIC 01-03 REAR BUMPER COVER, 2-pc kit, with Tail Lights, Coupe
OEM #s: 04715S5PA90ZZ, 33501S5PA01
Partslink #s: HO1100199,HO2801134$341.95 -
ID: 137✓ In Stock
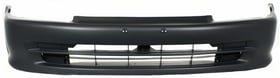
Front Bumper Cover for Honda Civic 1999-2000, Primed (Ready to Paint), Replacement
CIVIC 99-00 FRONT BUMPER COVER, Primed
OEM #: 04711-S01-A01ZZ$124.95 -
ID: 138✓ In Stock
Primed (Ready to Paint) Rear Bumper Cover for Honda Civic 1999-2000 Coupe/Sedan, Compatible with Vehicles Built in Canada/USA 1996-1998 and Japan 1996-1998, Replacement
CIVIC 96-00 REAR BUMPER COVER, Primed, Coupe & Sedan
OEM #: 04715-S01-A01ZZ$131.95 -
ID: 139✓ In Stock

Front Bumper Cover Assembly for 1999-2000 Honda Civic, 2-Piece Kit with Fender, Suitable for Canada, Japan or USA Built Vehicles, Replacement
CIVIC 99-00 FRONT BUMPER COVER, 2-pc kit, with Fender, Canada, Japan or USA Built Vehicle
OEM #s: 04711S01A01ZZ, 60211S01A10ZZ
Partslink #s: HO1000184,HO1241151$211.95 -
ID: 140✓ In Stock
Front Bumper Cover for Honda Civic 1999-2000, Primed (Ready to Paint), 2-Piece kit, with Fender - Replacement
CIVIC 99-00 FRONT BUMPER COVER, Primed, 2-pc kit, with Fender
OEM #s: 04711S01A01ZZ, 60261S01A10ZZ
Partslink #s: HO1000184,HO1240151$211.95 -
ID: 141✓ In Stock
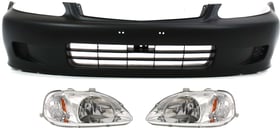
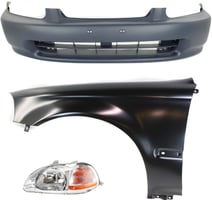
Front Bumper Cover Kit for 1999-2000 Honda Civic, 3-Piece Set with Headlights, Compatible with Coupe, Sedan, Hatchback Models, Replacement
CIVIC 99-00 FRONT BUMPER COVER, 3-pc kit, with Headlights, Coupe/Sedan/Hatchback
OEM #s: 04711S01A01ZZ, 33151S01A02, 33101S01A02
Partslink #s: HO1000184,HO2502113,HO2503113$254.95 -
ID: 142✓ In Stock
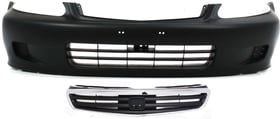
Front Bumper Cover Kit for 1999-2000 Honda Civic, Primed (Ready to Paint), 2-Piece with Grille, Replacement
CIVIC 99-00 FRONT BUMPER COVER, Primed, 2-pc kit, with Grille
OEM #s: 04711S01A01ZZ, HO1200147
Partslink #s: HO1000184,HO1200147$176.95 -
ID: 143✓ In Stock
Front Bumper Cover Kit for 1999-2000 Honda Civic Sedan, Primed (Ready to Paint), 2-Piece with Grille, Excluding G Models, Replacement
CIVIC 99-00 FRONT BUMPER COVER, Primed, 2-pc kit, with Grille, Exc. G Models, Sedan
OEM #s: 04711S01A01ZZ, 71121S04003-PFM
Partslink #s: HO1000184,HO1200143$179.95 -
ID: 144✓ In Stock
Rear Bumper Cover for Honda Civic DX/CX Models, Hatchback (1996-2000), Primed (Ready to Paint), Replacement
CIVIC 96-00 REAR BUMPER COVER, Primed, Hatchback, DX/CX Models
OEM #: 71501-S00-A00ZZ$188.95 -
ID: 145✓ In Stock
1996 - 1998 Honda Civic Rear Bumper Cover
1996-1998 HONDA CIVIC: 2dr hatchback, black finish OEM # Performance
$263.95 -
ID: 146✓ In Stock
Front Bumper Cover for 1996-1998 Honda Civic, Primed (Ready to Paint), Replacement
CIVIC 96-98 FRONT BUMPER COVER, Primed
OEM #: 04711-S01-A00ZZ$120.95 -
ID: 147✓ In Stock
Rear Bumper Cover for Honda Civic 1996-1998, Primed (Ready to Paint), Suitable for Coupe/Sedan, Canada/USA Built, Replacement
CIVIC 96-98 REAR BUMPER COVER, Primed, USA/Canada Built, Coupe & Sedan
OEM #: 04715-S01-A00ZZ$114.95 -
ID: 148✓ In Stock

Front and Rear Bumper Cover for 1996-1998 Honda Civic Coupe/Sedan, Primed (Ready to Paint) - Replacement Set
CIVIC 96-98 FRONT AND REAR BUMPER COVER, Primed, Coupe/Sedan
OEM #s: 04711S01A00ZZ, 04715S01A00ZZ
Partslink #s: HO1000172,HO1100178$237.95 -
ID: 149✓ In Stock

Front and Rear Bumper Cover Set for 1996-1998 Honda Civic DX/CX Hatchback Models, Primed (Ready to Paint), Replacement
CIVIC 96-98 FRONT AND REAR BUMPER COVER, Primed, DX/CX Models, Hatchback
OEM #s: 04711S01A00ZZ, 71501S00A00ZZ
Partslink #s: HO1000172,HO1100179$295.95 -
ID: 150✓ In Stock
Front Bumper Cover 3-Piece Kit for 1996-1998 Honda Civic, Includes Fender and Headlight, Replacement
CIVIC 96-98 FRONT BUMPER COVER, 3-pc kit, with Fender and Headlight
OEM #s: 04711S01A00ZZ, 60211S04A00ZZ, 33101S01A01
Partslink #s: HO1000172,HO1241143,HO2519101$271.95 -
ID: 151✓ In Stock
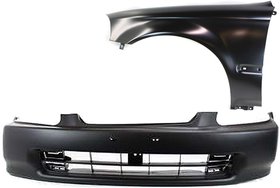
Front Bumper Cover and Fenders for 1996-1998 Honda Civic, 3-Piece Kit, Auto Part Replacement
CIVIC 96-98 FRONT BUMPER COVER, 3-pc kit, with Fenders
OEM #s: 04711S01A00ZZ, 60261S04A00ZZ, 60211S04A00ZZ
Partslink #s: HO1000172,HO1240143,HO1241143$283.95 -
ID: 152✓ In Stock

Front Bumper Cover Assembly for 1996-1998 Honda Civic, 2-Piece Kit with Fender, Premium Replacement
CIVIC 96-98 FRONT BUMPER COVER, 2-pc kit, with Fender
OEM #s: 04711S01A00ZZ, 60211S04A00ZZ
Partslink #s: HO1000172,HO1241143$221.95 -
ID: 153✓ In Stock
Front Bumper Cover for Honda Civic 1996-1998, 3-Piece Kit with Fender and Headlight, Replacement
CIVIC 96-98 FRONT BUMPER COVER, 3-pc kit, with Fender and Headlight
OEM #s: 04711S01A00ZZ, 60261S04A00ZZ, 33151S01A01
Partslink #s: HO1000172,HO1240143,HO2518101$269.95 -
ID: 154✓ In Stock
Front Bumper Cover for Honda Civic 1996-1998, Primed (Ready to Paint), 2-Piece Kit with Fender, Replacement
CIVIC 96-98 FRONT BUMPER COVER, Primed, 2-pc kit, with Fender
OEM #s: 04711S01A00ZZ, 60261S04A00ZZ
Partslink #s: HO1000172,HO1240143$221.95 -
ID: 155✓ In Stock

Front Bumper Cover for Honda Civic 1996-1998, Primed (Ready to Paint), 2-Piece Kit with Grille, Sedan - Replacement
CIVIC 96-98 FRONT BUMPER COVER, Primed, 2-pc kit, with Grille, Sedan
OEM #s: 04711S01A00ZZ, 71121S04000-PFM
Partslink #s: HO1000172,HO1200124$157.95 -
ID: 156✓ In Stock
1992 - 1995 Honda Civic Front Bumper Cover
FRONT BUMPER COVER, COUPE AND HATCHBACK MODELS, UN-PRIMERED
OEM #: Performance$260.95 -
ID: 157✓ In Stock
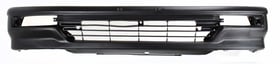
Front Bumper Cover for Honda Civic 1992-1995, Primed (Ready to Paint), Suitable for 4-Door Sedan, Replacement
CIVIC 92-95 FRONT BUMPER COVER, Primed, 4-Door, Sedan
OEM #: 71101-SR4-000ZZ$214.95 -
ID: 158✓ In Stock
Rear Bumper Cover for Honda Civic 1992-1995, Primed (Ready to Paint), Suitable for Coupe/Sedan, Replacement
CIVIC 92-95 REAR BUMPER COVER, Primed, Sedan & Coupe
OEM #: 71501-SR4-000ZZ$116.95 -
ID: 159✓ In Stock

Front and Rear Bumper Cover Set for 1992-1995 Honda Civic, Set of 2, Primed (Ready to Paint), Suitable for Hatchback Model - Replacement
CIVIC 92-95 FRONT AND REAR BUMPER COVER, Set of 2, Primed, Hatchback
OEM #s: 71101SR0A00ZZ, 71501SR0A00ZZ
Partslink #s: HO1000141,HO1100128$252.95 -
ID: 160✓ In Stock
1990 - 1991 Honda Civic Front Bumper Cover Replacement
Front Bumper Cover for Honda Civic Hatchback 1990-1991, Textured, USA Built, Replacement
CIVIC 90-91 FRONT BUMPER COVER, Textured, USA Built, Hatchback
OEM #: 71101-SH0-A00$223.95 -
ID: 161✓ In Stock
2022 - 2024 Honda Civic Rear Bumper Cover (CAPA Certified)
Capa Rr Bumper Cover Exl|lx|sport, H/b, Without Parking Sensors, Prime Honda Civic 22c
oem #: 04715-t47-a00zz$276.95 -
ID: 162✓ In Stock
Rear Bumper Cover for Honda Civic 2022-2023, Primed (Ready to Paint), without Parking Aid Sensor Holes, Suitable for EX Model (Canada/Japan Built Vehicle)/LX/SI/Sport Models, Sedan - CAPA-Certified, Replacement
2022-2022 HONDA CIVIC: EX|LX|SPORT, Sedan, without Parking Sensors, prime , , ,OEM # 04715-T20-A00ZZ
$202.95 -
ID: 163✓ In Stock
2022 - 2024 Honda Civic Rear Bumper Cover (CAPA Certified)
Rear Bumper Cover Touring, Sedan, W/parking Sensors, Prime Honda Civic 22c Capa
oem #: 04715-t20-a50zz$195.95 -
ID: 164✓ In Stock
2020 - 2021 Honda Civic Rear Bumper Cover (CAPA Certified)
Capa Rr Bumper Cover H/b, Prime Honda Civic 2021
oem #: 04715-tgg-a50zz$387.95 -
ID: 165✓ In Stock
2016 - 2018 Honda Civic Front Bumper Cover (CAPA Certified)
Front Bumper Cover for Honda Civic 2016-2018, Primed (Ready to Paint), Suitable for DX, EX, EX-L, EX-T, LX, LX-P, Touring Models, Coupe/Sedan, North America Built, Replacement (CAPA Certified)
CIVIC 16-18 FRONT BUMPER COVER, Primed, (Exc. Si Model), Coupe/Sedan - CAPA
OEM #: 04711-TBA-A00ZZ$206.95 -
ID: 166✓ In Stock
Rear Bumper Cover for Honda Civic Coupe 2014-2015, Primed (Ready to Paint), Replacement (CAPA Certified)
CIVIC 14-15 REAR BUMPER COVER; Primed; Coupe - CAPA
OEM #: 71501-TS8-A50ZZ$141.95 -
ID: 167✓ In Stock
Rear Bumper Cover for Honda Civic 2012-2013, Lower, Primed (Ready to Paint), 2.4L Engine, Compatible with Coupe/(Sedan 2012), CAPA-Certified, Replacement
CIVIC 12-13 REAR BUMPER COVER, Lower, Primed, 2.4L Eng., Coupe/(Sedan12-12)
OEM #: 04716-TR7-A91$433.95 -
ID: 168✓ In Stock
Front Bumper Grille Center for Honda Civic Coupe 2009-2011, Textured Black, Replacement (CAPA Certified)
FT BMP GRILLE CENTER BLK
OEM #: 71107-SVA-A50$95.95
Why Millions Choose Go-Parts
Your Go-To Place for Auto Parts!
100% Money-Back Guarantee
Shop with confidence and peace of mind
Trusted Since 2007
Over 18 years of excellence
OEM Quality
Meets or exceeds OE standards
🚚 Fast Shipping • ↩️ 90-Day Returns • 🎯 Perfect Fit Guaranteed
Join millions of satisfied customers. Every order ships fast with our industry-leading warranty.