


Buy Mercedes-Benz GLC300 Tail Light Assembly
-
ID: 1✓ In Stock
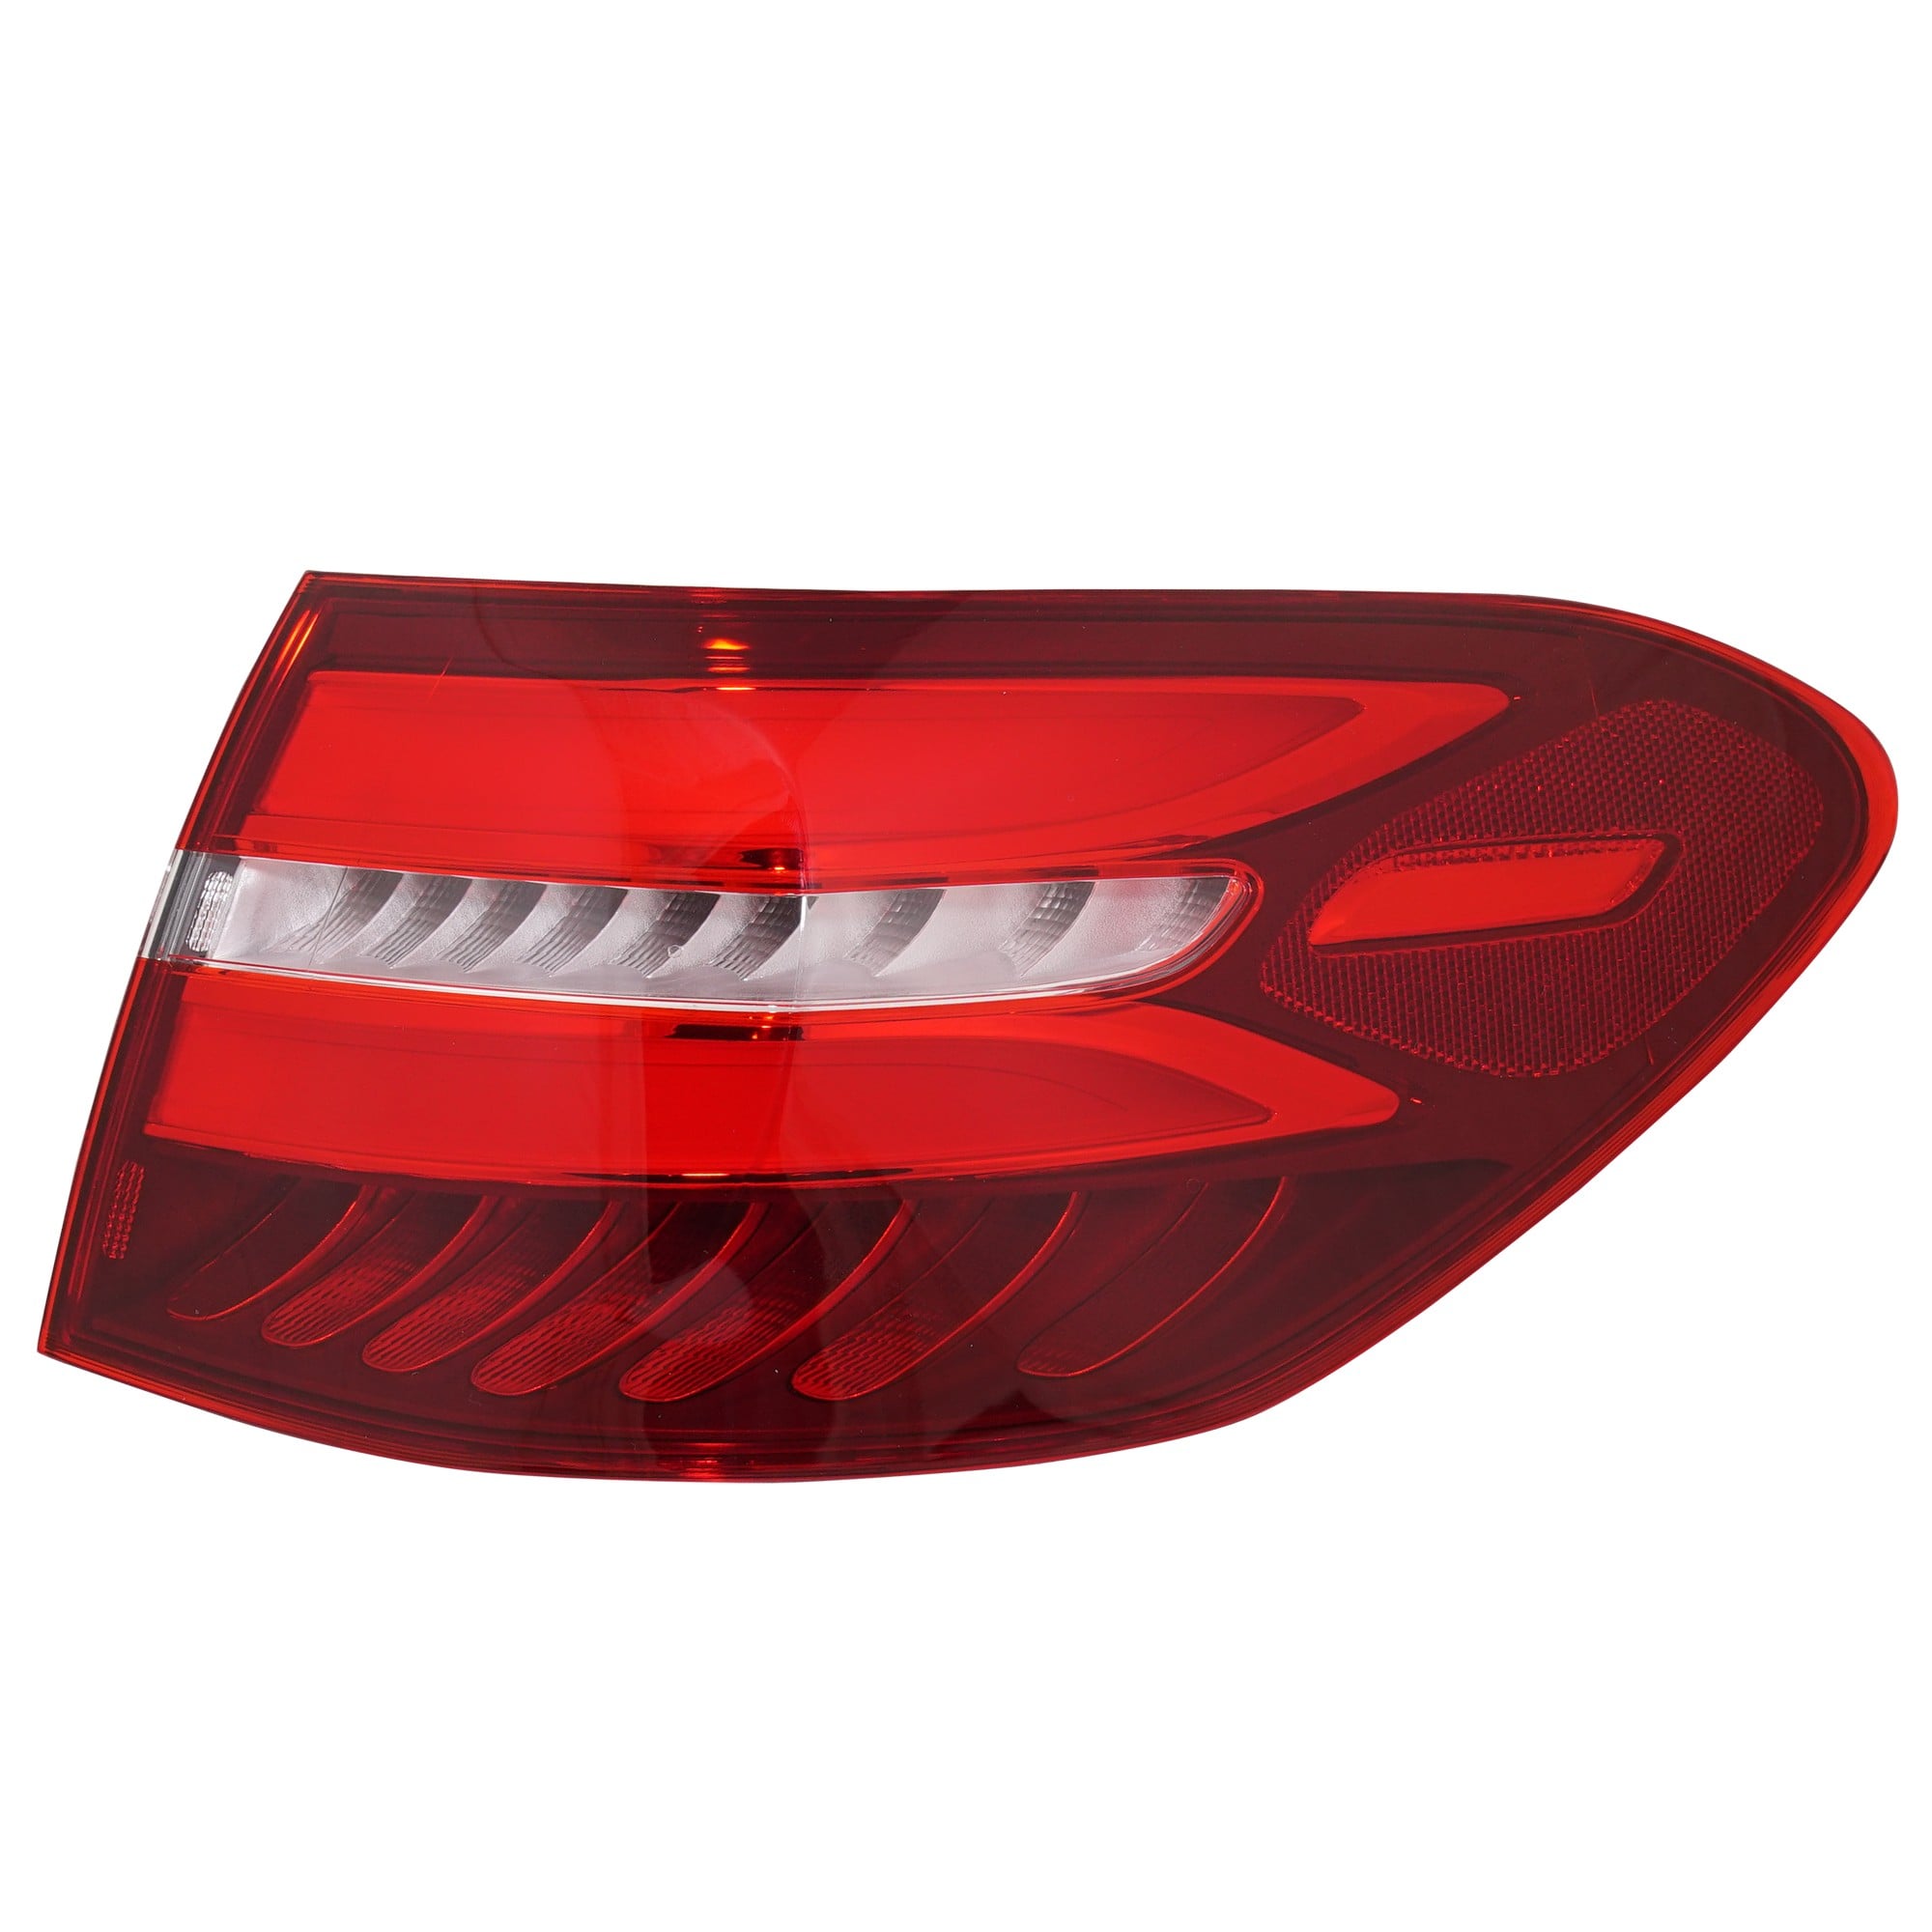
LED Tail Light Assembly for Mercedes-Benz GLC-Class SUV, Right (Passenger) Outer, Fits 2016-2019 Models, Replacement
⚠️ IMPORTANT: This tail light ONLY fits vehicles that came factory-equipped with LED Headlamps (front lights). If your vehicle has standard halogen front lights, this part will NOT fit.
This is the RIGHT (Passenger) Outer light. Fits GLC300 and GLC43 AMG models (X253 chassis).
The OEM # is 253 906 12 00.$161.95 -
ID: 2✓ In Stock
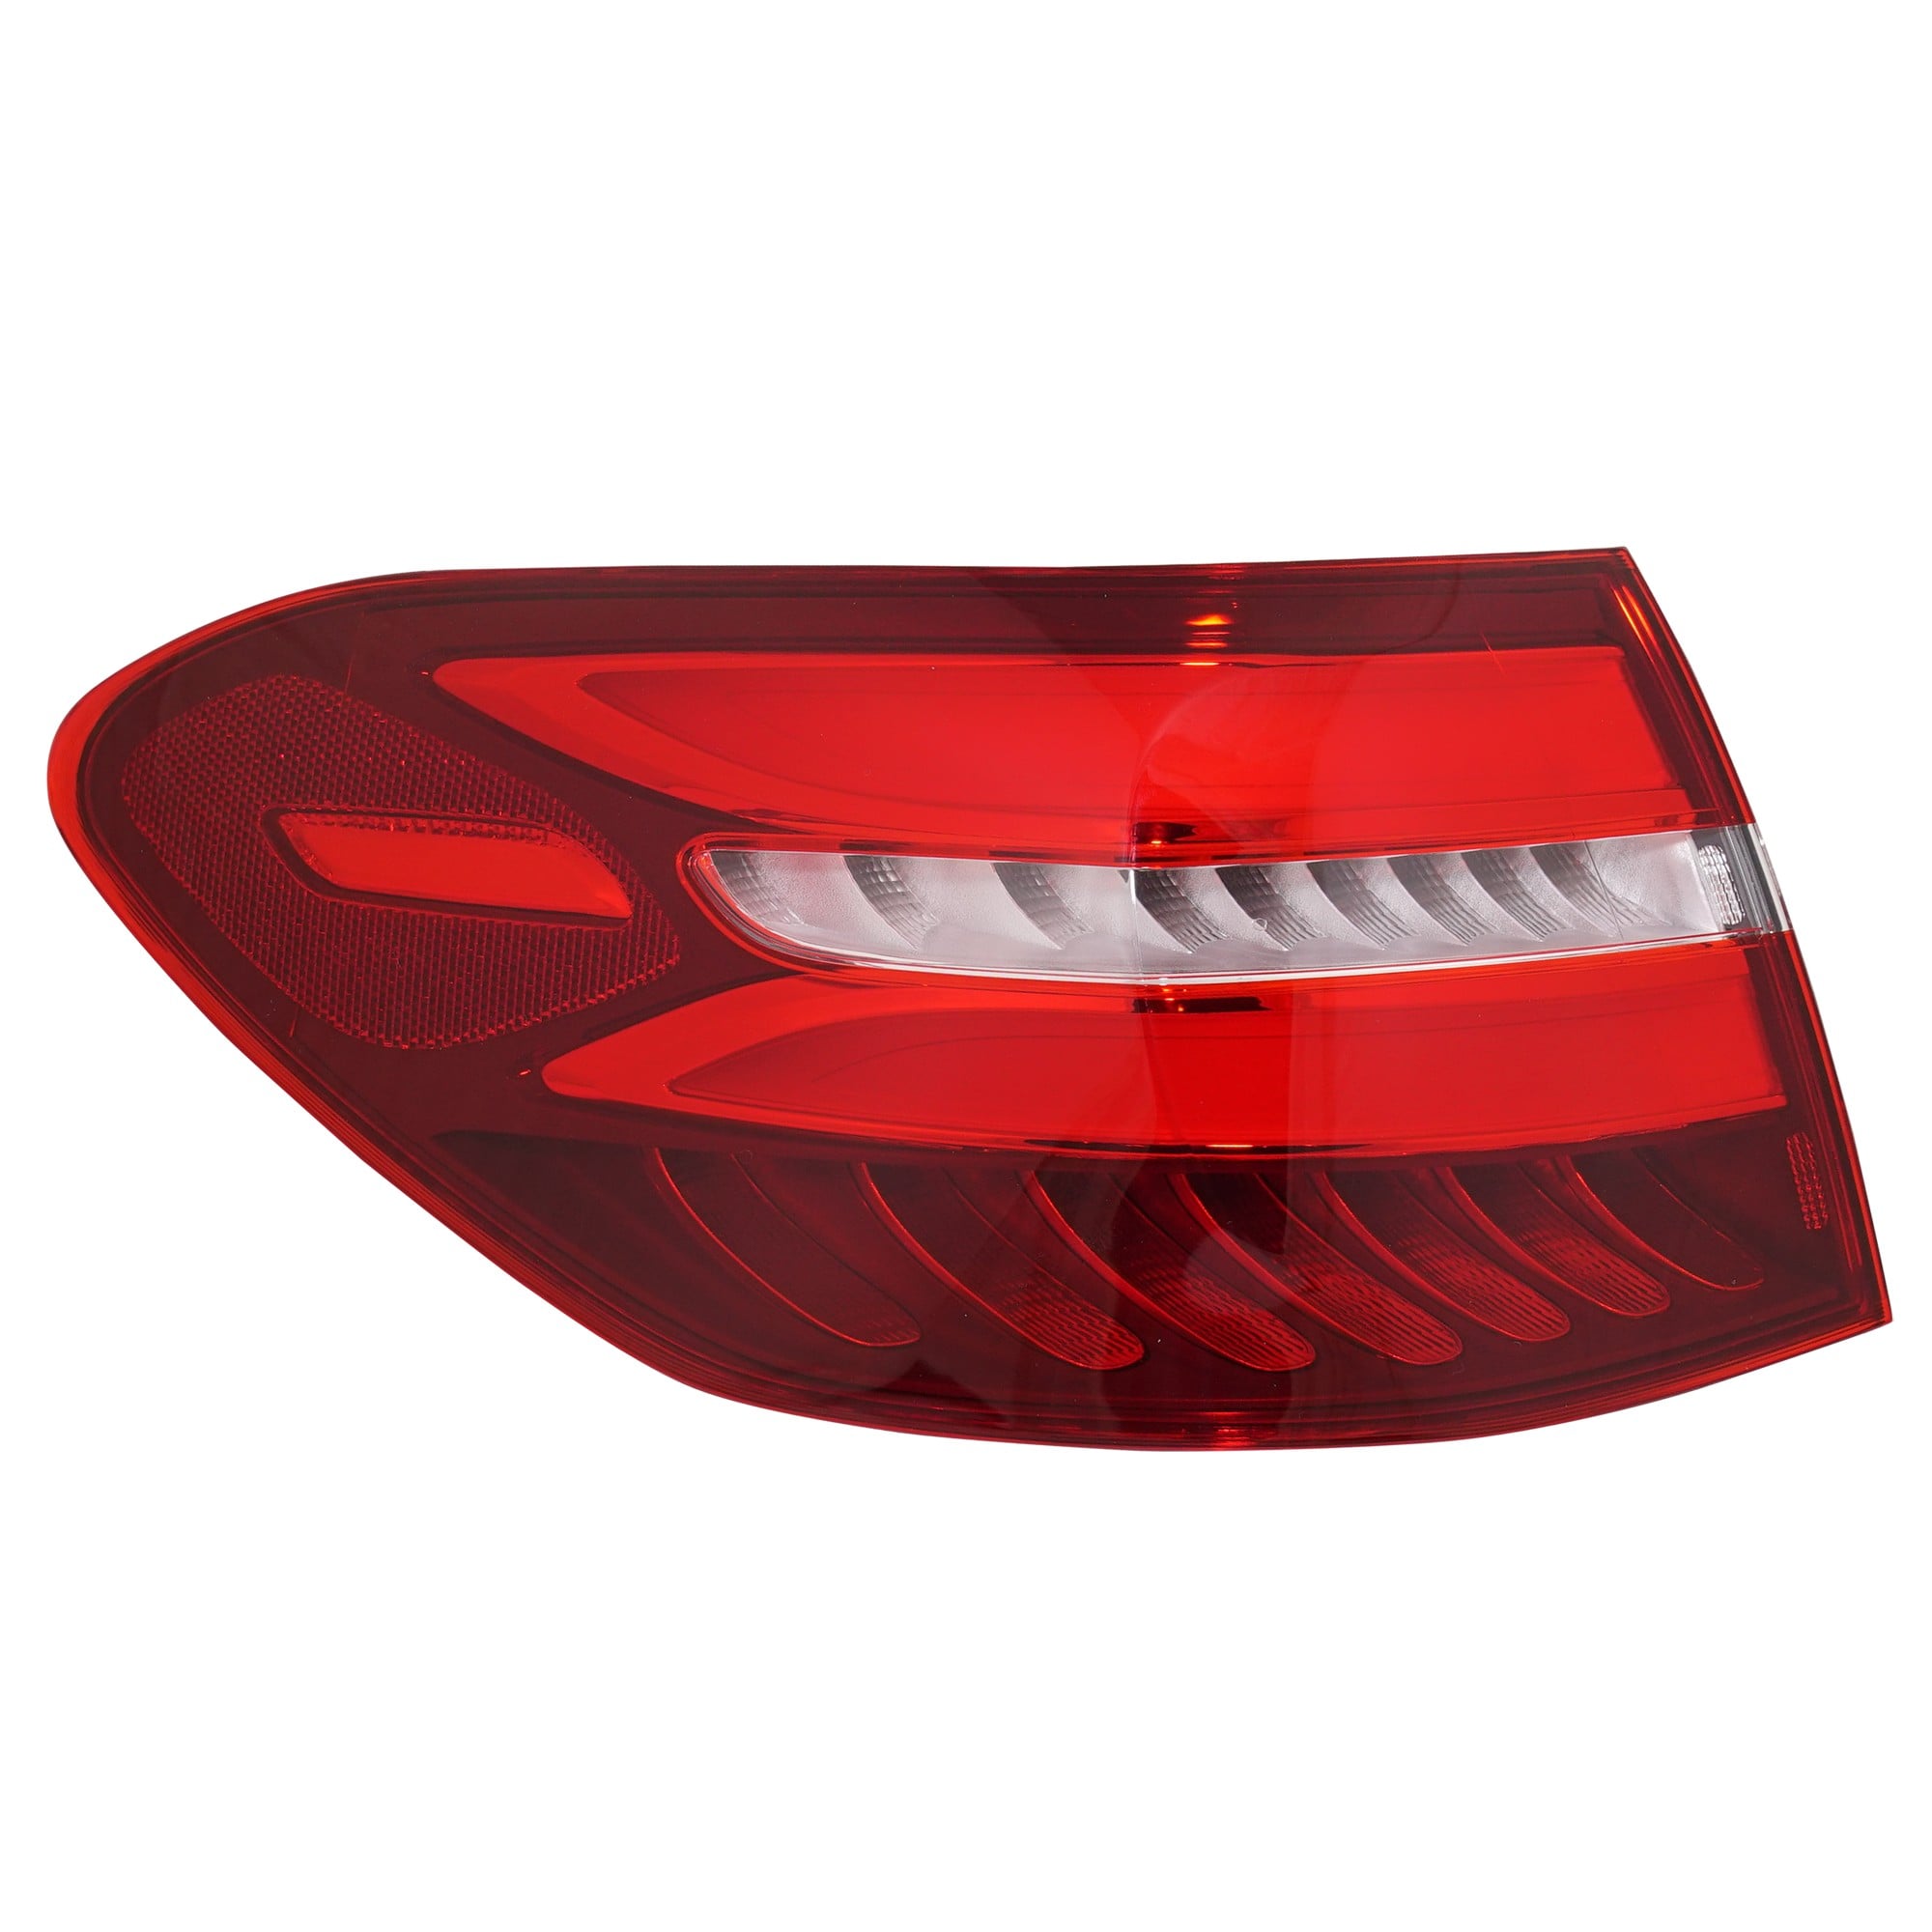
Tail Light Assembly for Mercedes-Benz GLC-Class SUV 2016-2019, Left (Driver) Side, Outer, LED, Replacement
⚠️ IMPORTANT: Fits Mercedes-Benz GLC-Class SUV models GLC300 (2016-2019) and GLC43 AMG (2017-2019) ONLY. This tail light works ONLY if your vehicle currently has LED Headlamps (check your front lights).
Left (Driver) Side, Outer position.
This part is for X253 chassis SUV models.
OEM # 253 906 11 00 64$84.95 -
ID: 3✓ In Stock
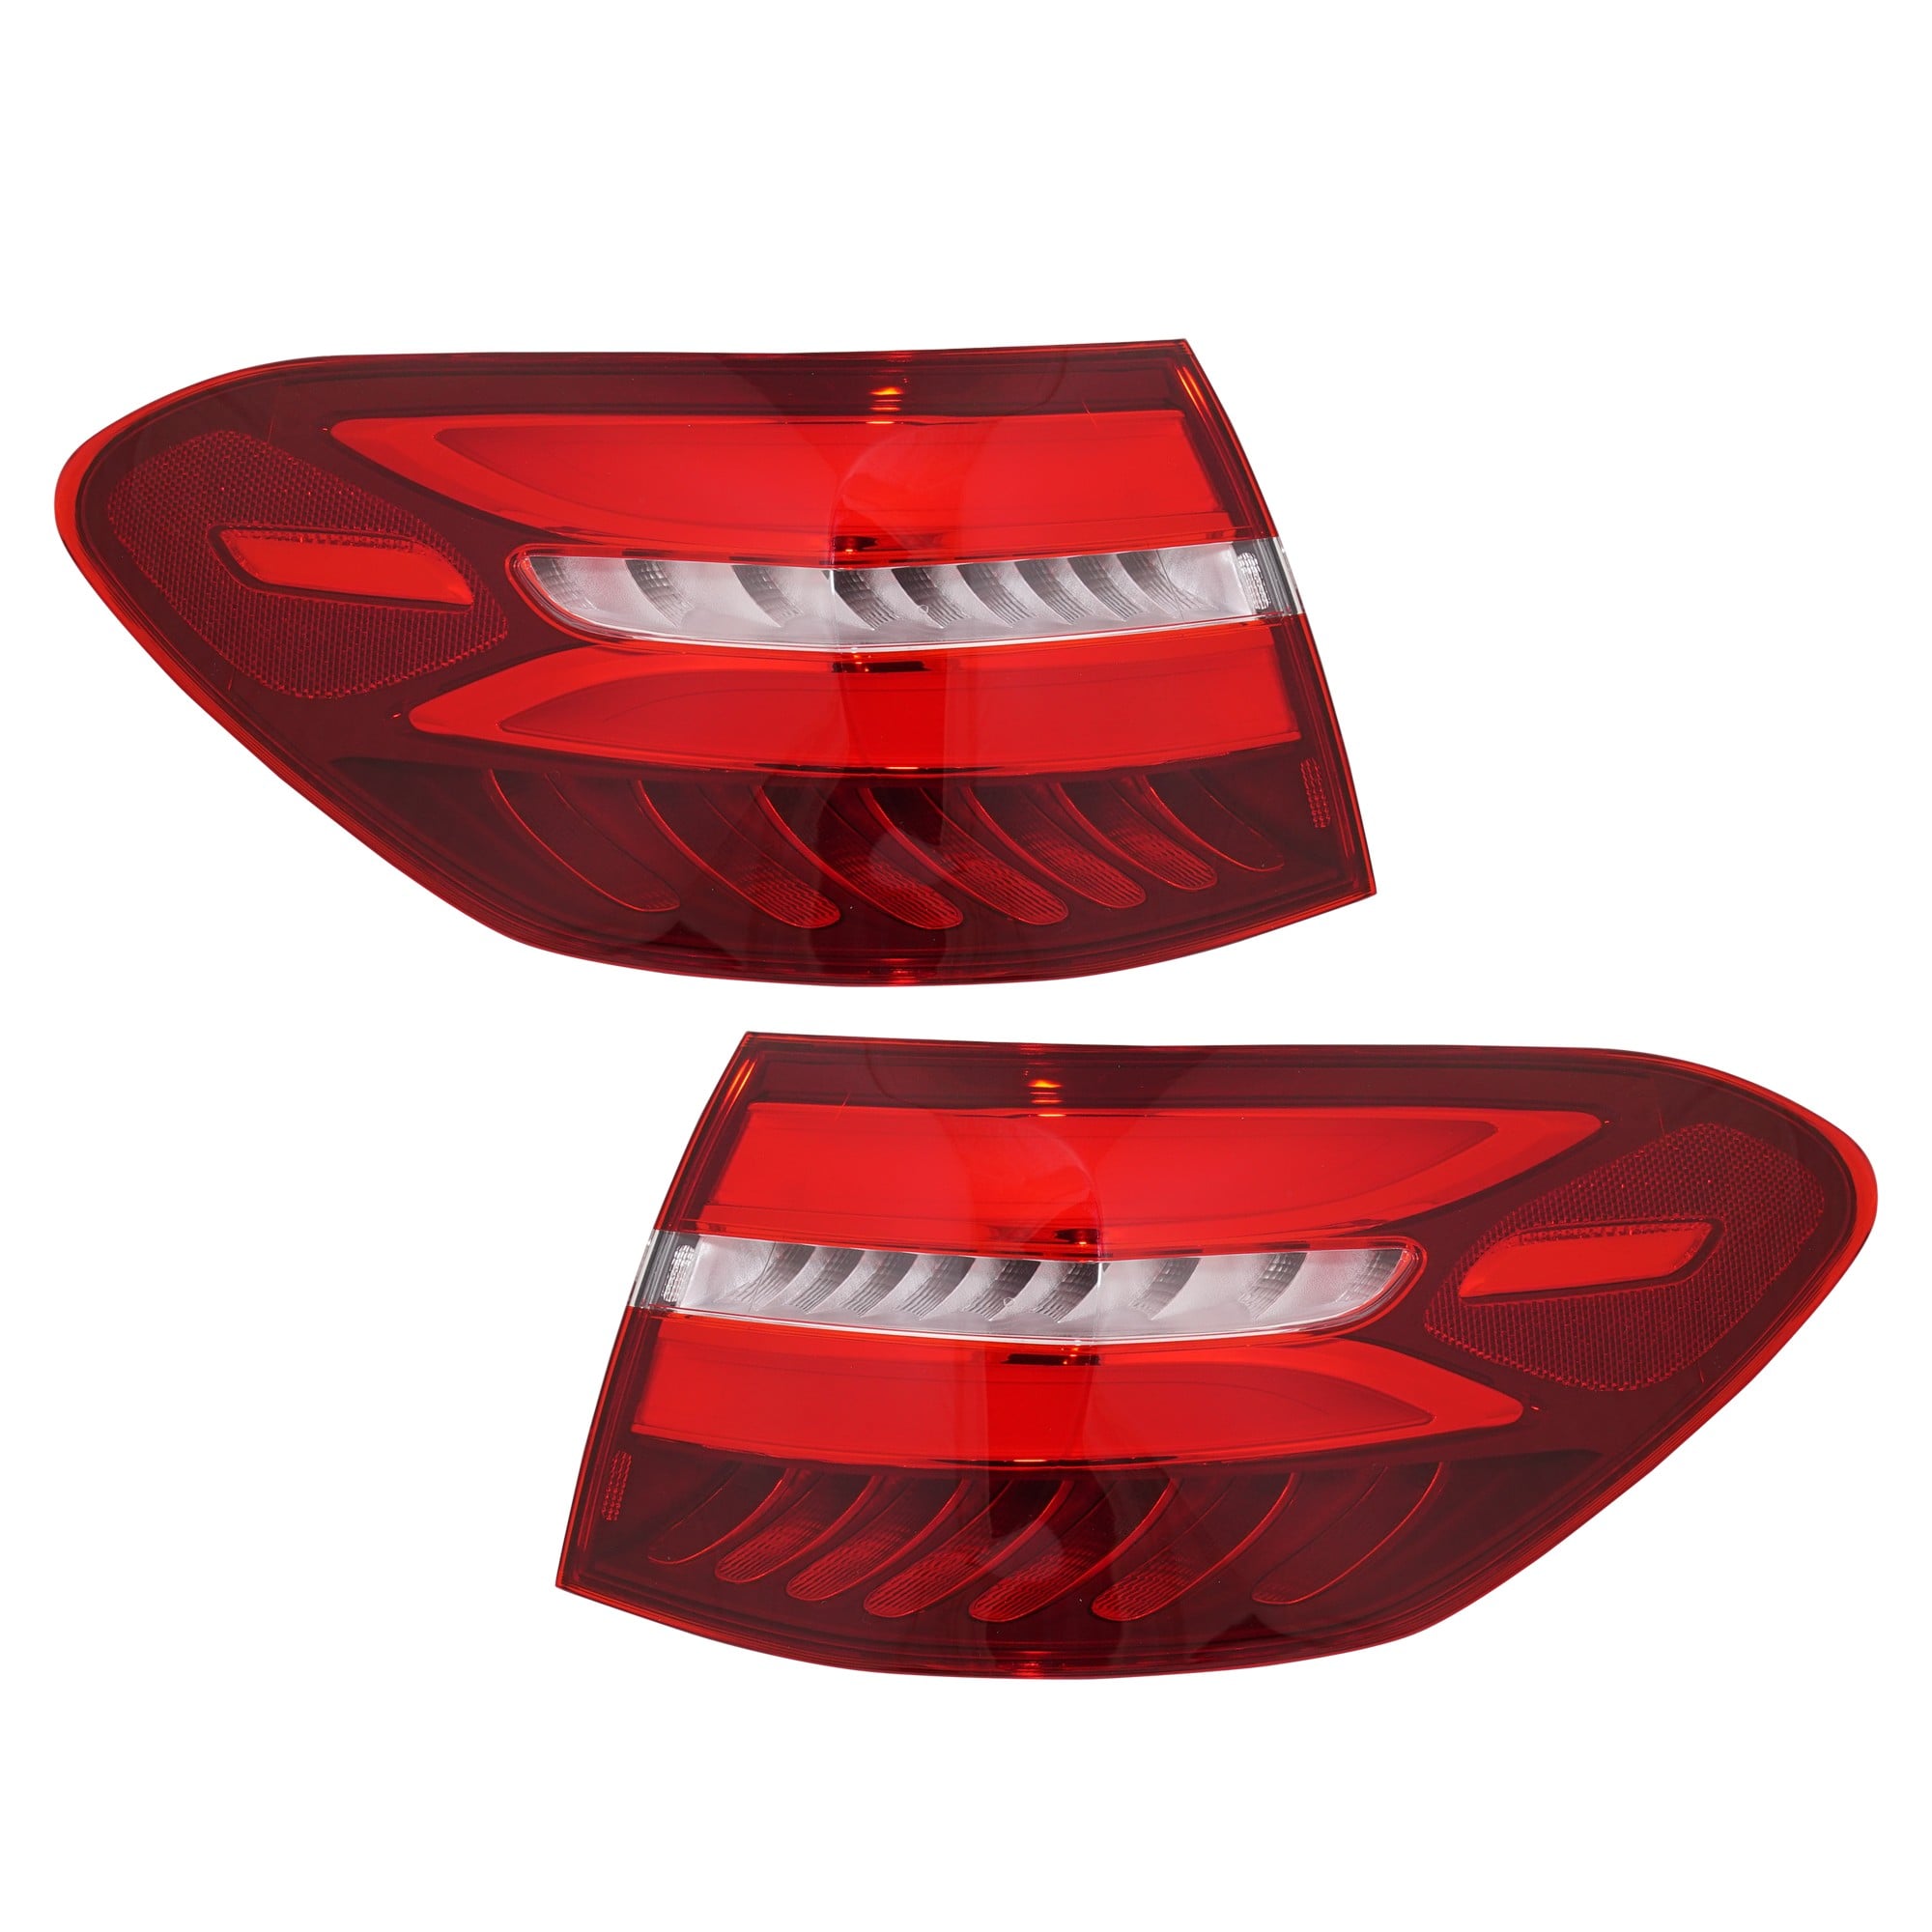
LED Tail Light Assembly Pair/Set for Mercedes-Benz GLC-Class SUV, 2016-2019, Outer Right (Passenger) and Left (Driver), Replacement
OEM #s: 253906110064, 2539061200
Partslink #s: MB2805115, MB2804115$376.95
Why Millions Choose Go-Parts
Your Go-To Place for Auto Parts!
100% Money-Back Guarantee
Shop with confidence and peace of mind
Trusted Since 2007
Over 18 years of excellence
OEM Quality
Meets or exceeds OE standards


